Documentation
Crsine - Car Washing WordPress Theme
Thank you so much for purchasing our item from themeforest.
- Version: 1.4.1
- Author: WowPixelTheme
- Created: 24 June, 2022
- Update: 17 May 2025
If you have any questions that are beyond the scope of this help file, Please feel free to email via Item Support Page.
WordPress Installation
Below are all the useful links for WordPress information:
- WordPress Codex – general info about WordPress and how to install on your server.
- First Steps With WordPress – general information that covers a wide variety of topics.
- FAQ New To WordPress – the most popular FAQ’s regarding WordPress.
Follow the steps below to setup Install WordPress::
Before beginning the installation and configuring of your new theme, you must have WordPress installed. If you need to install WordPress then please visit: http://wordpress.org/download/. If you need any help with the installation , please refer to this guide: http://codex.wordpress.org/Installing_WordPress.
Here is a brief step by step on how to install WordPress:
- Download and unzip the WordPress package if you haven't already.
- Create a database for WordPress on your web server, as well as a MySQL user who has all privileges for accessing and modifying it.
- Upload the WordPress files in the desired location on your web server:
- If you want to integrate WordPress into the root of your domain (e.g. http://example.com/), move or upload all contents of the unzipped WordPress directory (but excluding the directory itself) into the root directory of your web server.
- If you want to have your WordPress installation in its own subdirectory on your web site (e.g. http://example.com/blog/), create the blog directory on your server and upload WordPress to the directory via FTP. Note: If your FTP client has an option to convert file names to lower case, make sure it's disabled.
- Run the WordPress installation script by accessing wp-admin/install.php in a web browser.
- If you installed WordPress in the root directory, you should visit: http://example.com/wp-admin/install.php
- If you installed WordPress in its own subdirectory called blog, for example, you should visit: http://example.com/blog/wp-admin/install.php
Install Theme
Once you've downloaded the installation file on ThemeForest, extract it and locate a file called crsine.zip. You can install the theme by using one of two installation methods:
WordPress Upload
- Login to WordPress admin.
- Go to Admin panel > Appearance > Themes > Add New > Upload Theme.
-
Click on Choose File and select
crsine.zip. - Click on Install Now.
- When your theme is successfully installed, click Activate to activate the newly installed theme.
FTP Upload
- Using FTP client, login to the server where your WordPress website is hosted.
-
Using FTP client, navigate to the
/wp-content/themes/directory under your WordPress website's root directory. -
Using FTP client, upload the
crsinedirectory to themes directory on remote server. - Once uploaded, navigate to Dashboard > Appearance > Themes in the WordPress Dashboard and hit Activate below your newly uploaded theme.
Demo Content Setup
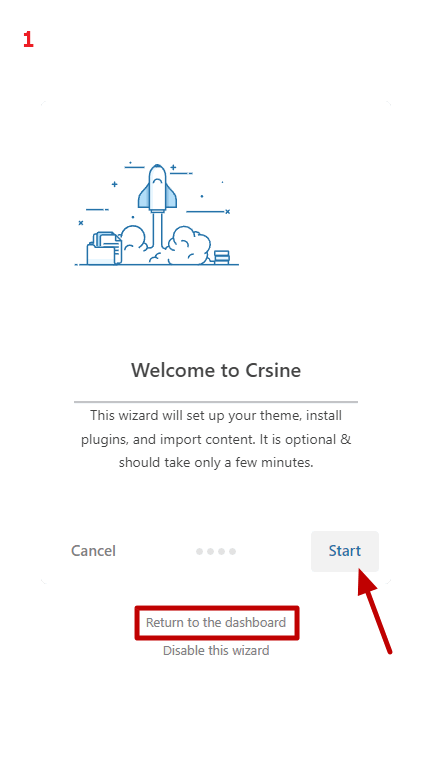
After activating the theme you installed, You will redirected to Demo content setup page.
- Click on Start to Continue.
- If you don't want to import demo data, click on "Return to the dashboard"
- After it will ask you to install the child theme, click on install to Install the child theme.
- Next step is to install required plugin in order to run the demo data seamlessly
- Click on Install Button to install selected plugins.
- Here comes the main part. We recommend you select all the option shown below.
- Click on Import, It will take some time to import the data. So sit back and wait.
All Done now. Click on View your website button.
General Settings
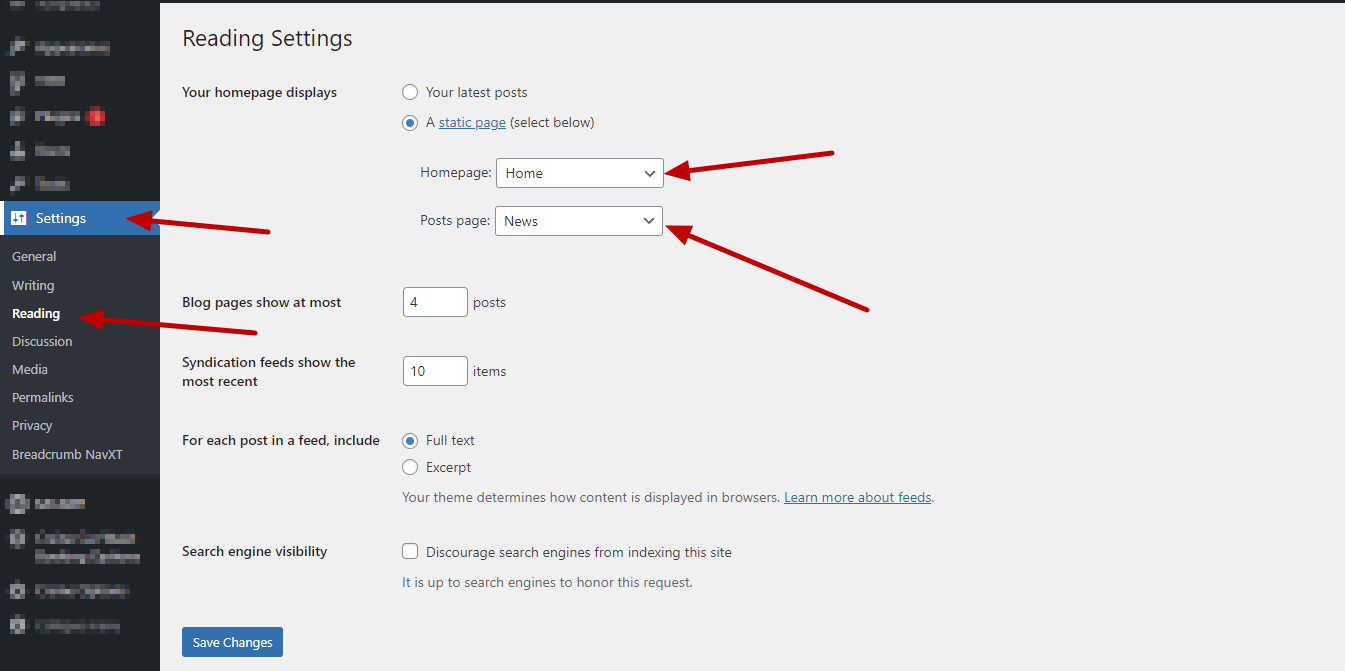
Set Home Page and Blog Page. WP-admin >> Settings >> Reading
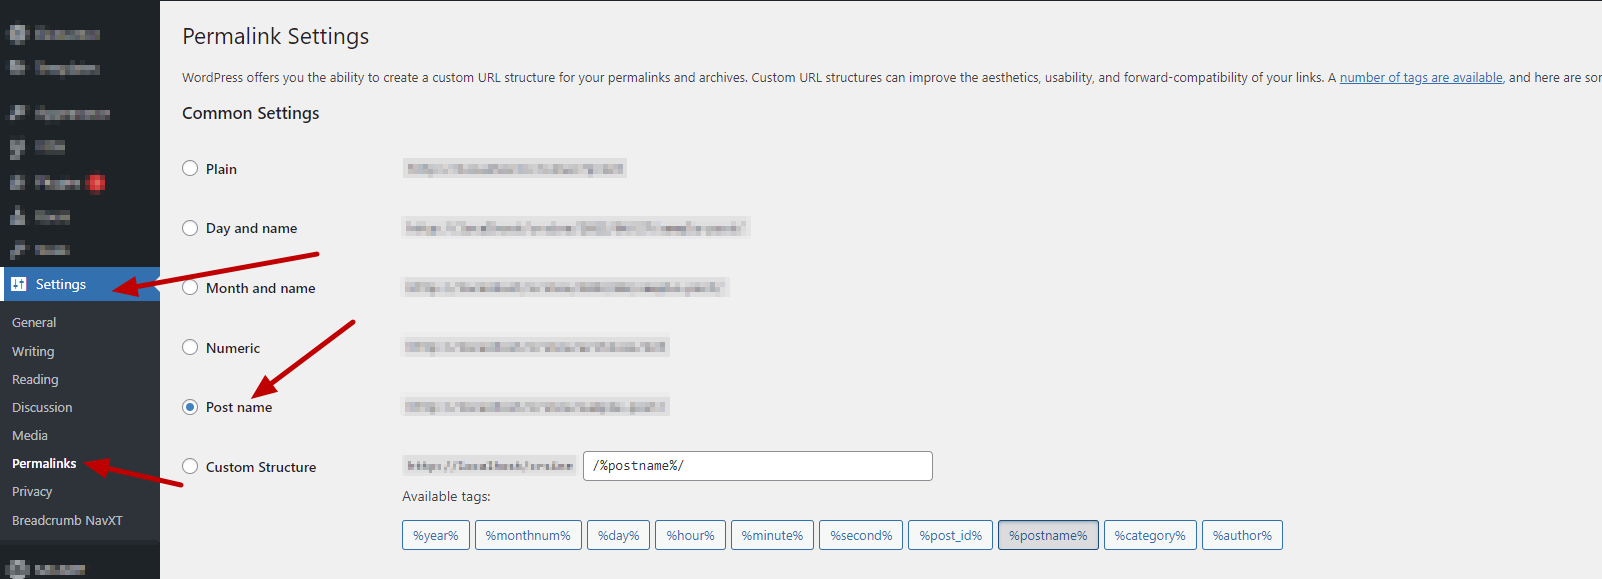
Set Permalink as Post name. WP-admin >> Settings >> Permalinks
Menu Settings
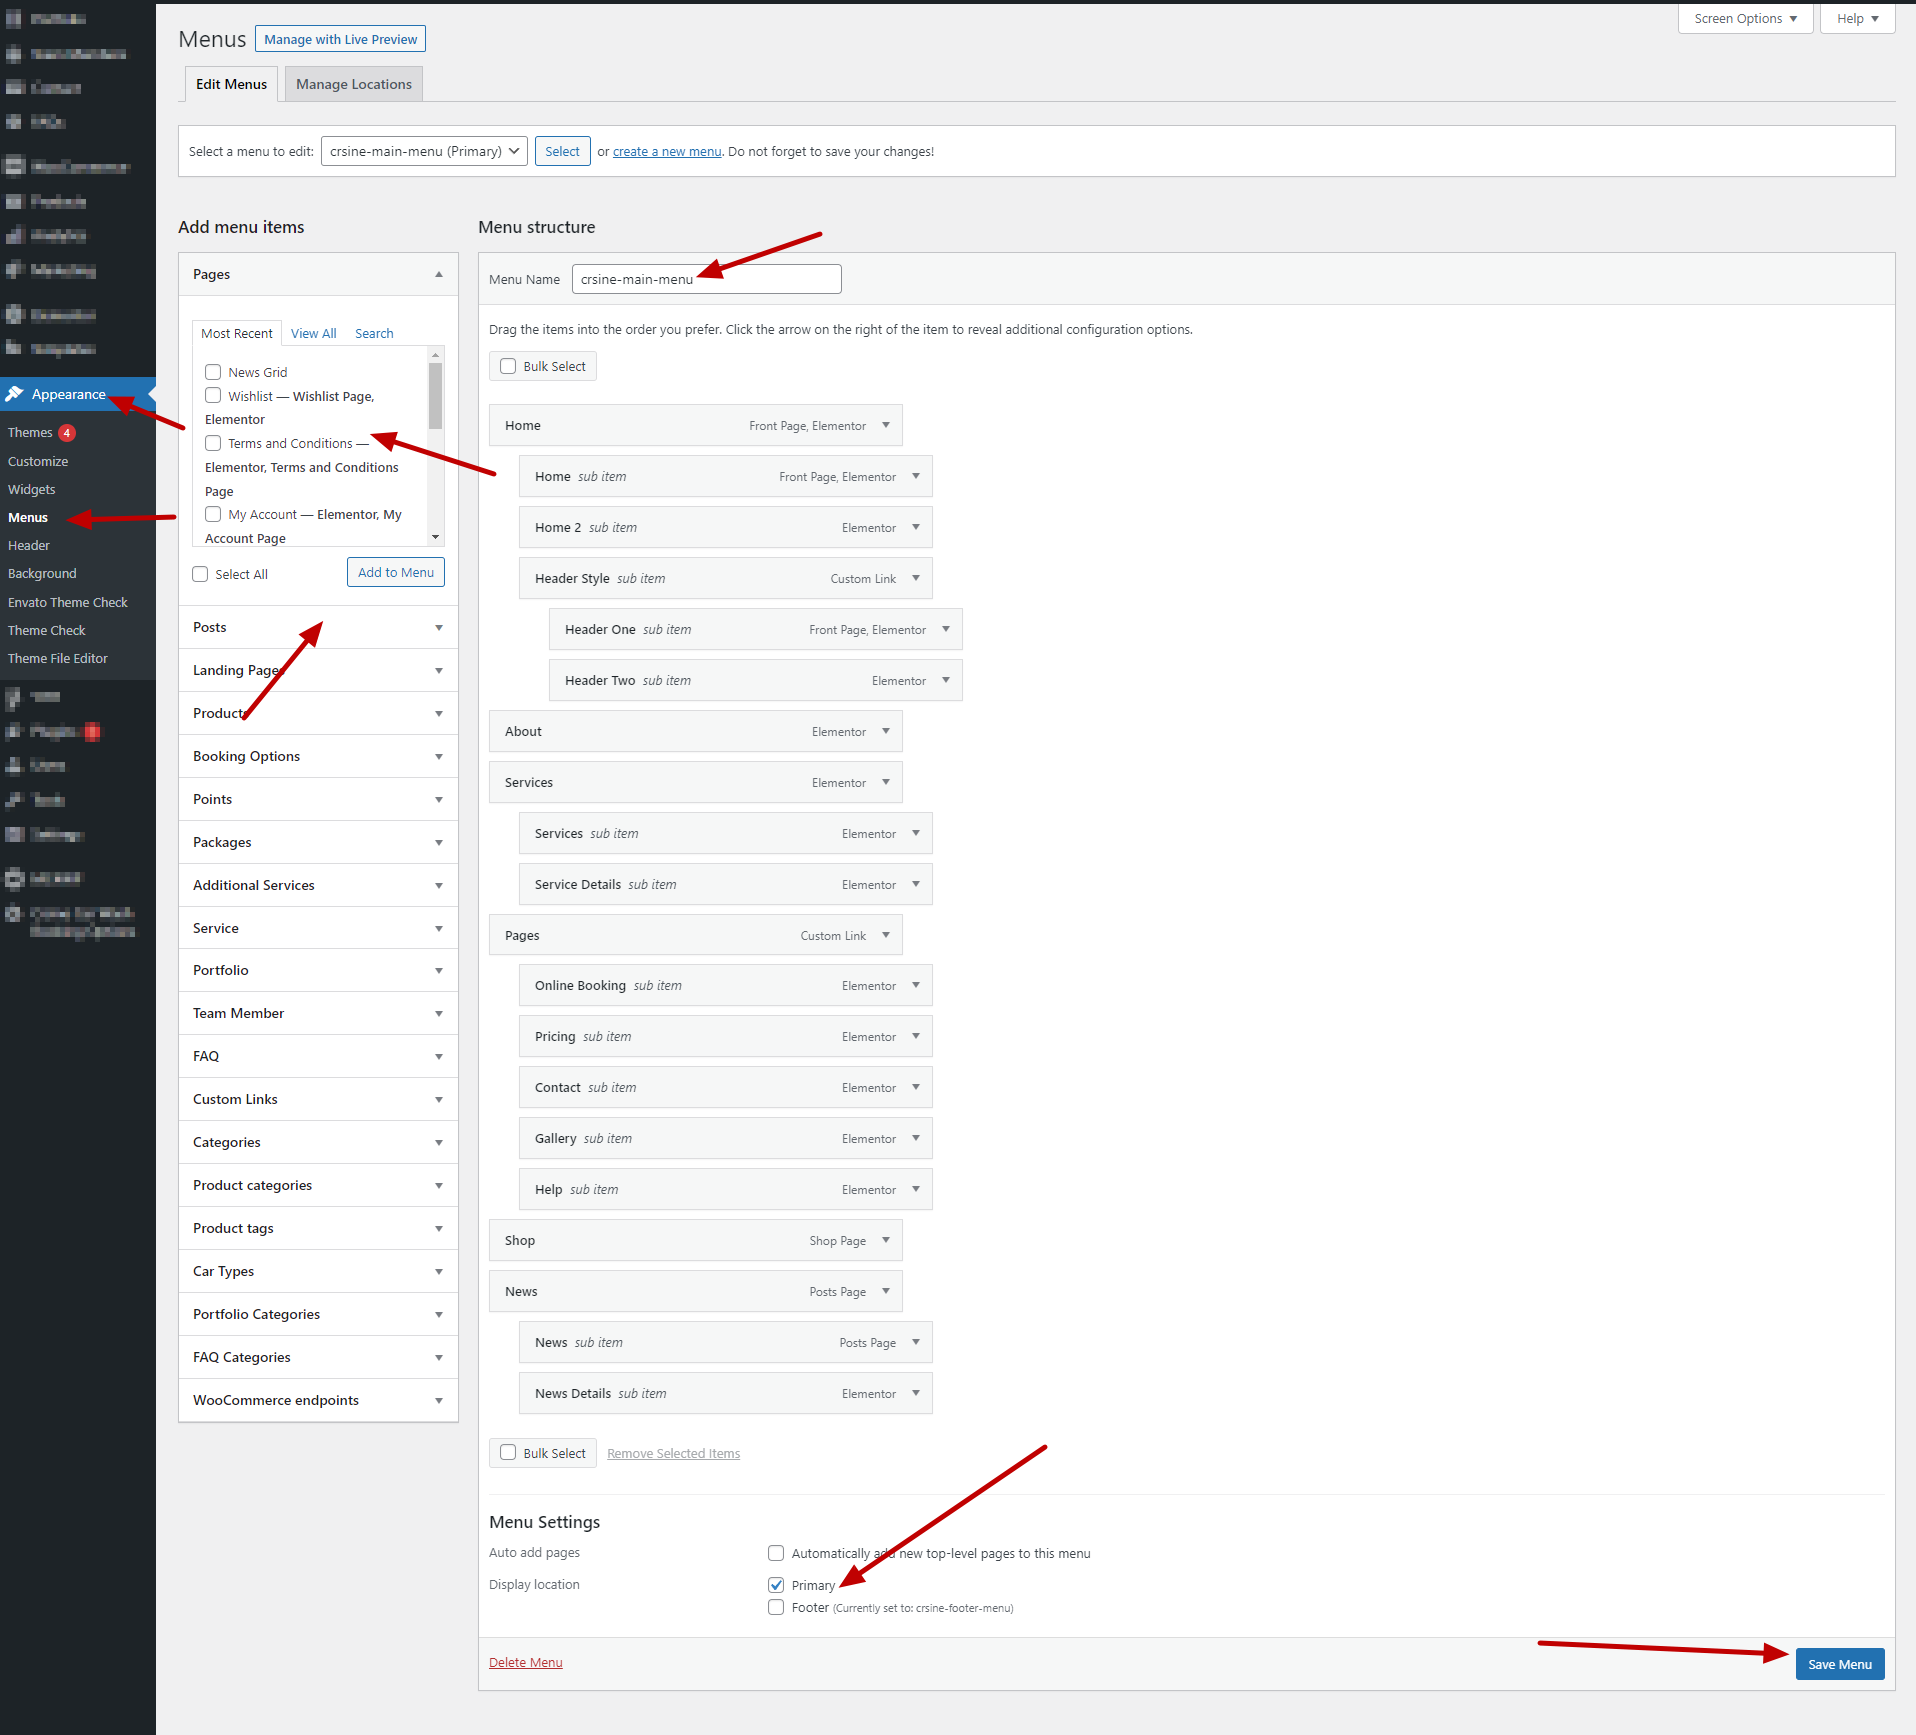
Create Menu and add pages in it and Set the Display Location. Wp-admin >> Appearance >> Menu
Page Settings
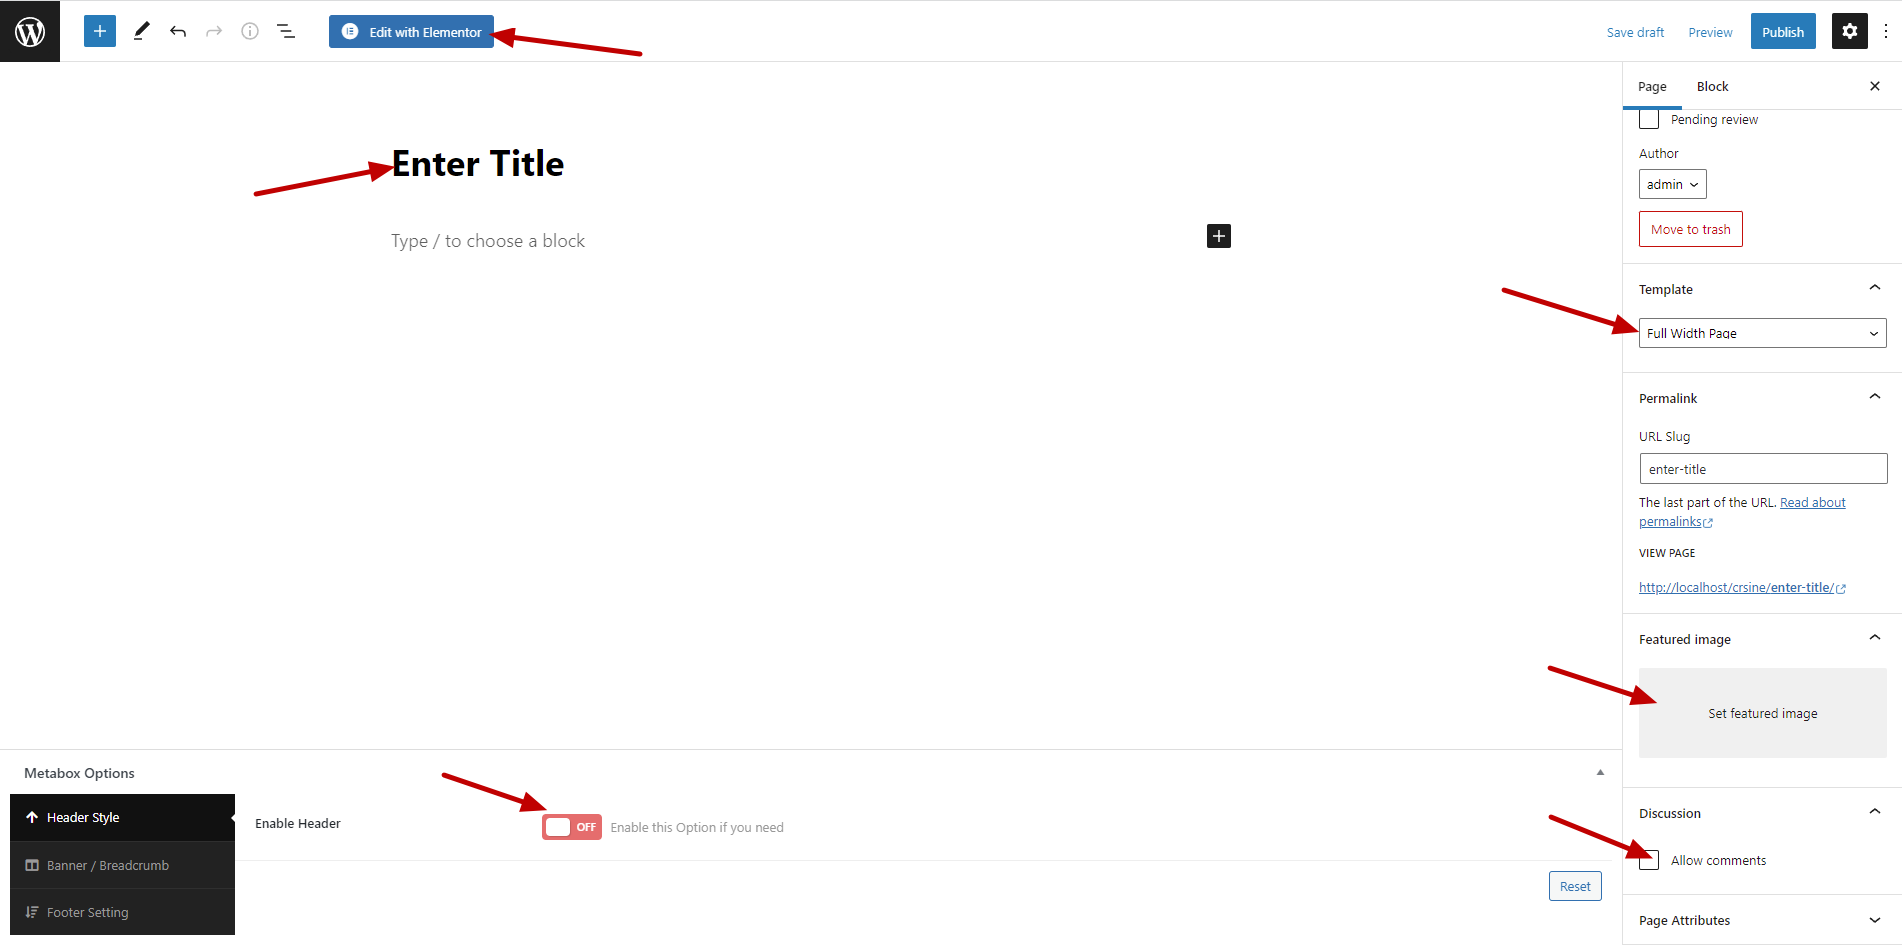
Wp-admin >> Page >> Add New
If you Want to change header style for particular page , enable it and choose style. Otherwise it will be default header as other pages.
Set Page Template to Full Width Page for Batter View.

Theme Options Setting (Crsine Options)
Documentation for Header, Typography, Color, Sidebar, Footer
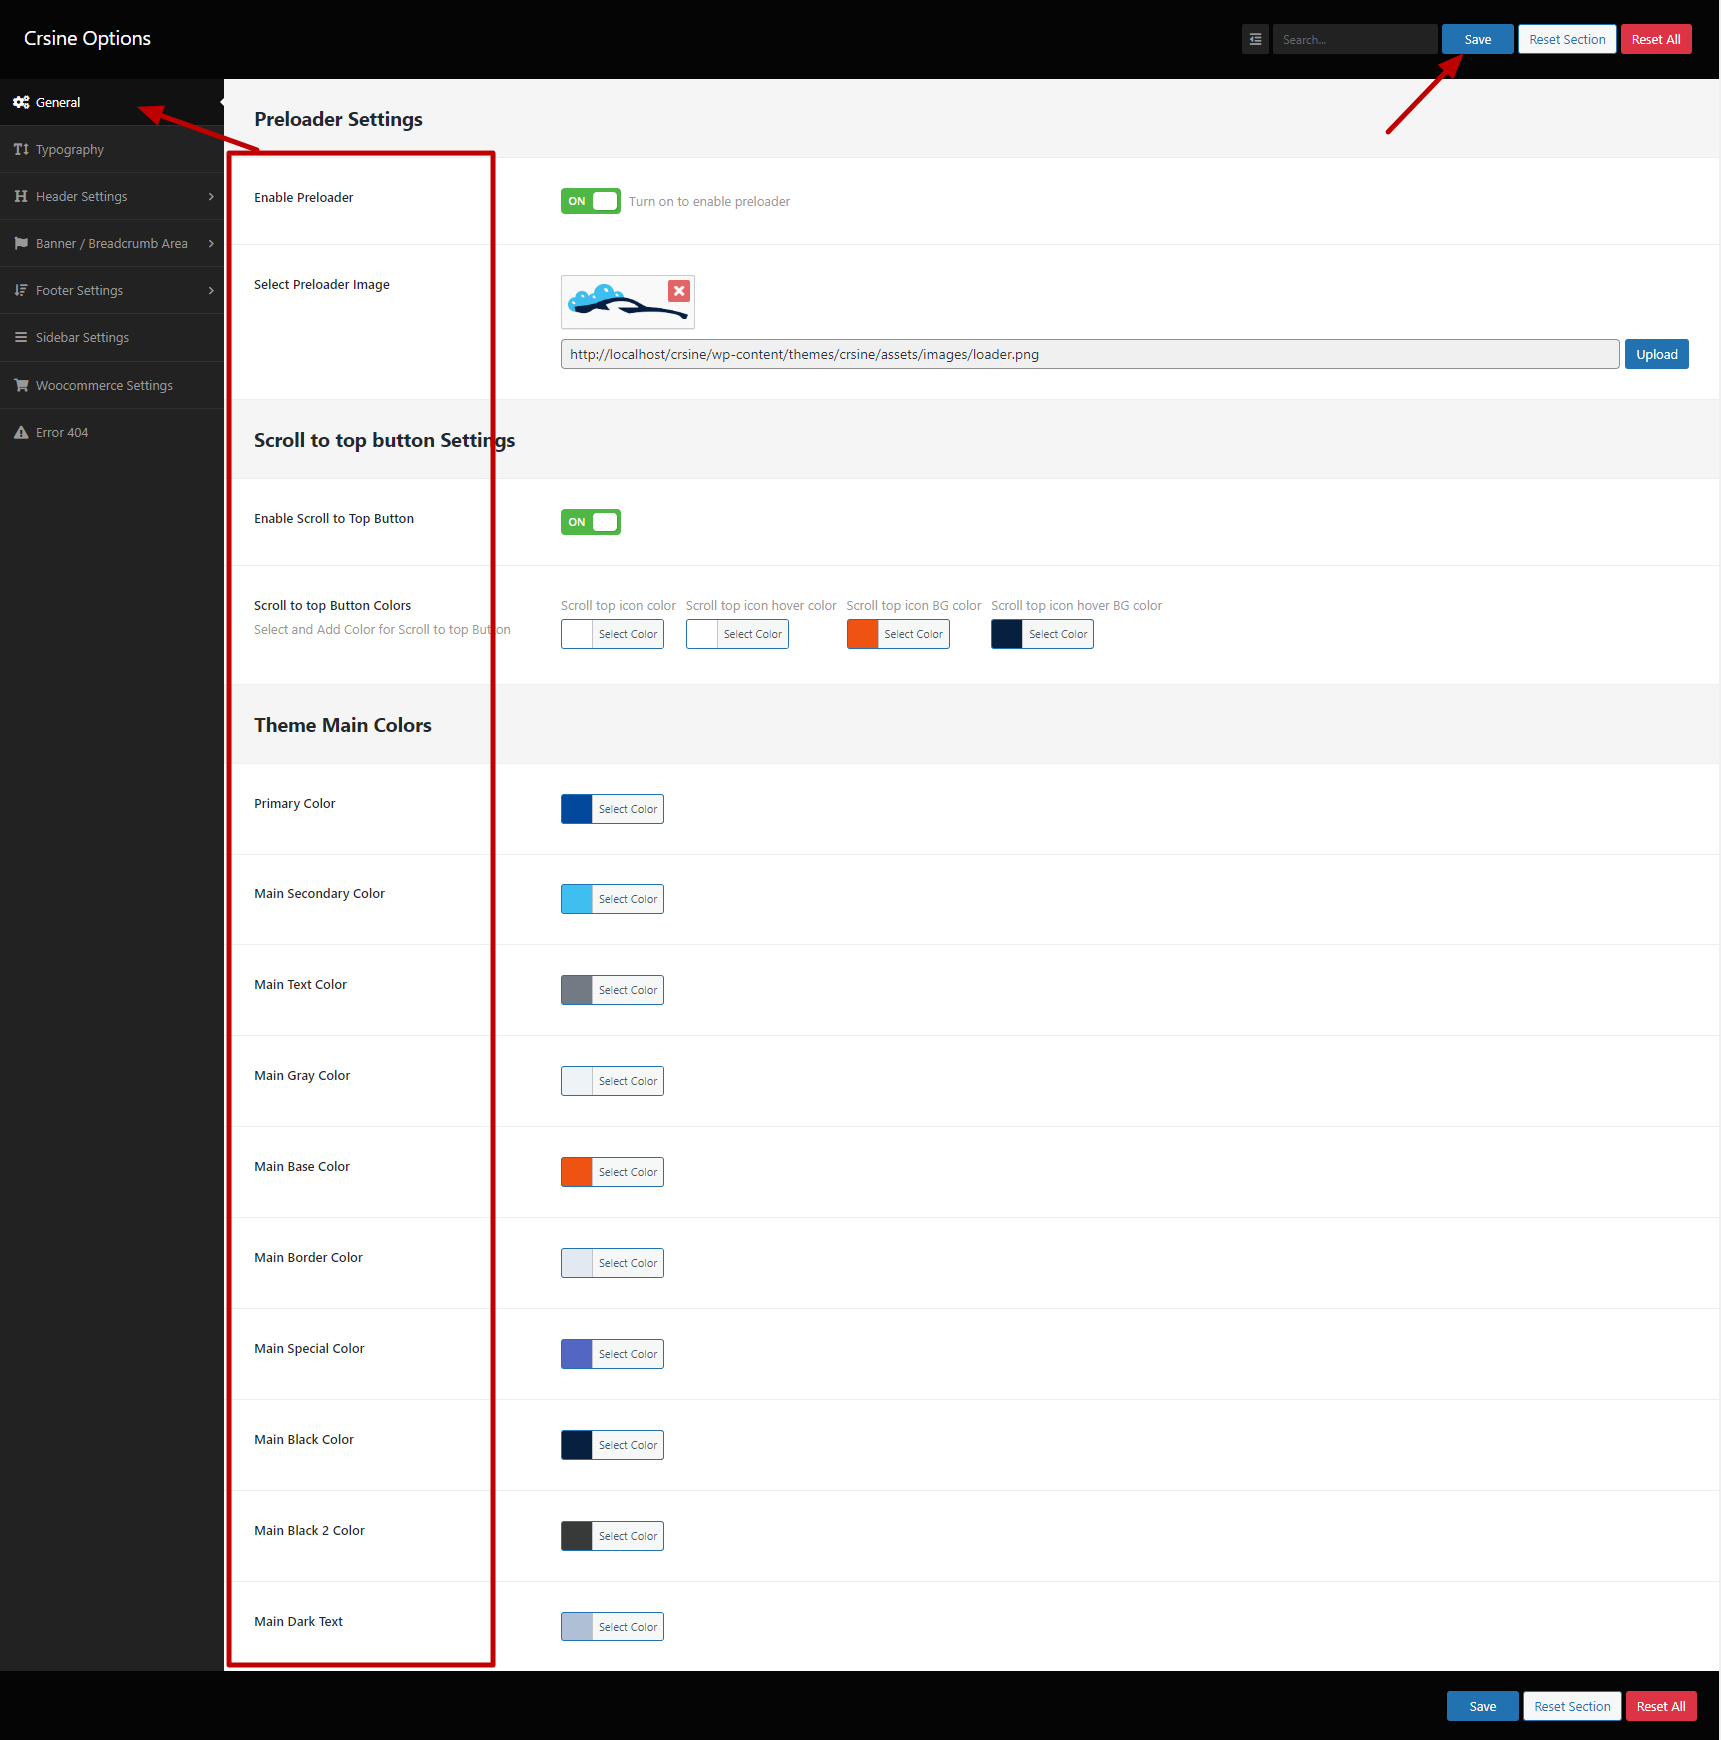
General Setting
wp-admin >> Crsine Options >> General Setting
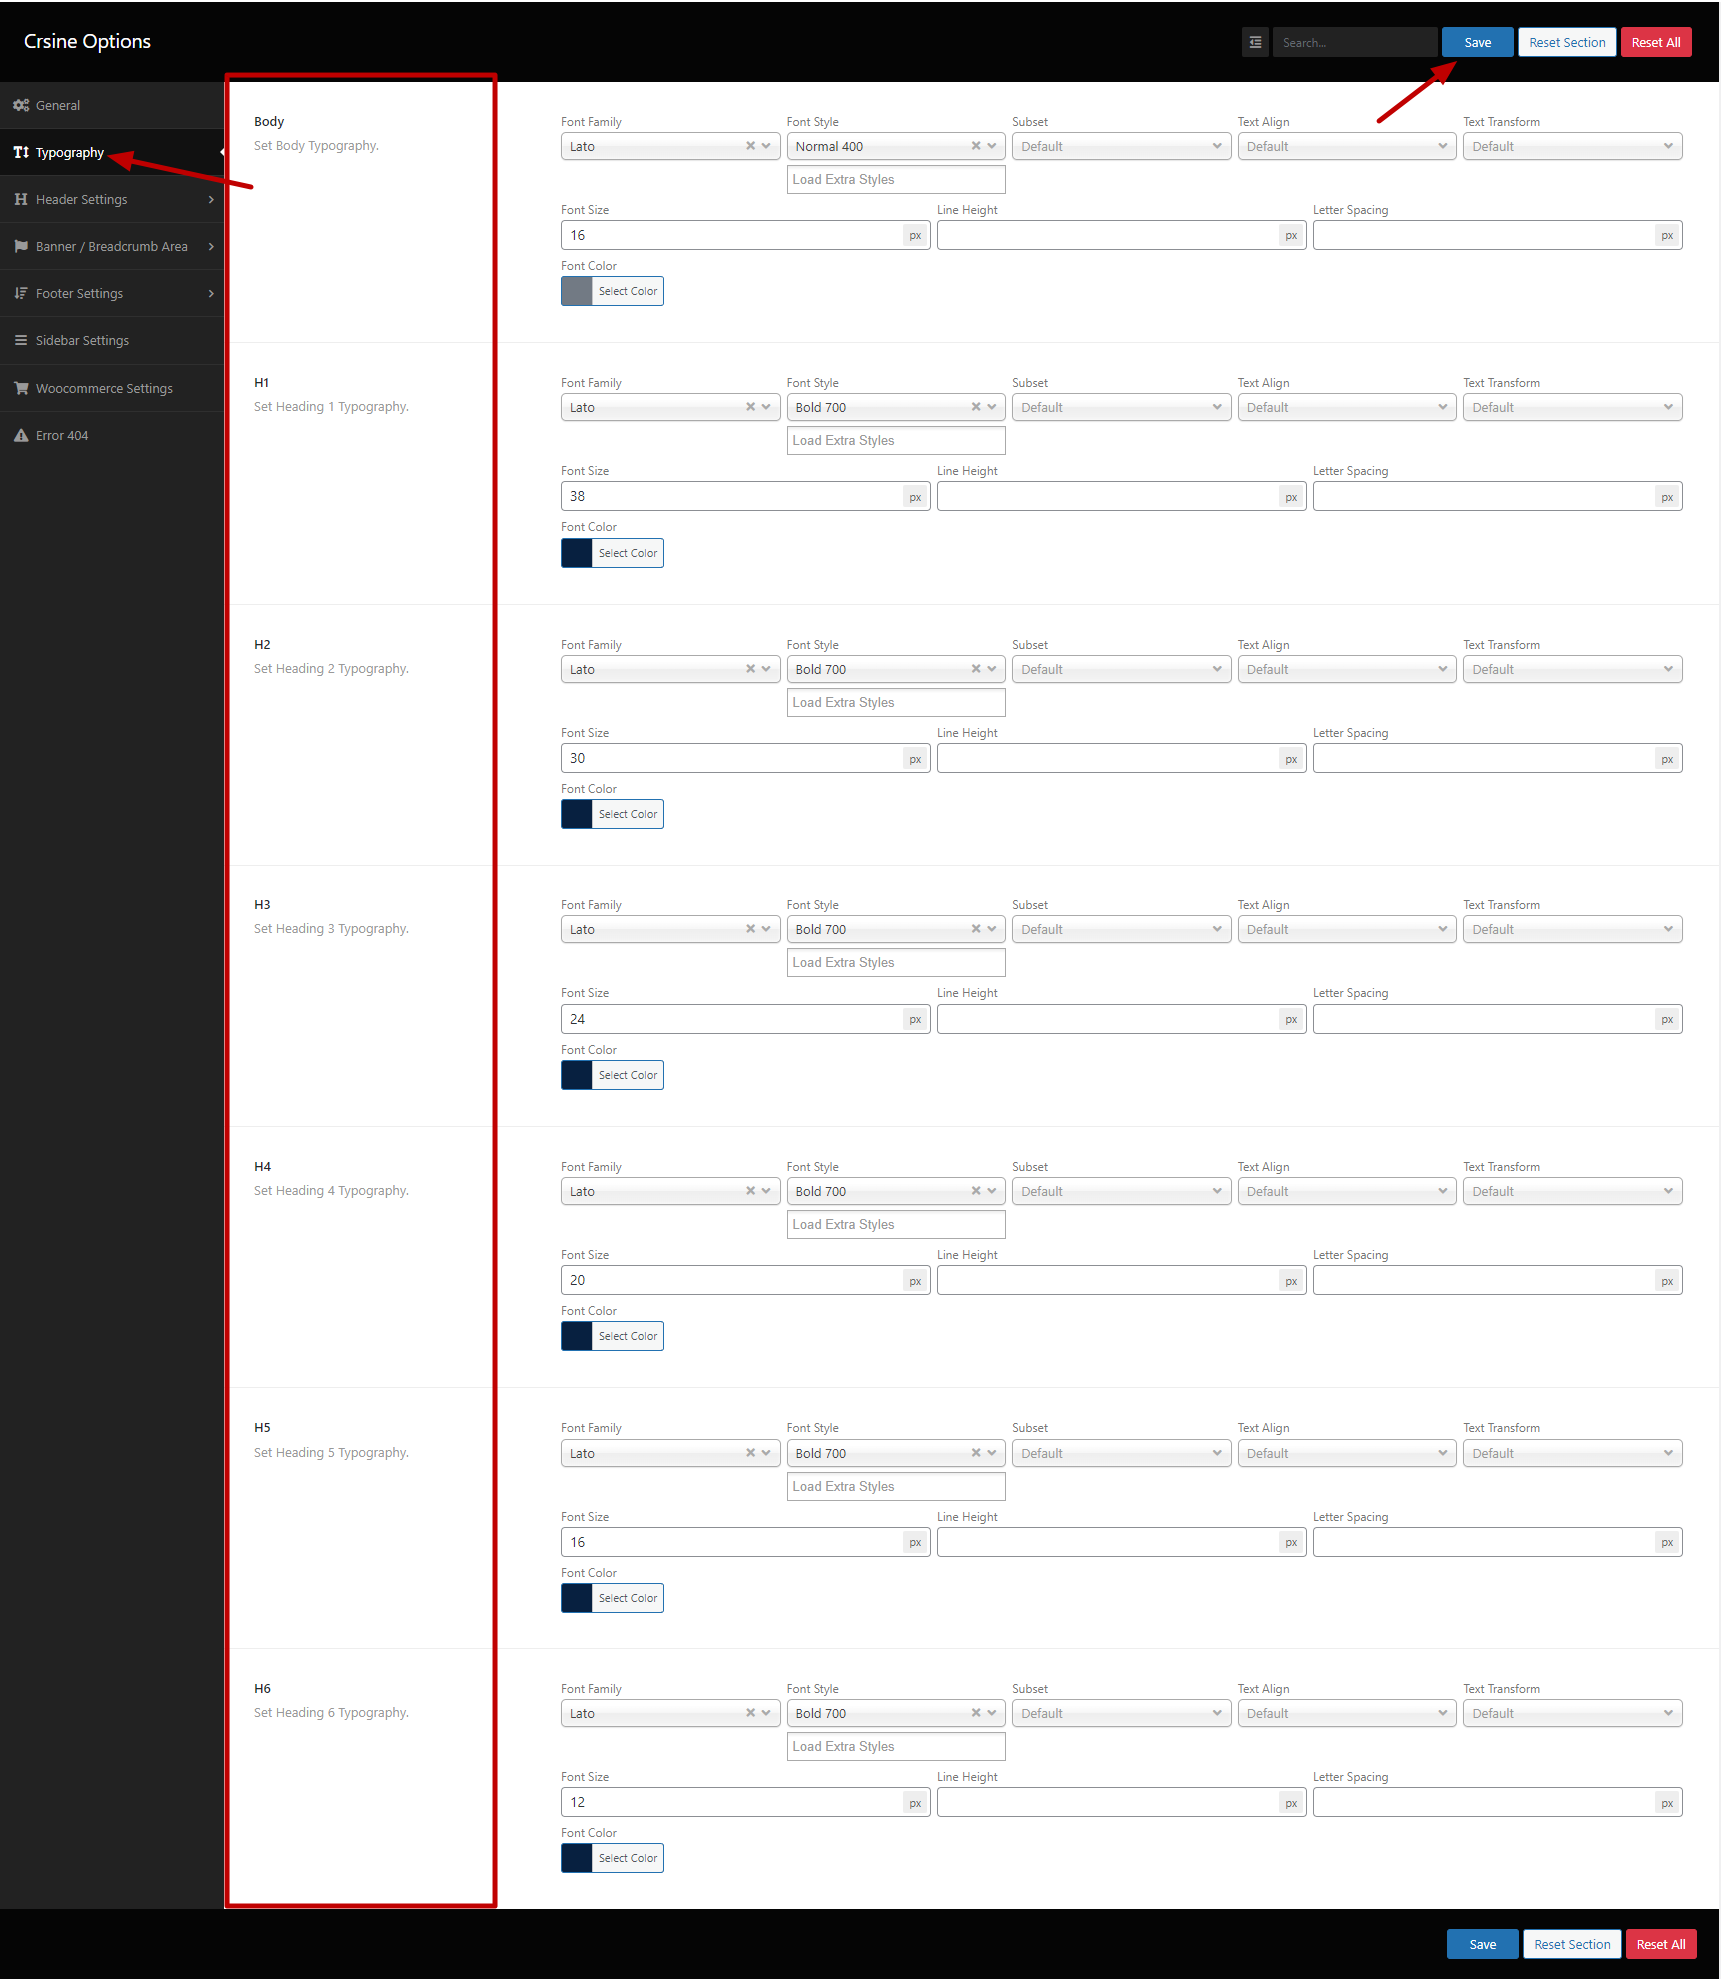
Typography Setting
wp-admin >> Crsine Options >> Typography
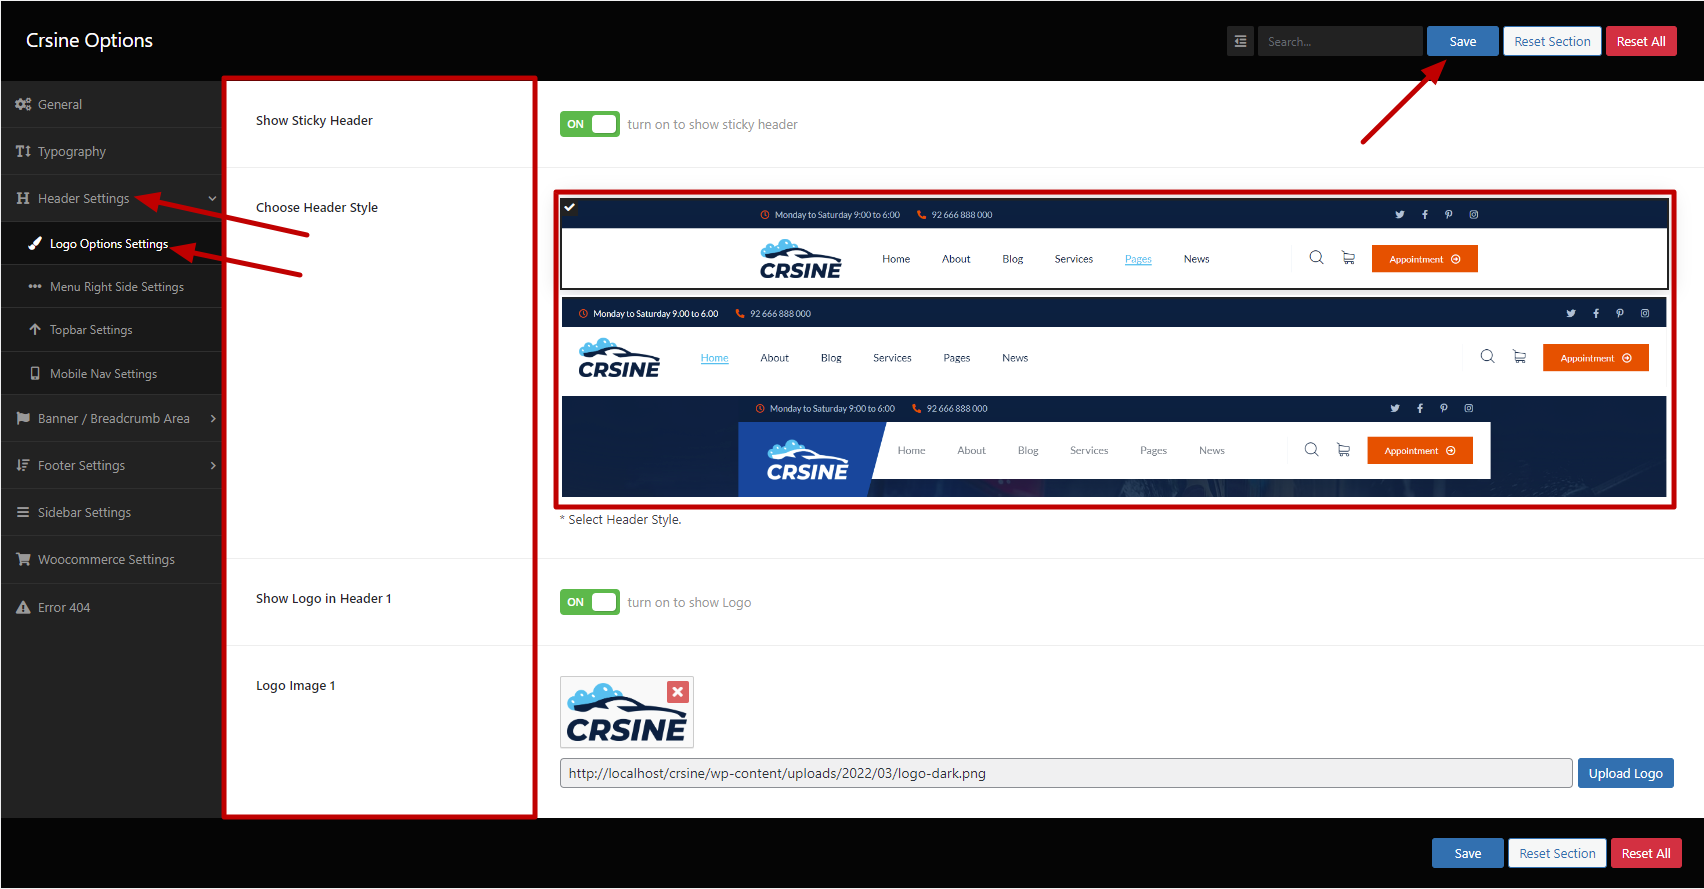
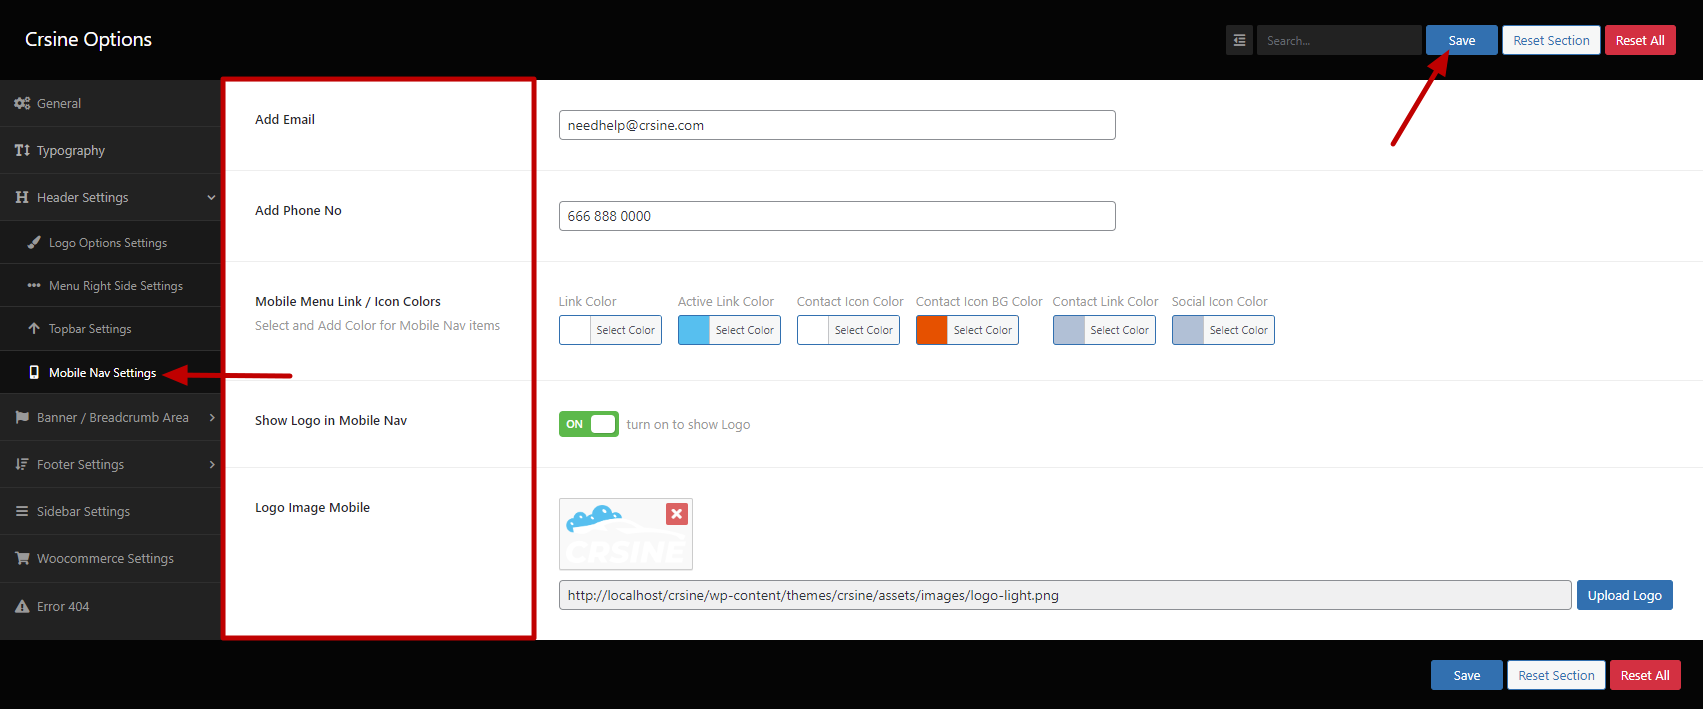
Header Settings
wp-admin >> Crsine Options >> Header Settings
Logo Options
wp-admin >> Crsine Options >> Header Settings >> Logo Option Settings
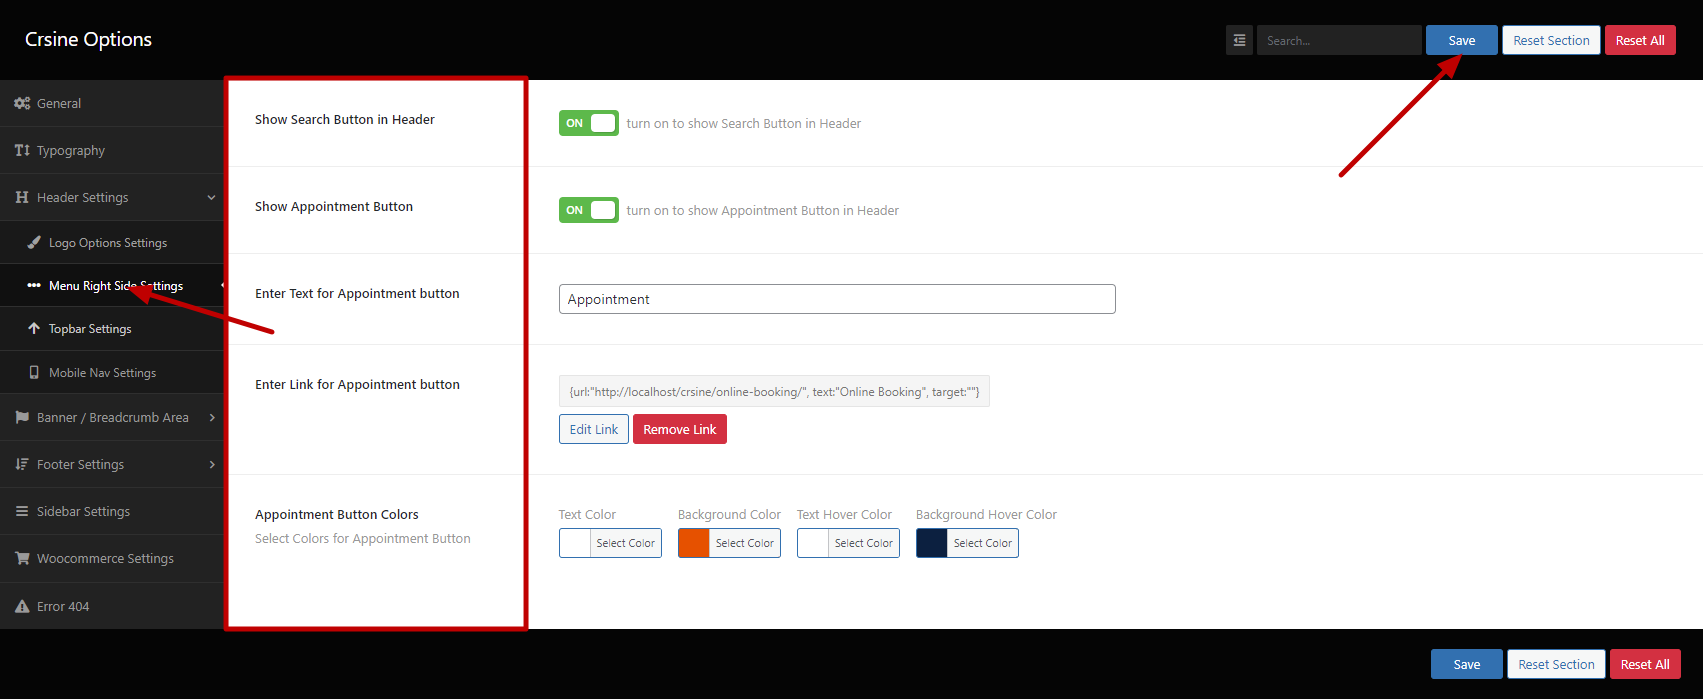
Menu Right side Settings
wp-admin >> Crsine Options >> Header Settings >> Menu Right Side Settings
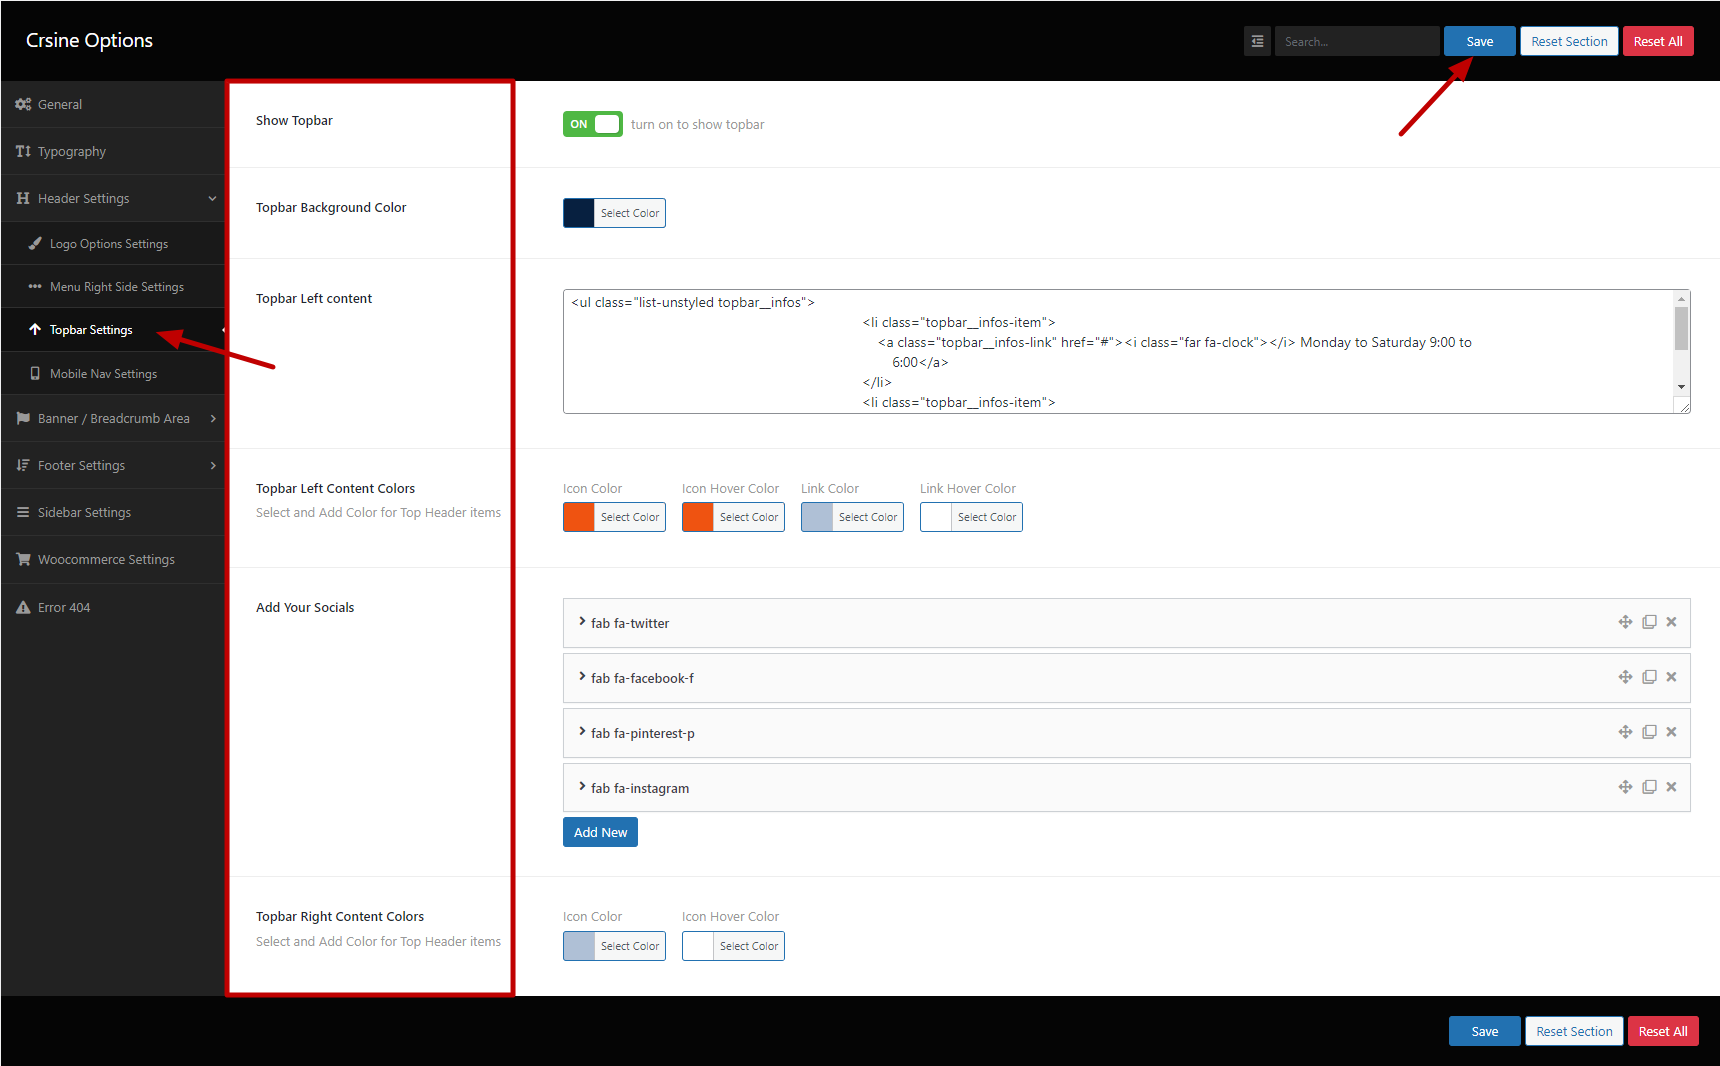
Topbar Settings
wp-admin >> Crsine Options >> Header Settings >> Topbar Settings
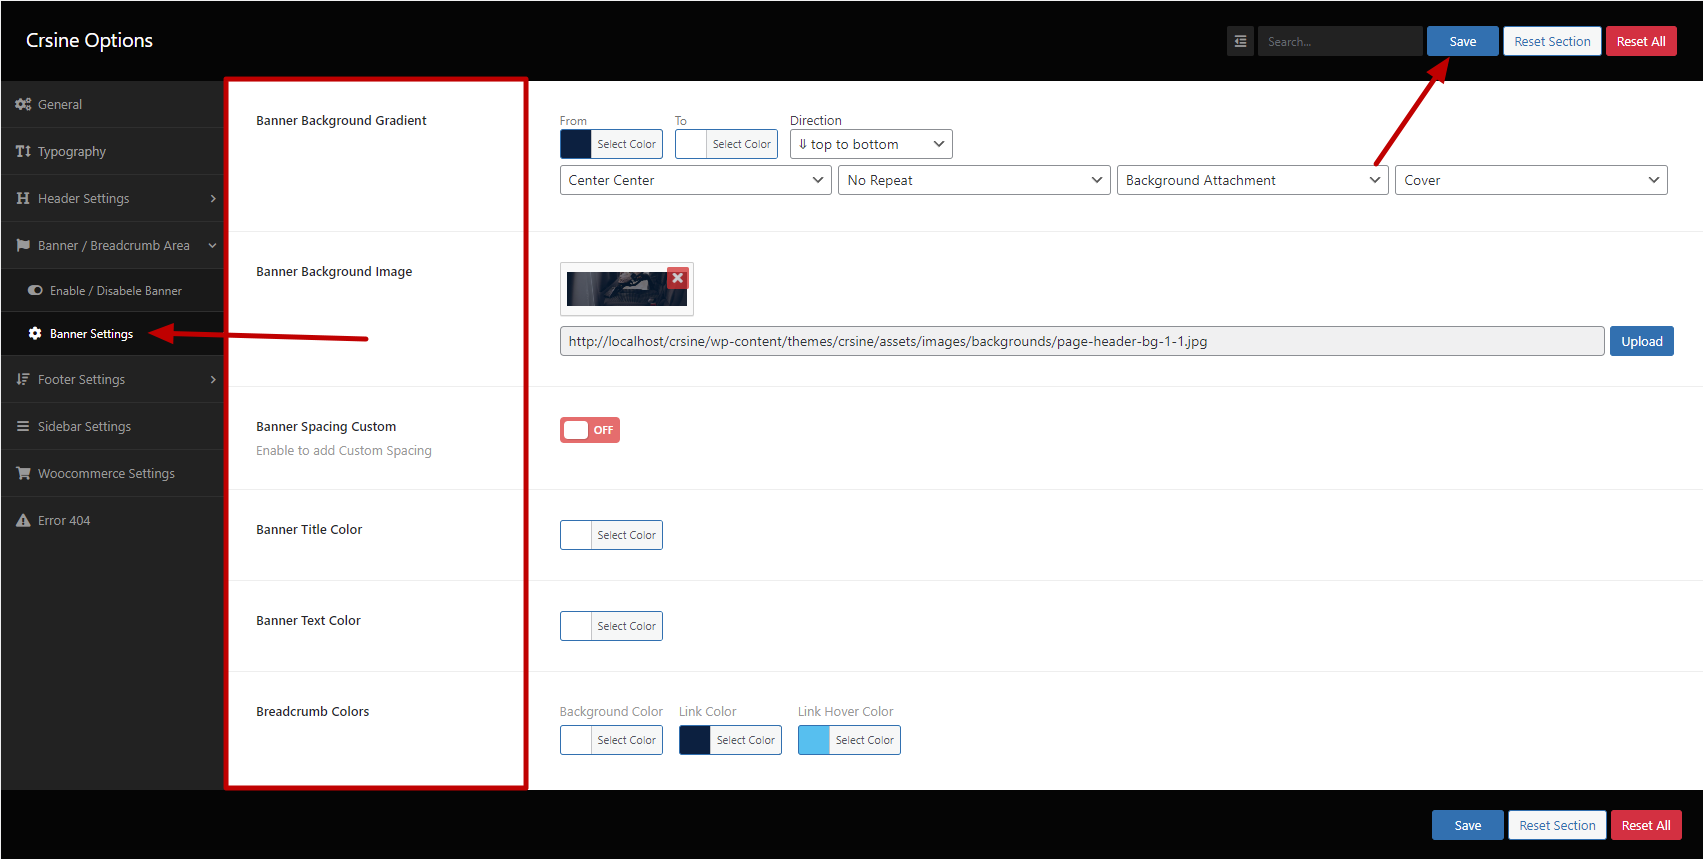
Banner Settings
wp-admin >> Crsine Options >> Banner / Breadcrumb Area
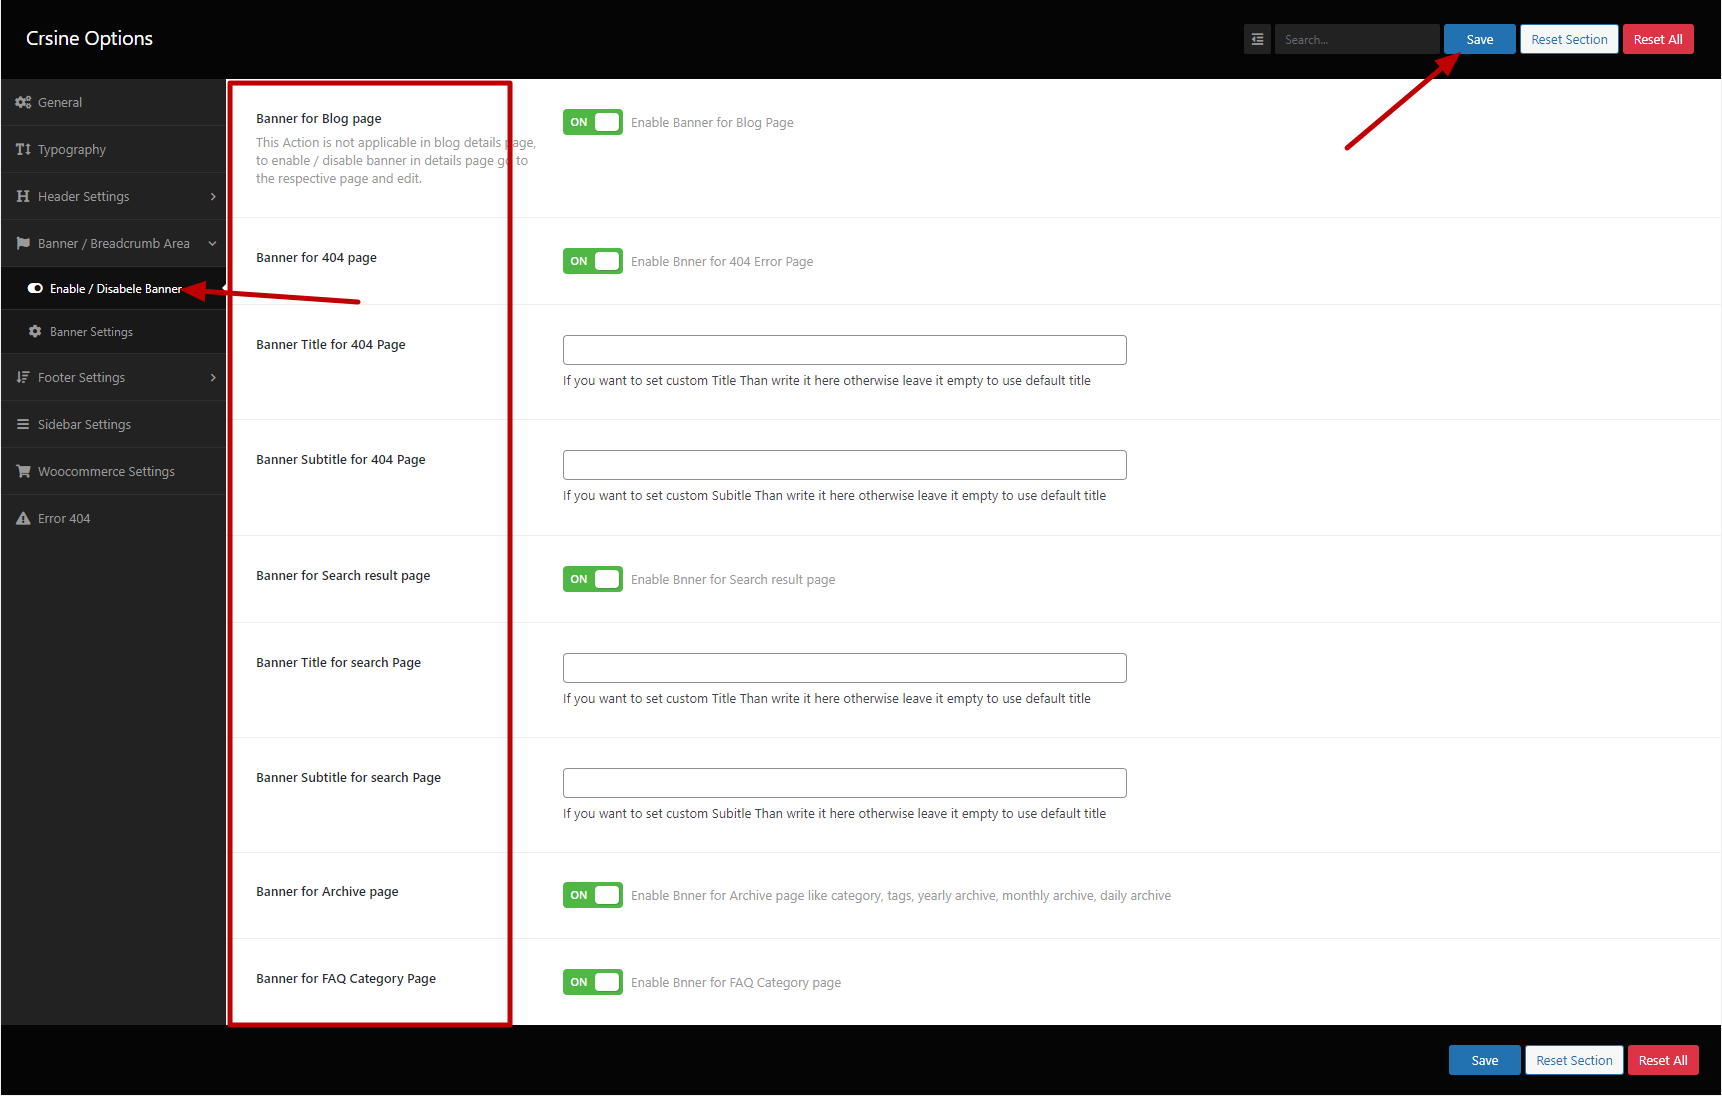
Enable / Disable Banner
wp-admin >> Crsine Options >> Banner / Breadcrumb Area >> Enable / Disable Banner
Banner Settings
wp-admin >> Crsine Options >> Banner / Breadcrumb Area >> Banner Settings
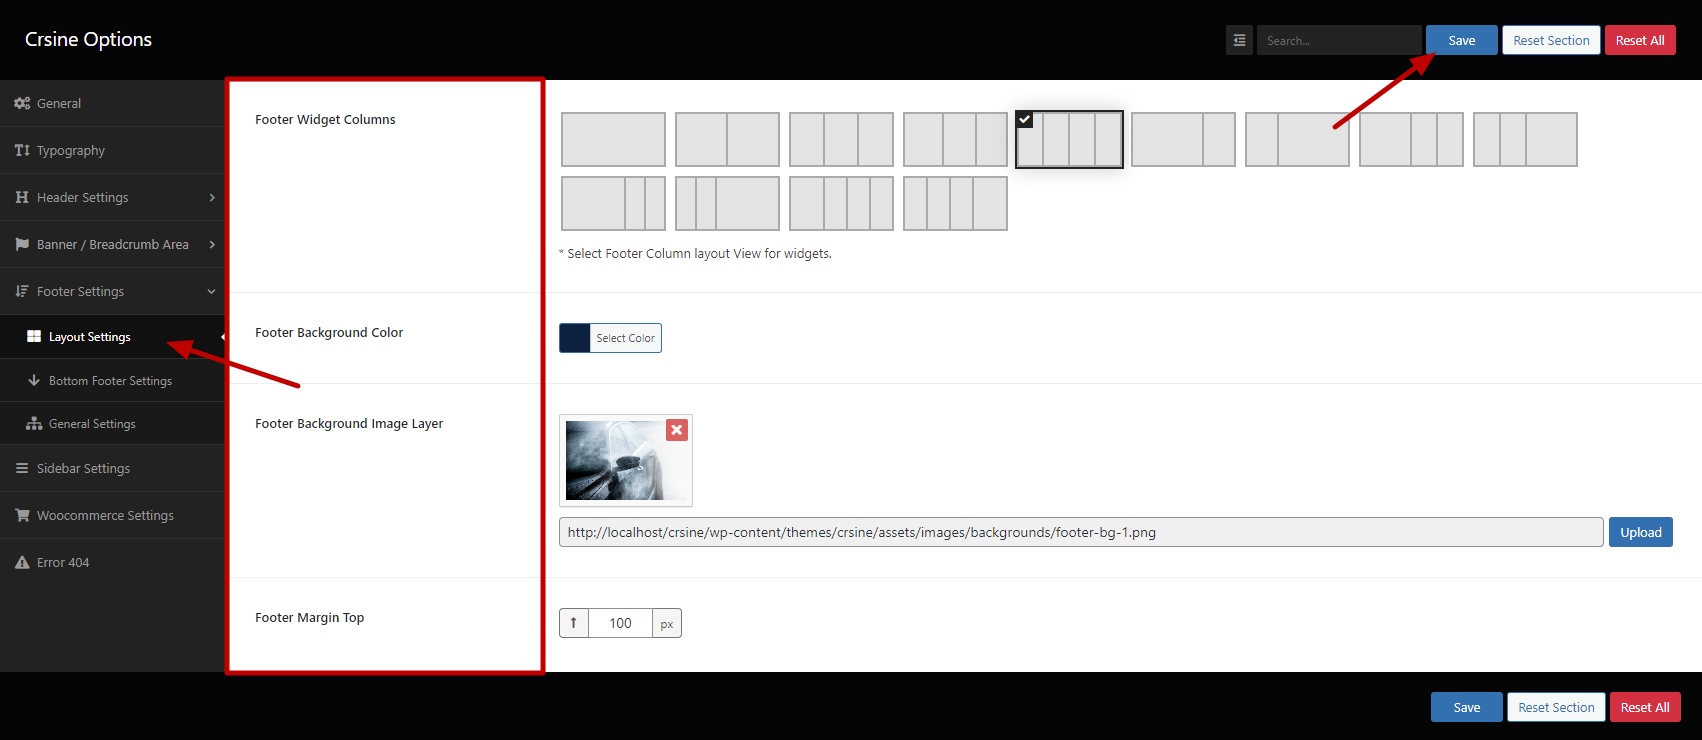
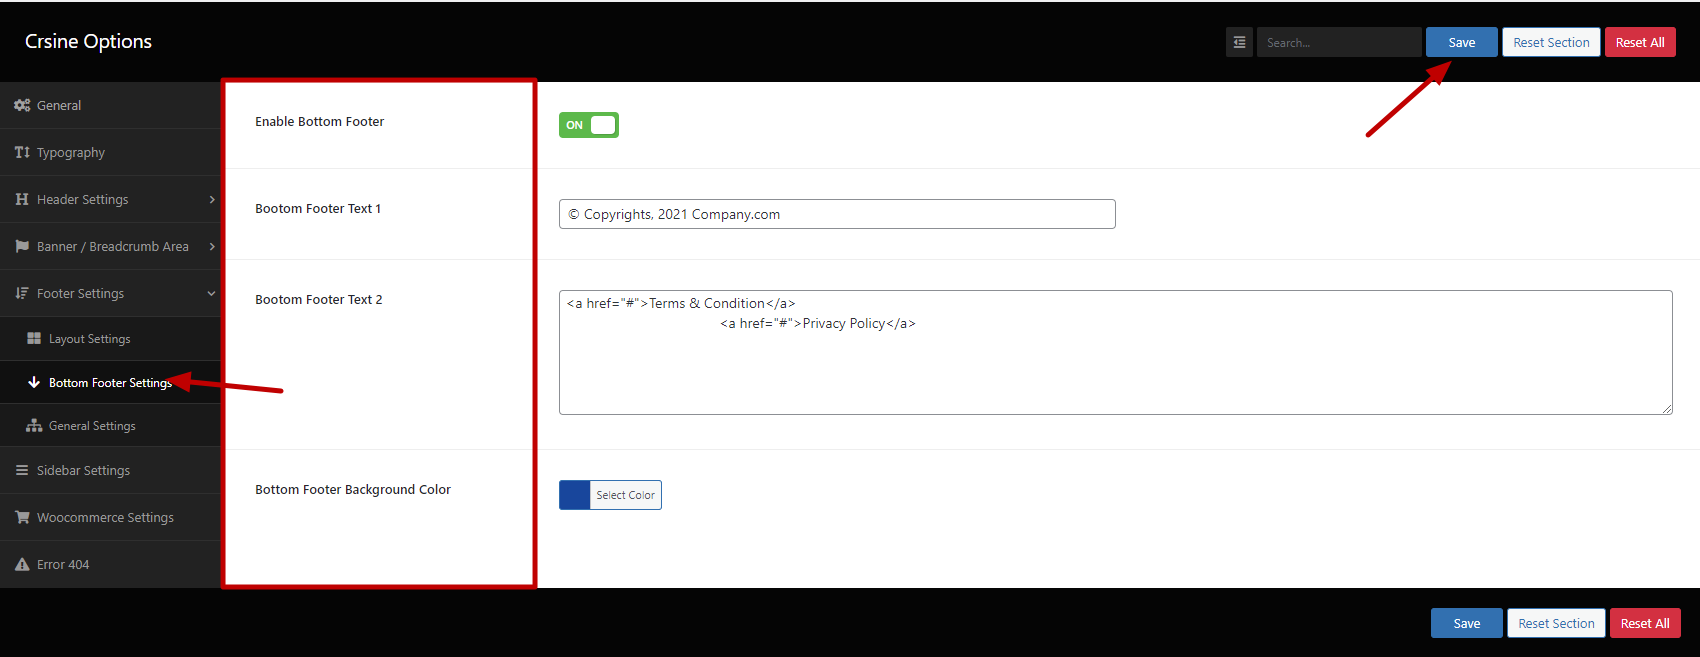
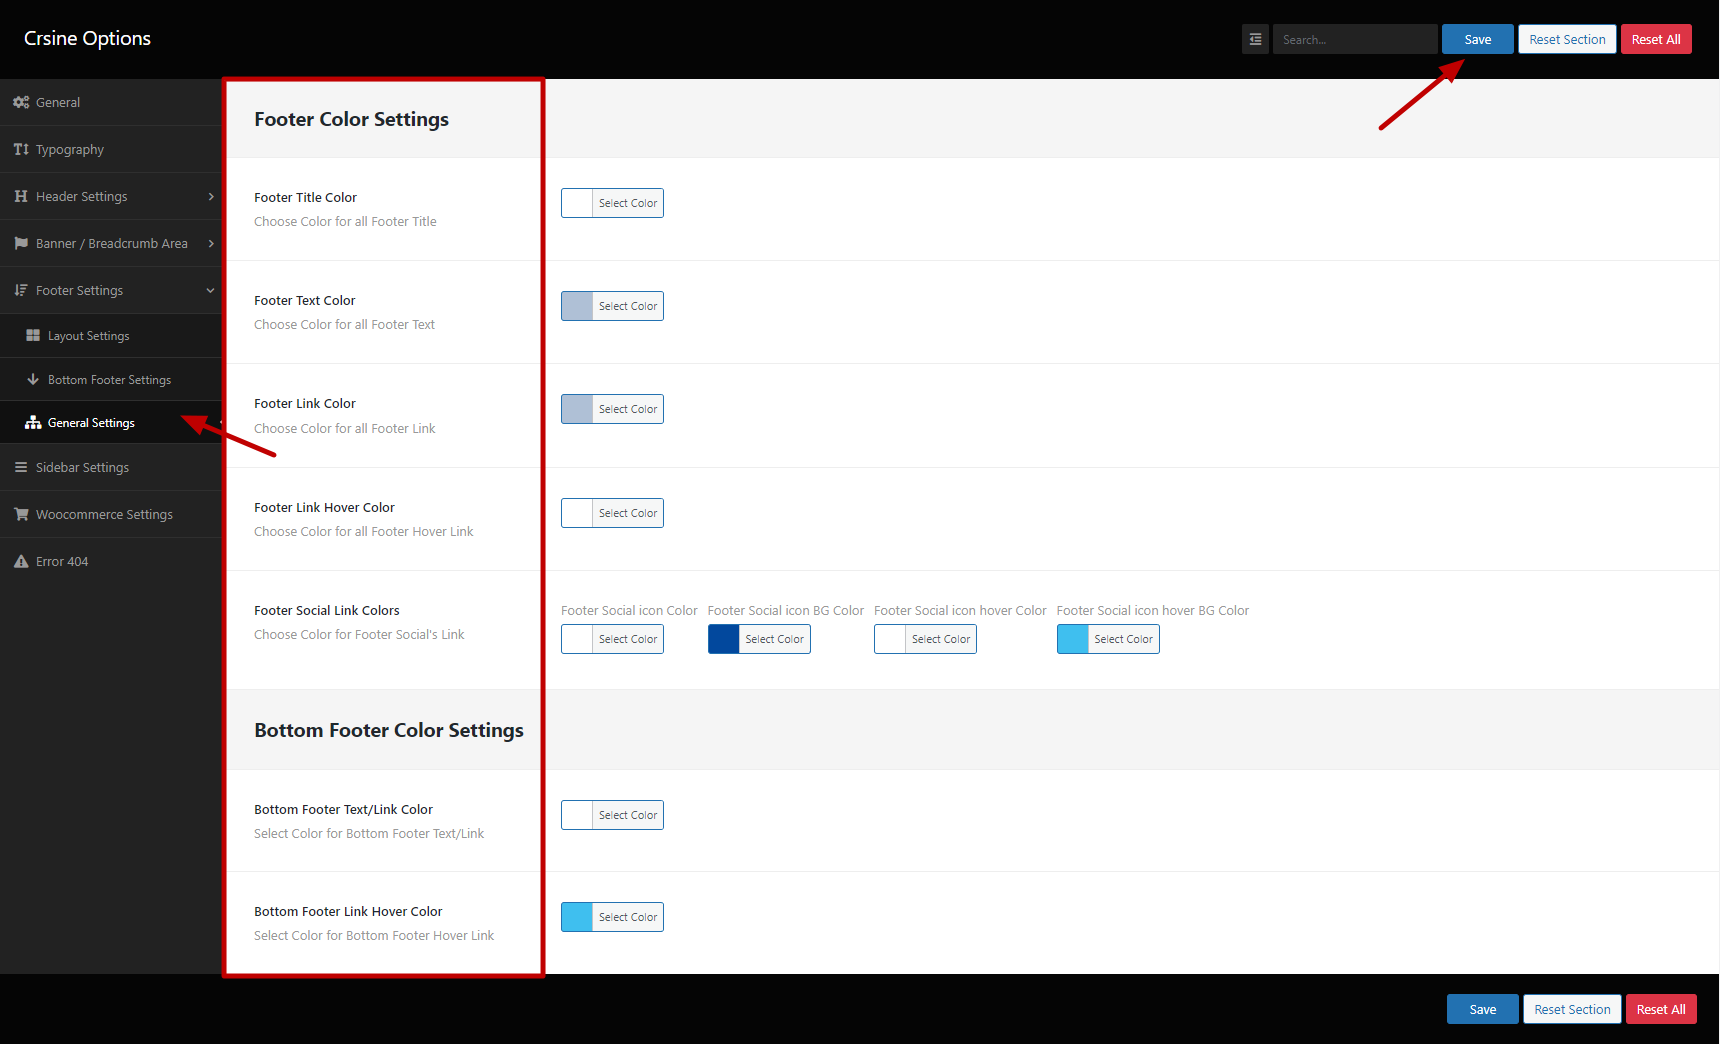
Footer Settings
wp-admin >> Crsine Options >> Footer Settings
Layout Settings
wp-admin >> Crsine Options >> Footer Settings >> Layout Settings
Bottom Footer Settings
wp-admin >> Crsine Options >> Footer Settings >> Bottom Footer Settings
General Settings
wp-admin >> Crsine Options >> Footer Settings >> General Settings
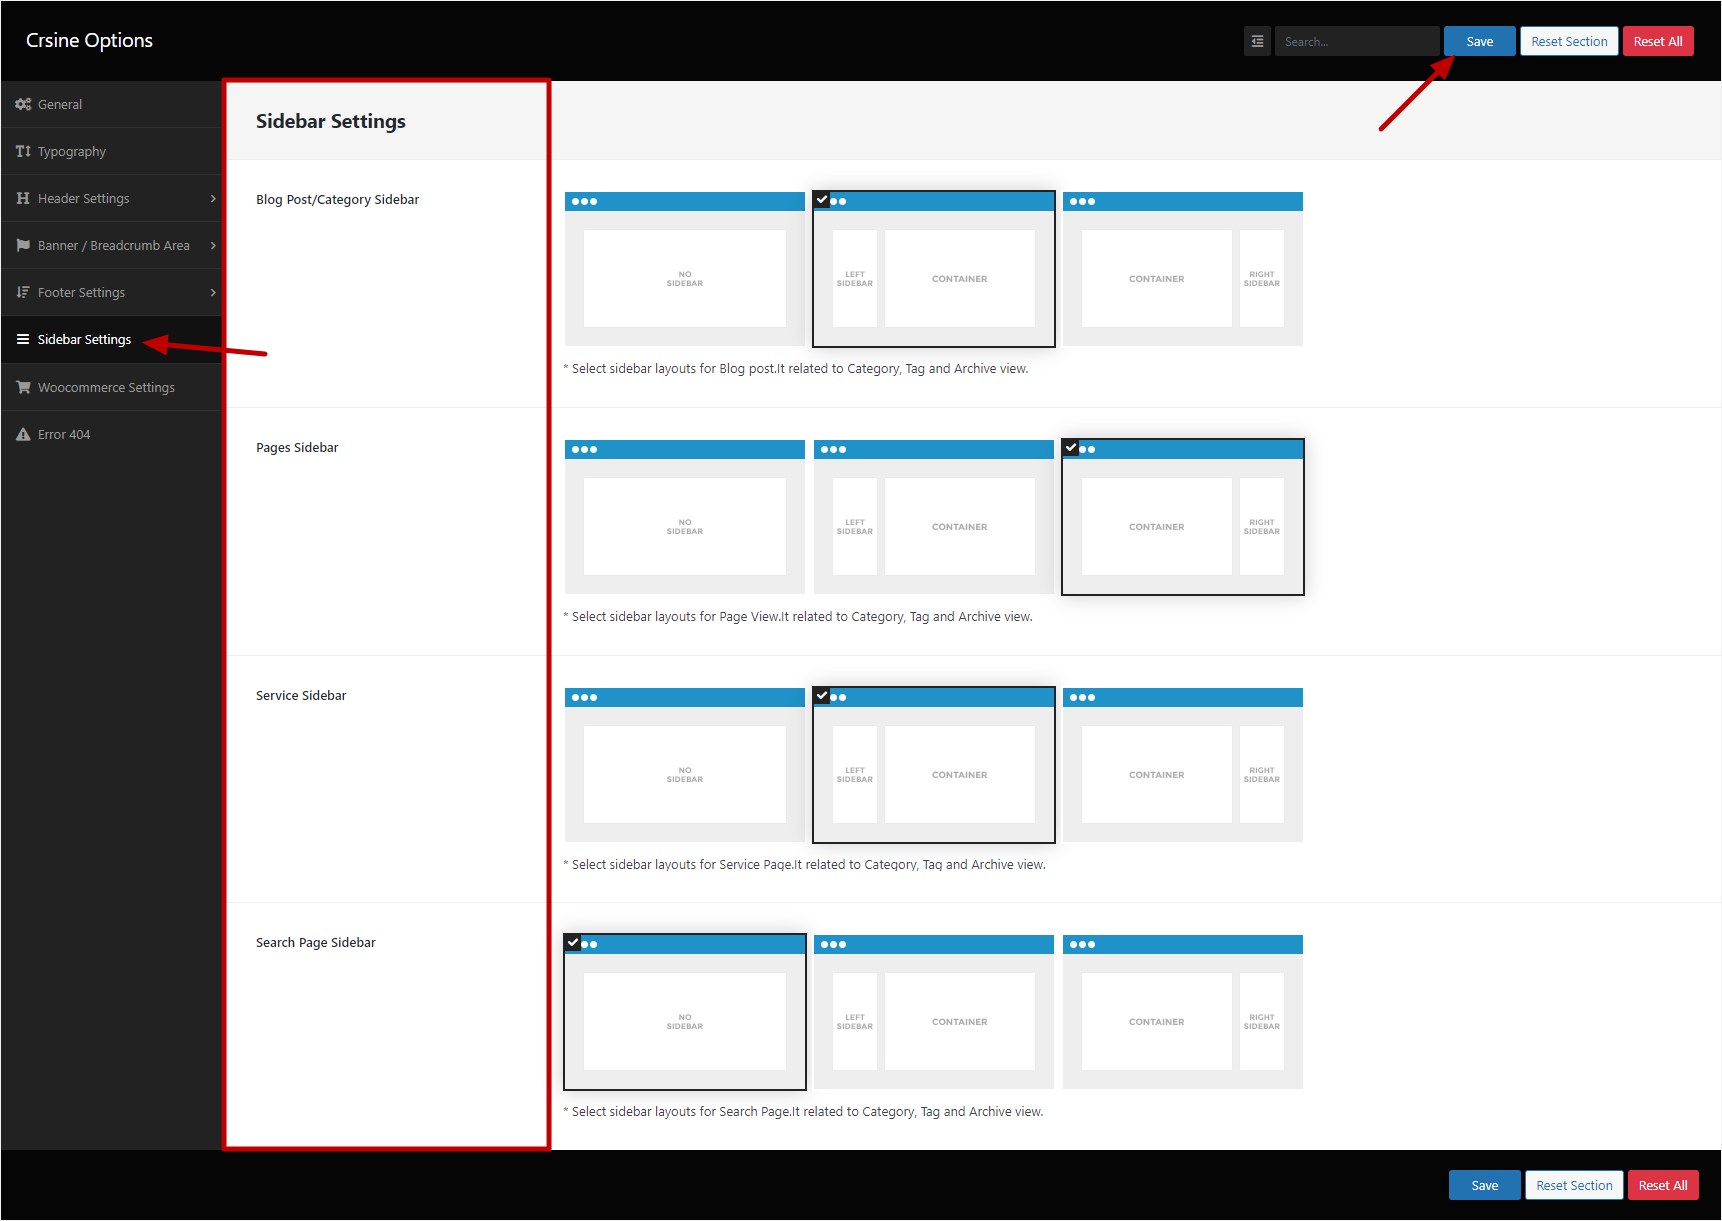
Sidebar Settings
wp-admin >> Crsine Options >> Sidebar Settings
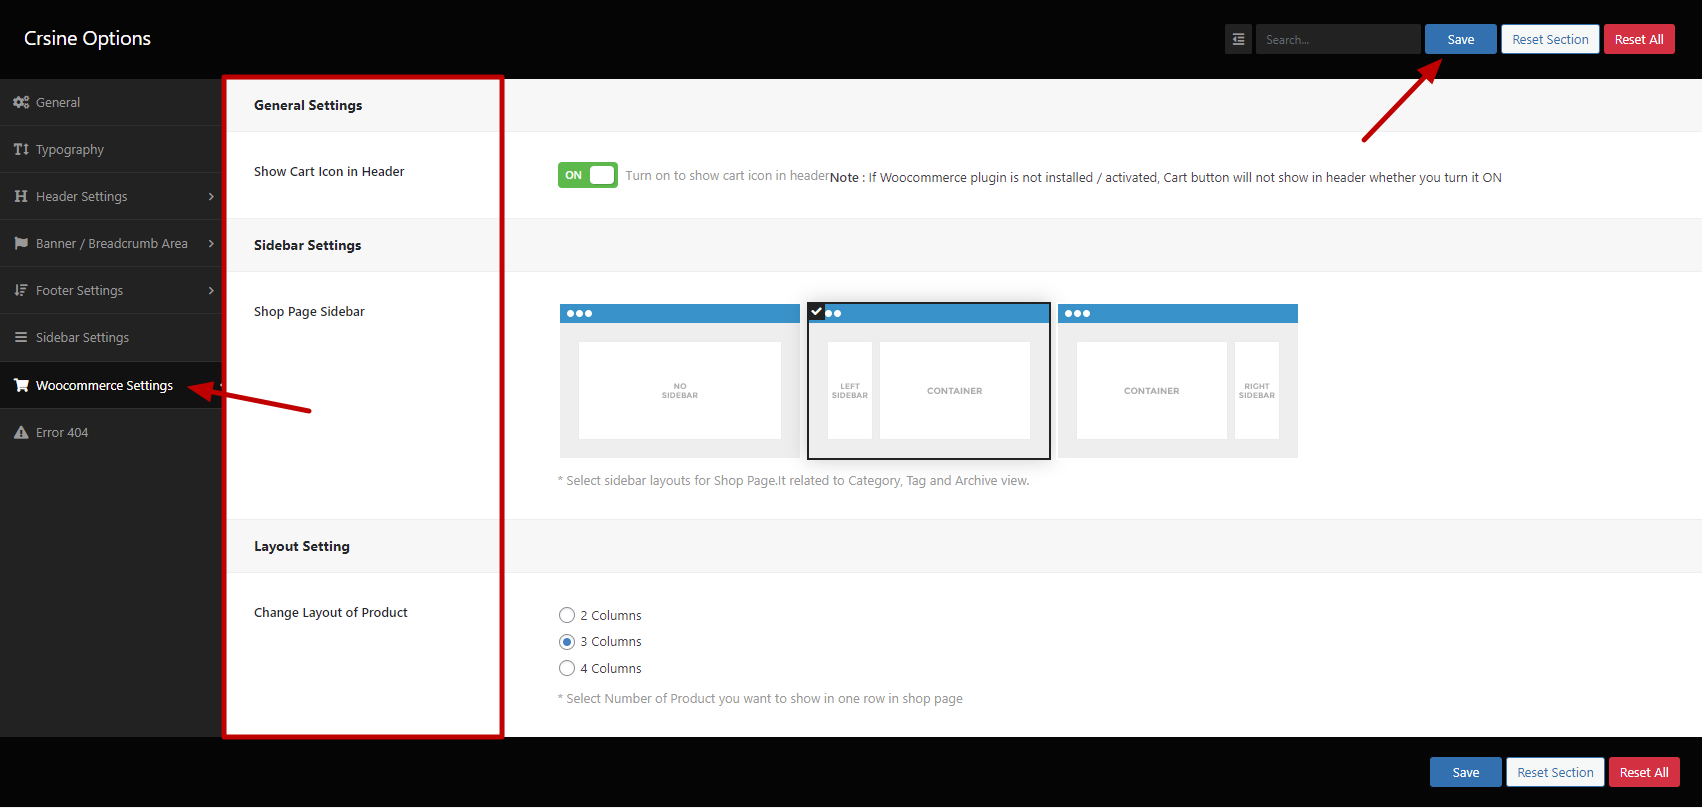
Woocommerce Settings
wp-admin >> Crsine Options >> Woocommerce Settings
Error 404
wp-admin >> Crsine Options >> Error 404

Error 404
wp-admin >> Crsine Options >> Error 404
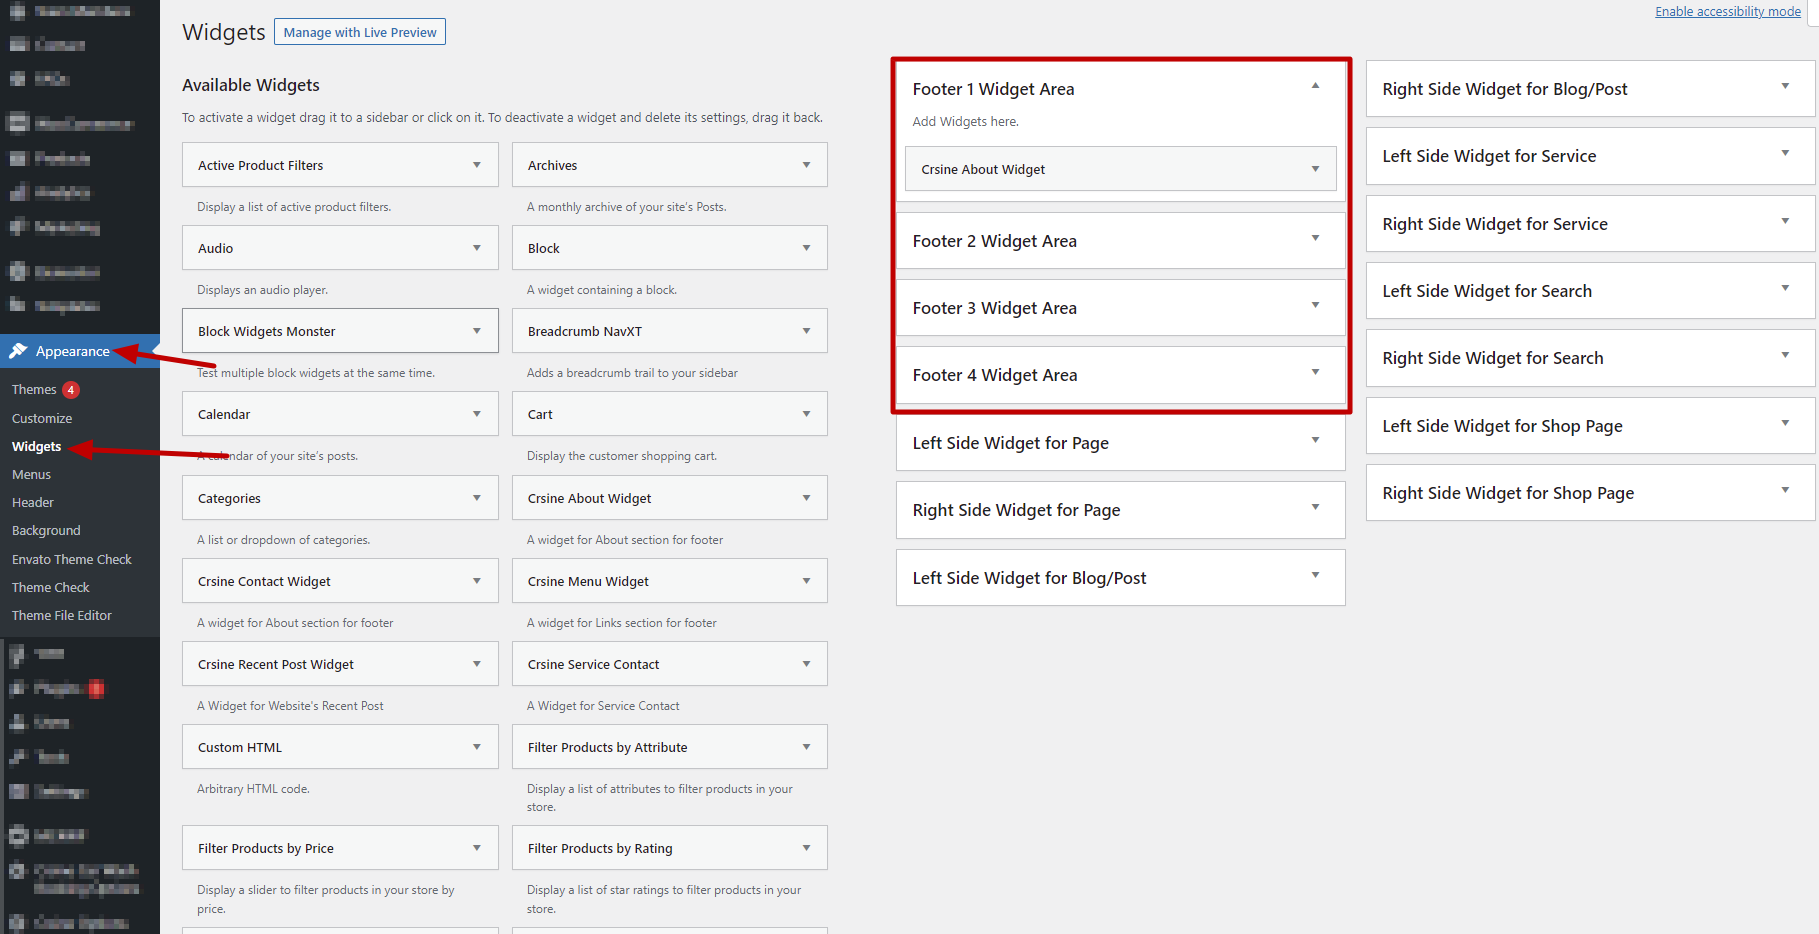
Widget Settings
wp-admin >> Appearance >> Widget
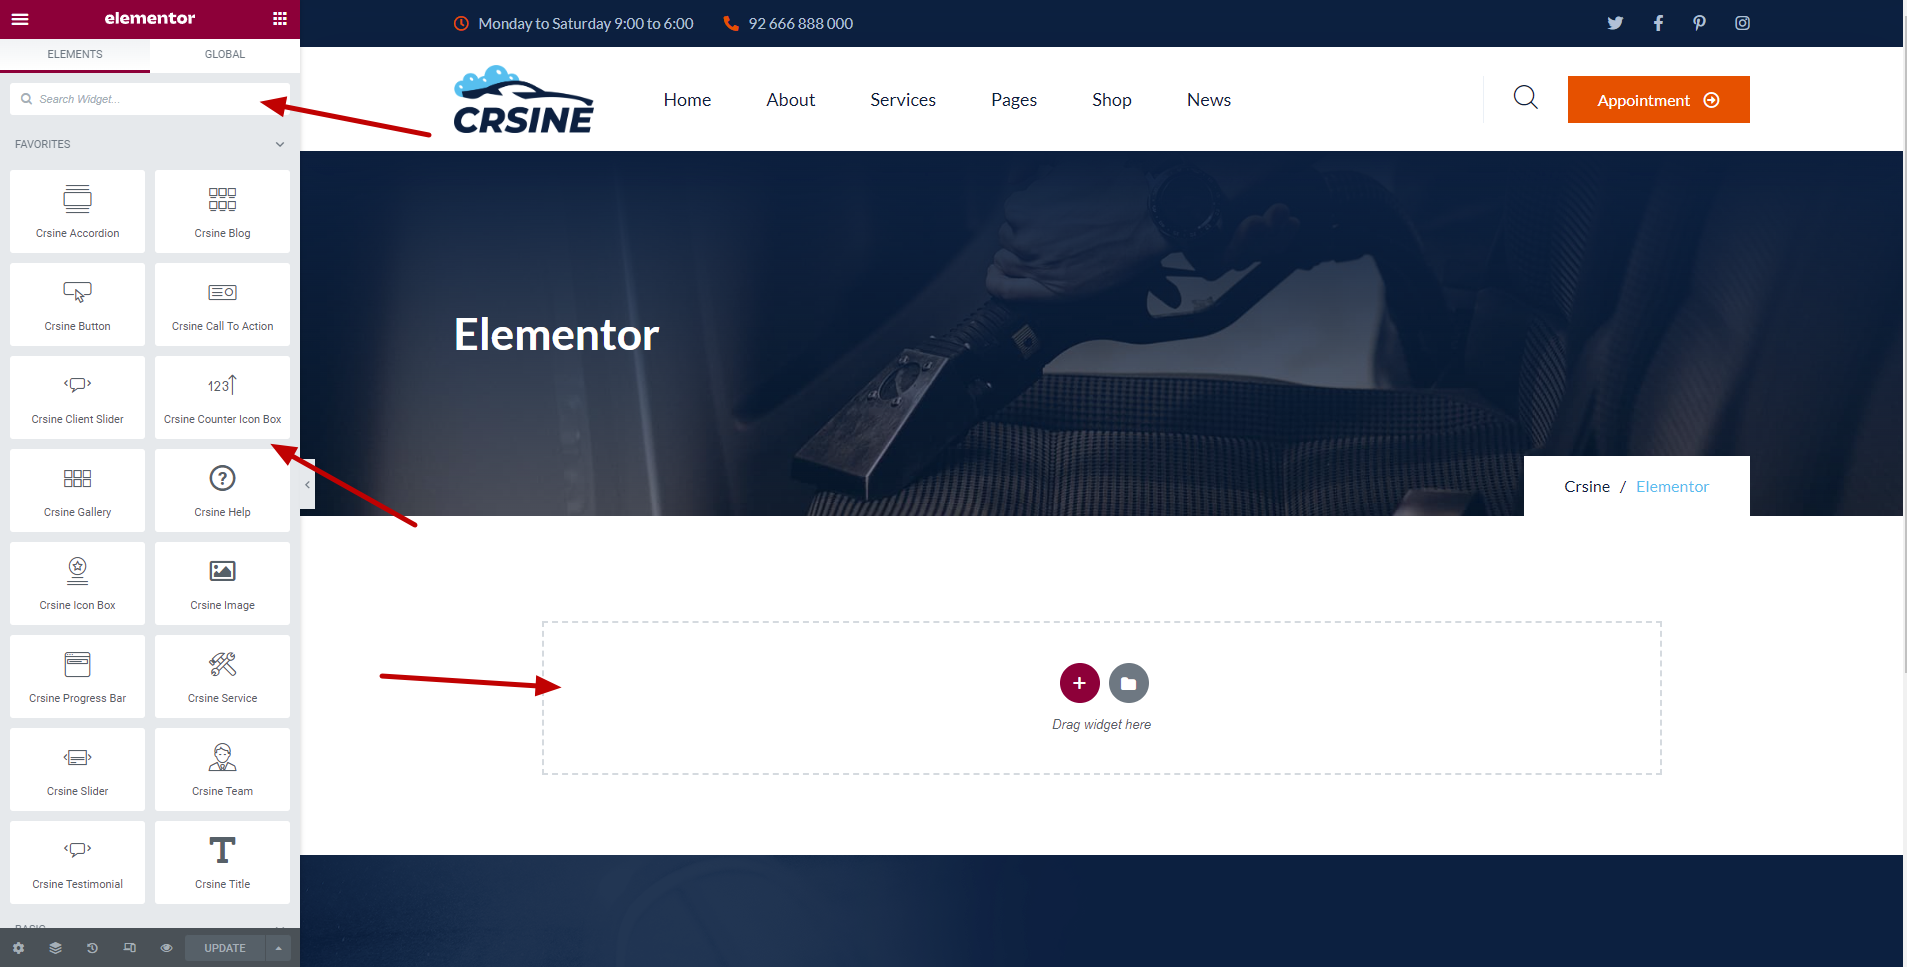
Elementor
Drag and drop element to add widget and create page and custom post type
Custom Elementor Widgets
Drag and Drop a custom elementor widgets from left sidebar.
You can even search for widget from text bar.
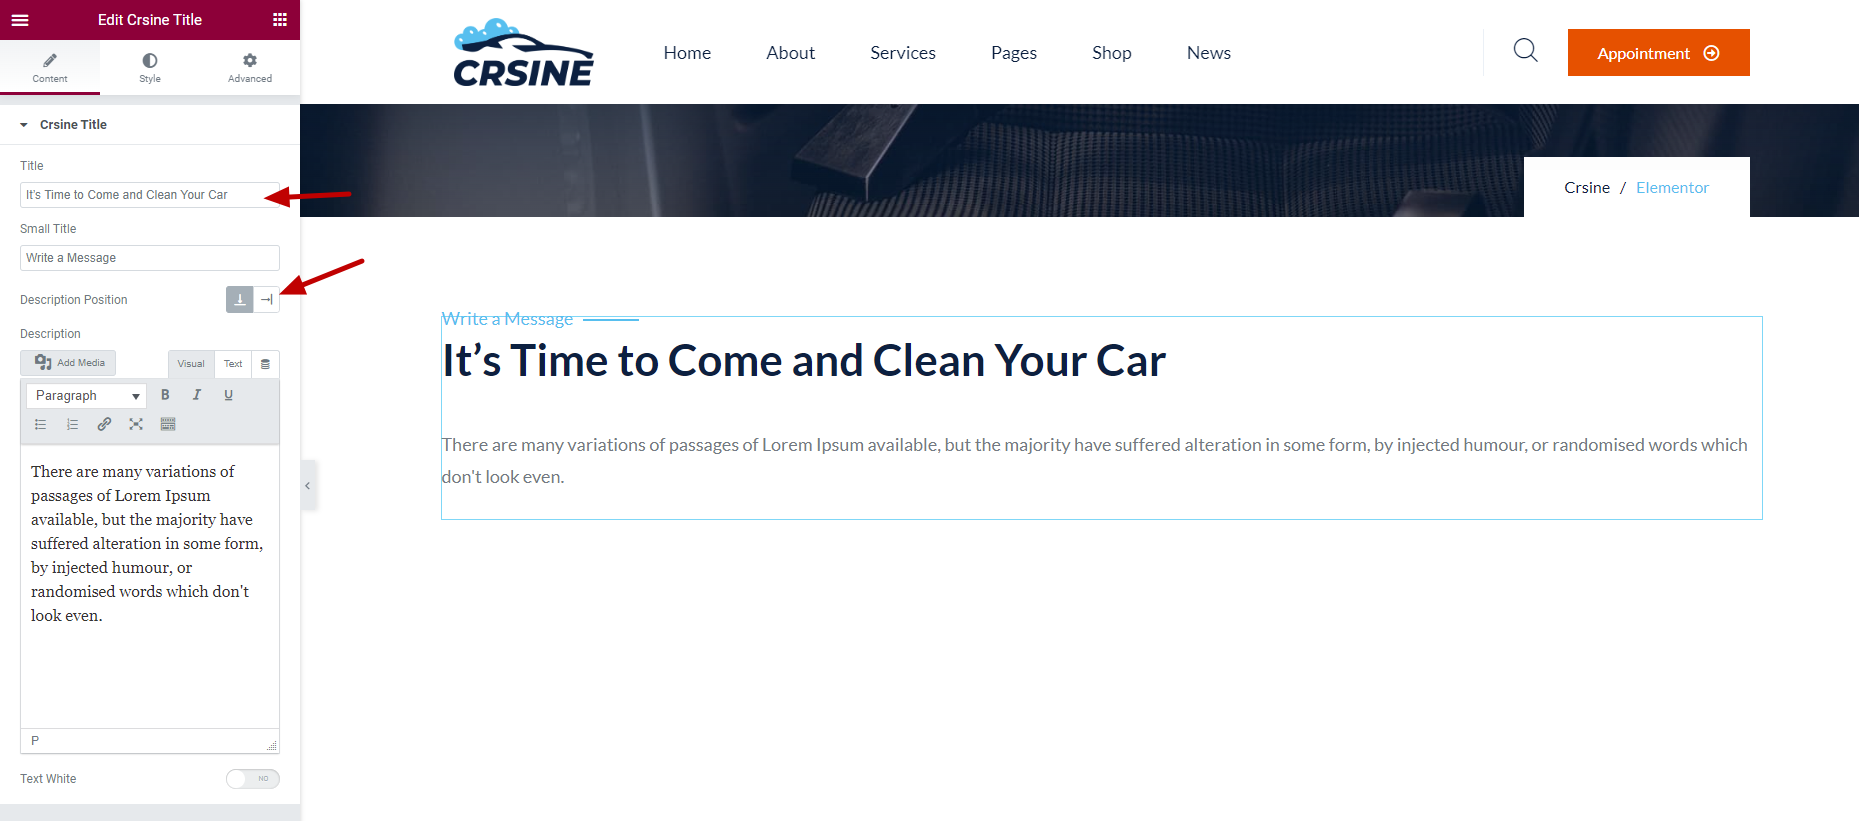
Crsine Title
Type Title, Subtitle and Description. If you don't want Subtitle and Description leave theme empty.
Set position of description.
If the Background is dark in color, It is recommanded to use text white.
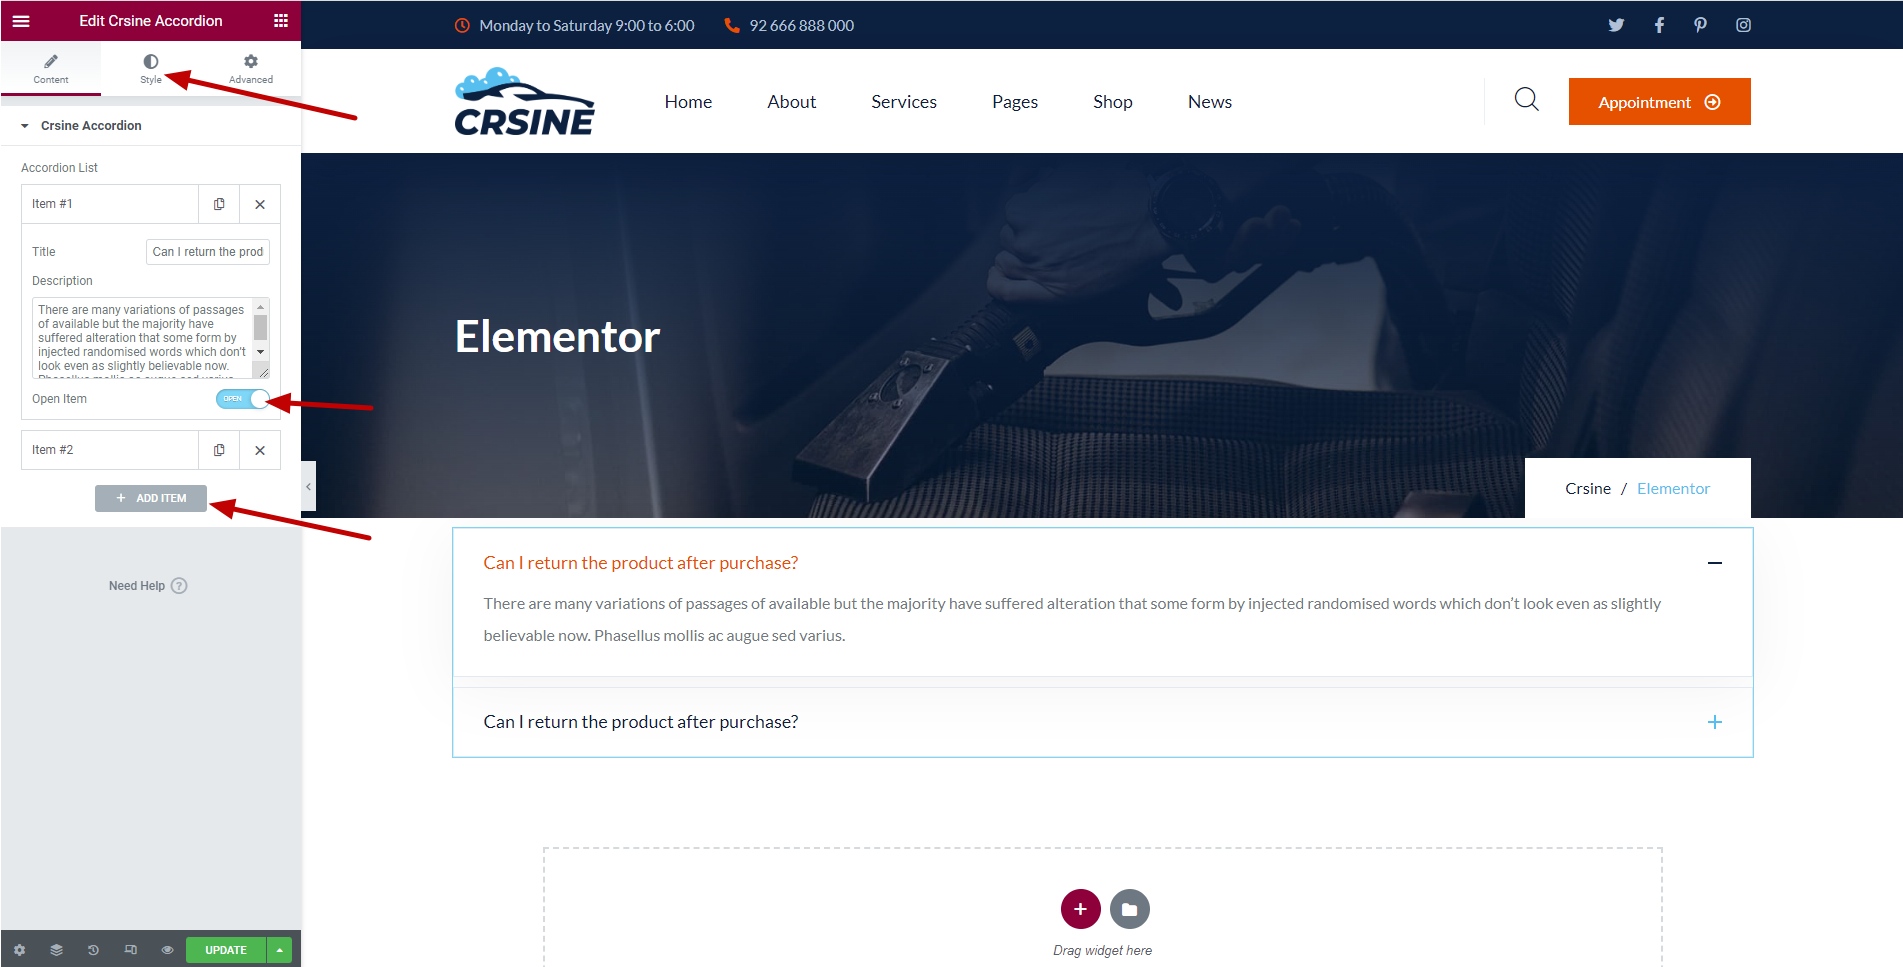
Crsine Accordion
Accordion is a vertically stacked list of headers that can be clicked to reveal or hide content associated with them.
You can style accordion by your choice. This Style tab is available for all custom widgets.
Toggle Open Item switch to Active Accordian.
Click on Add item button to add as many accordion as you want.
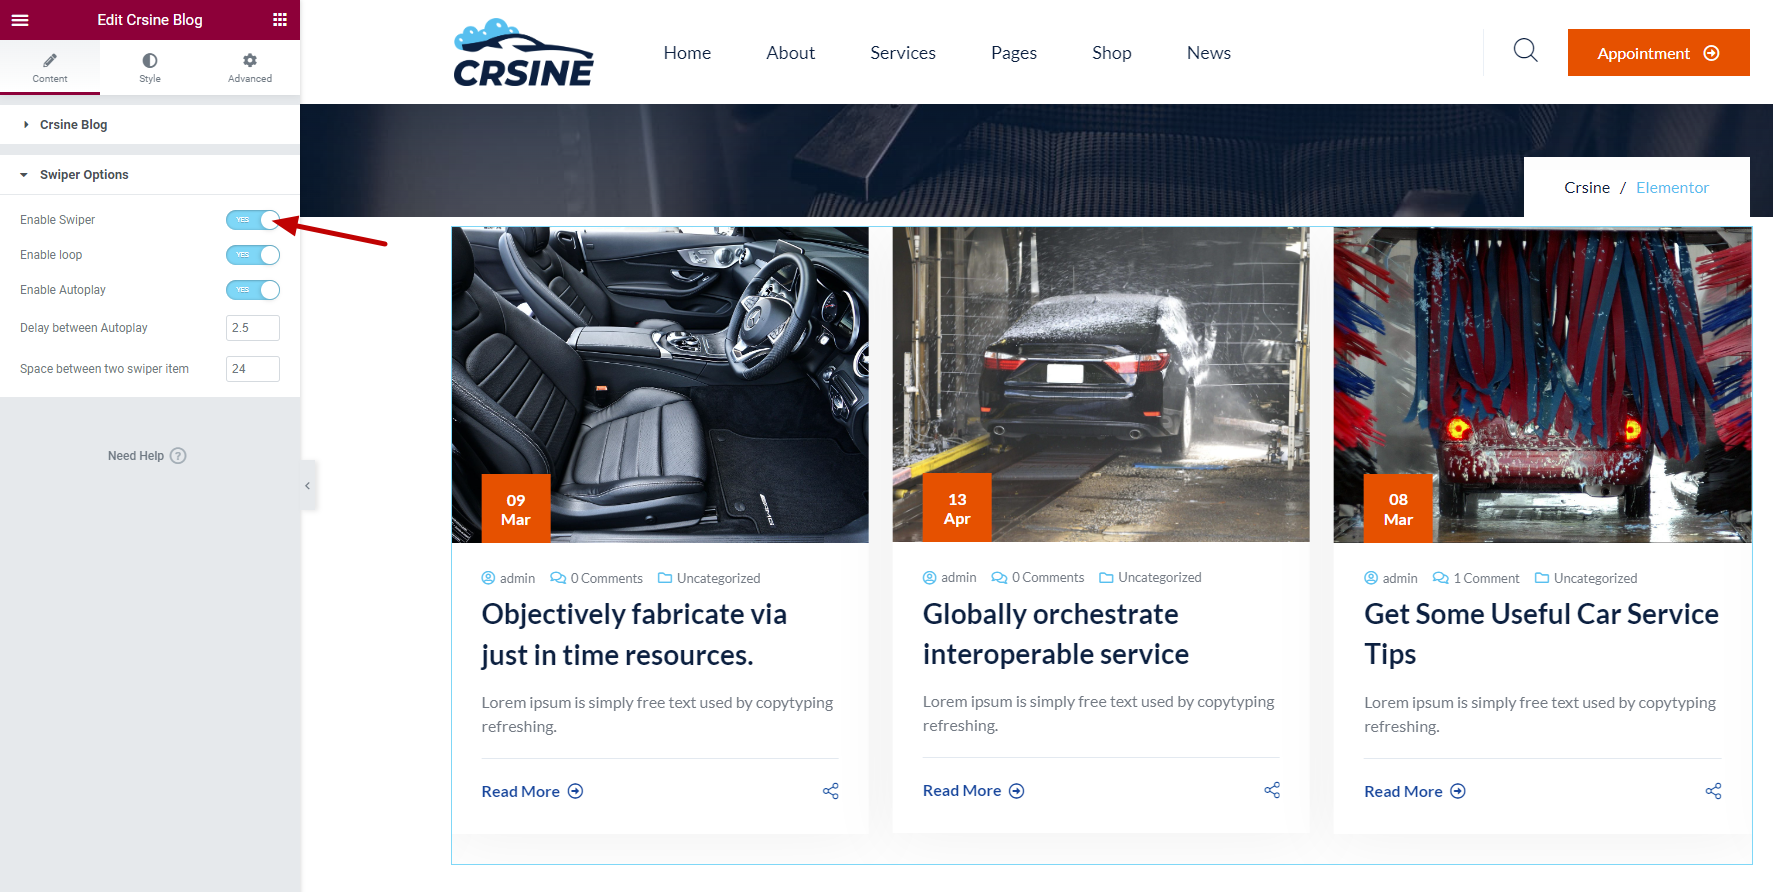
Crsine Blog
You can show as many Blog as you want.
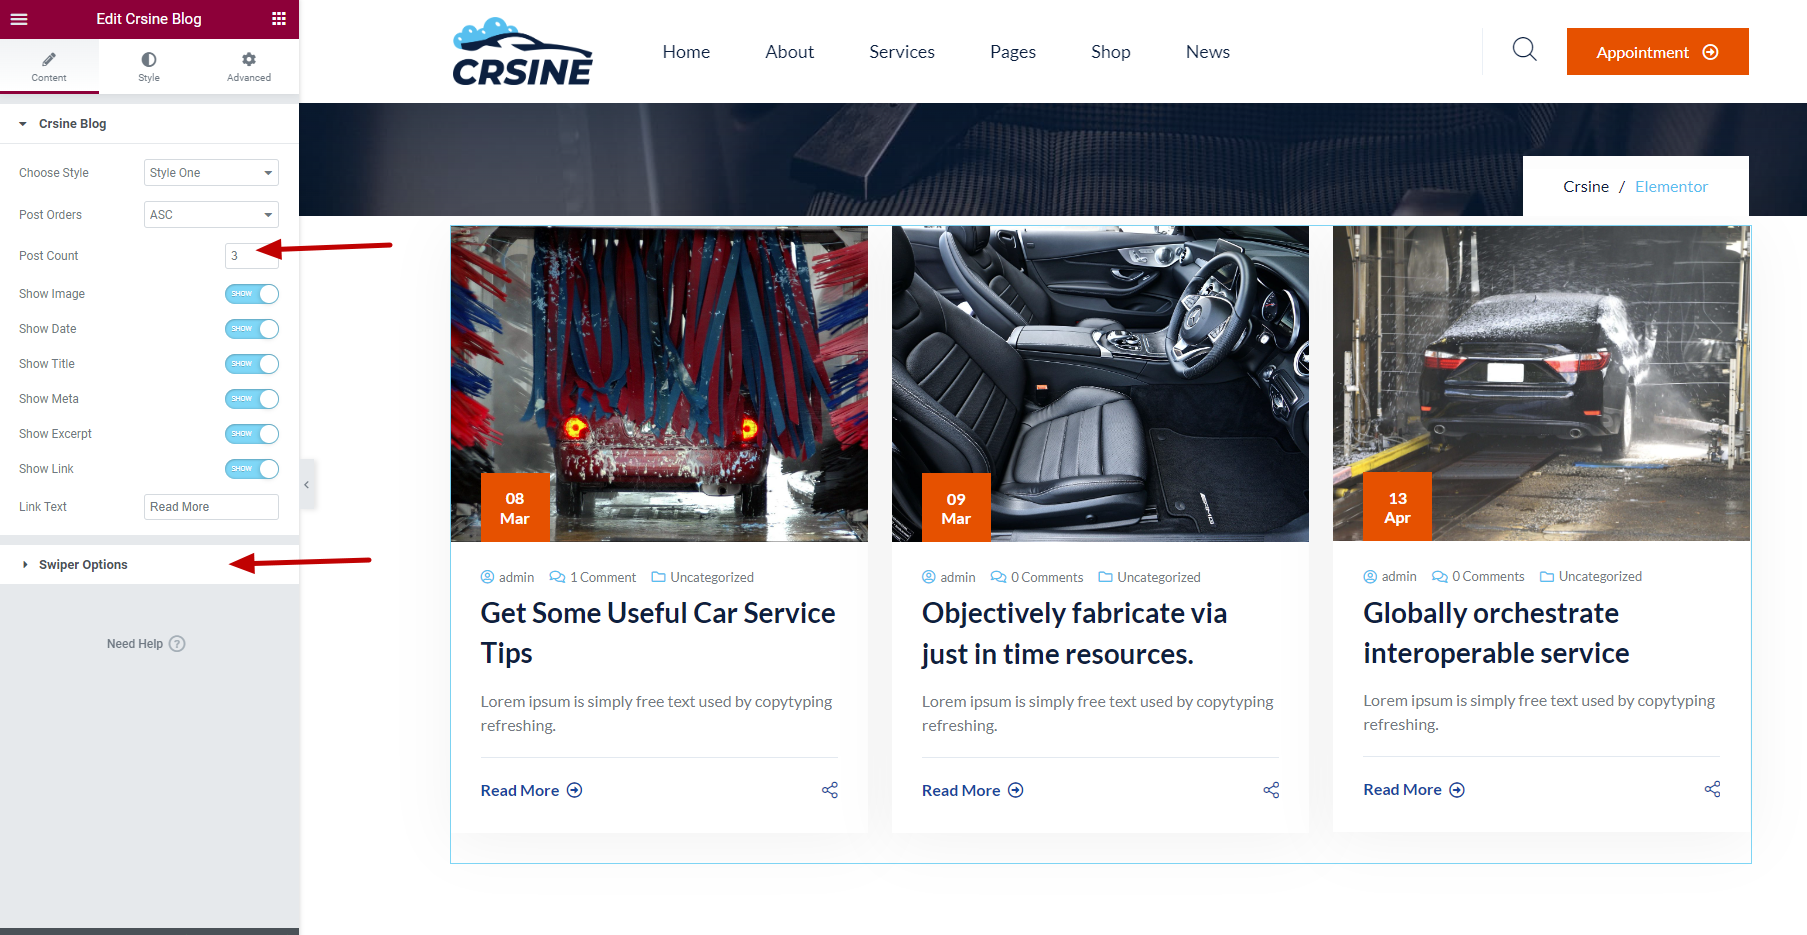
You can even turn on slider for blogs.
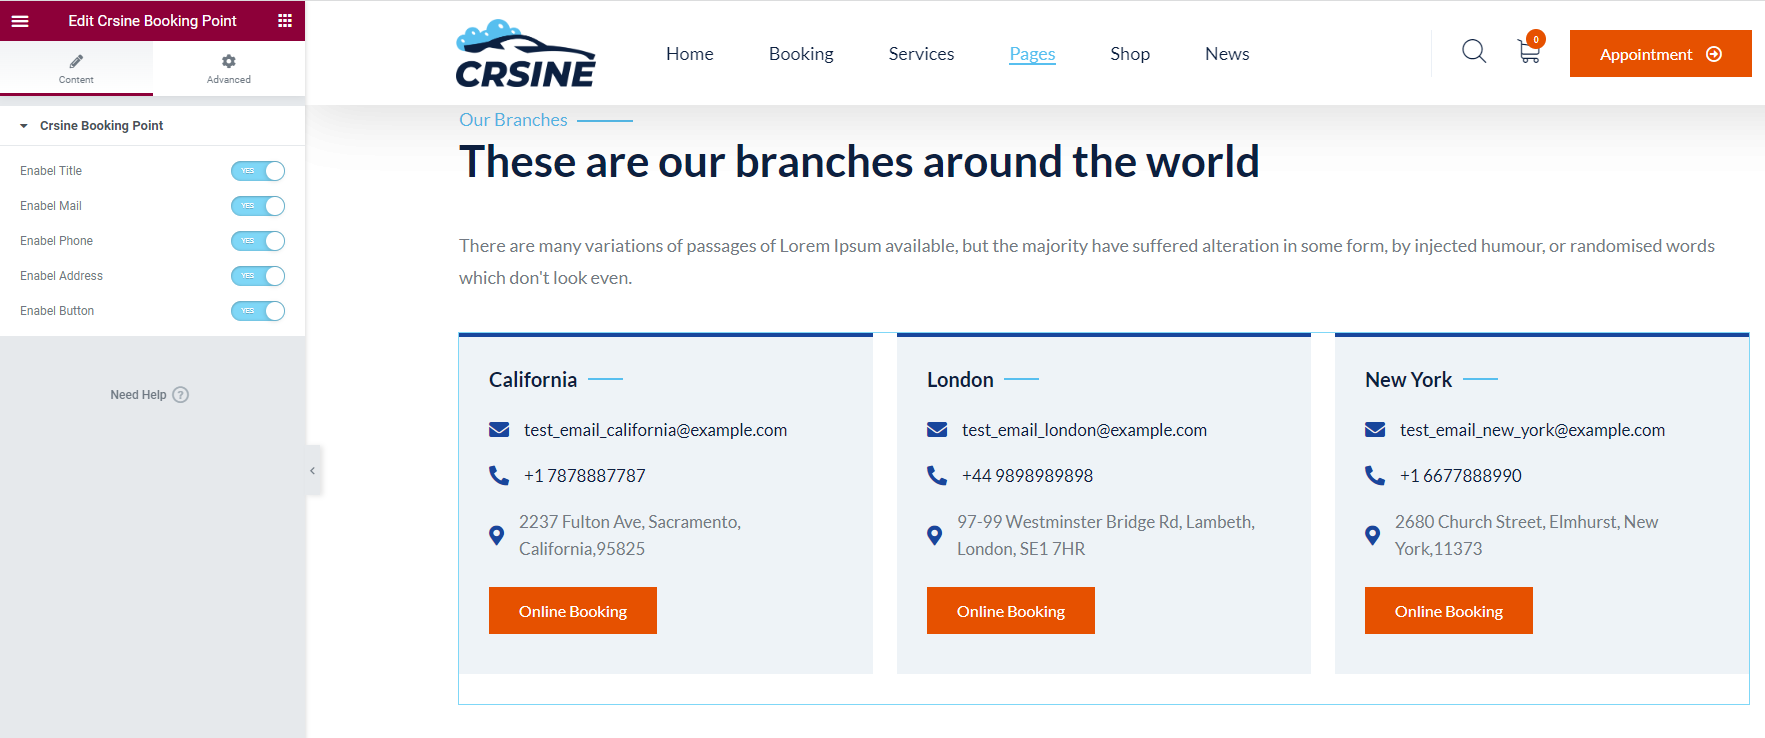
Crsine Booking Point
It shows all the Branch/Point you added.
Note: This widget will only be seen if Crsine Booking Plugin is Activated.
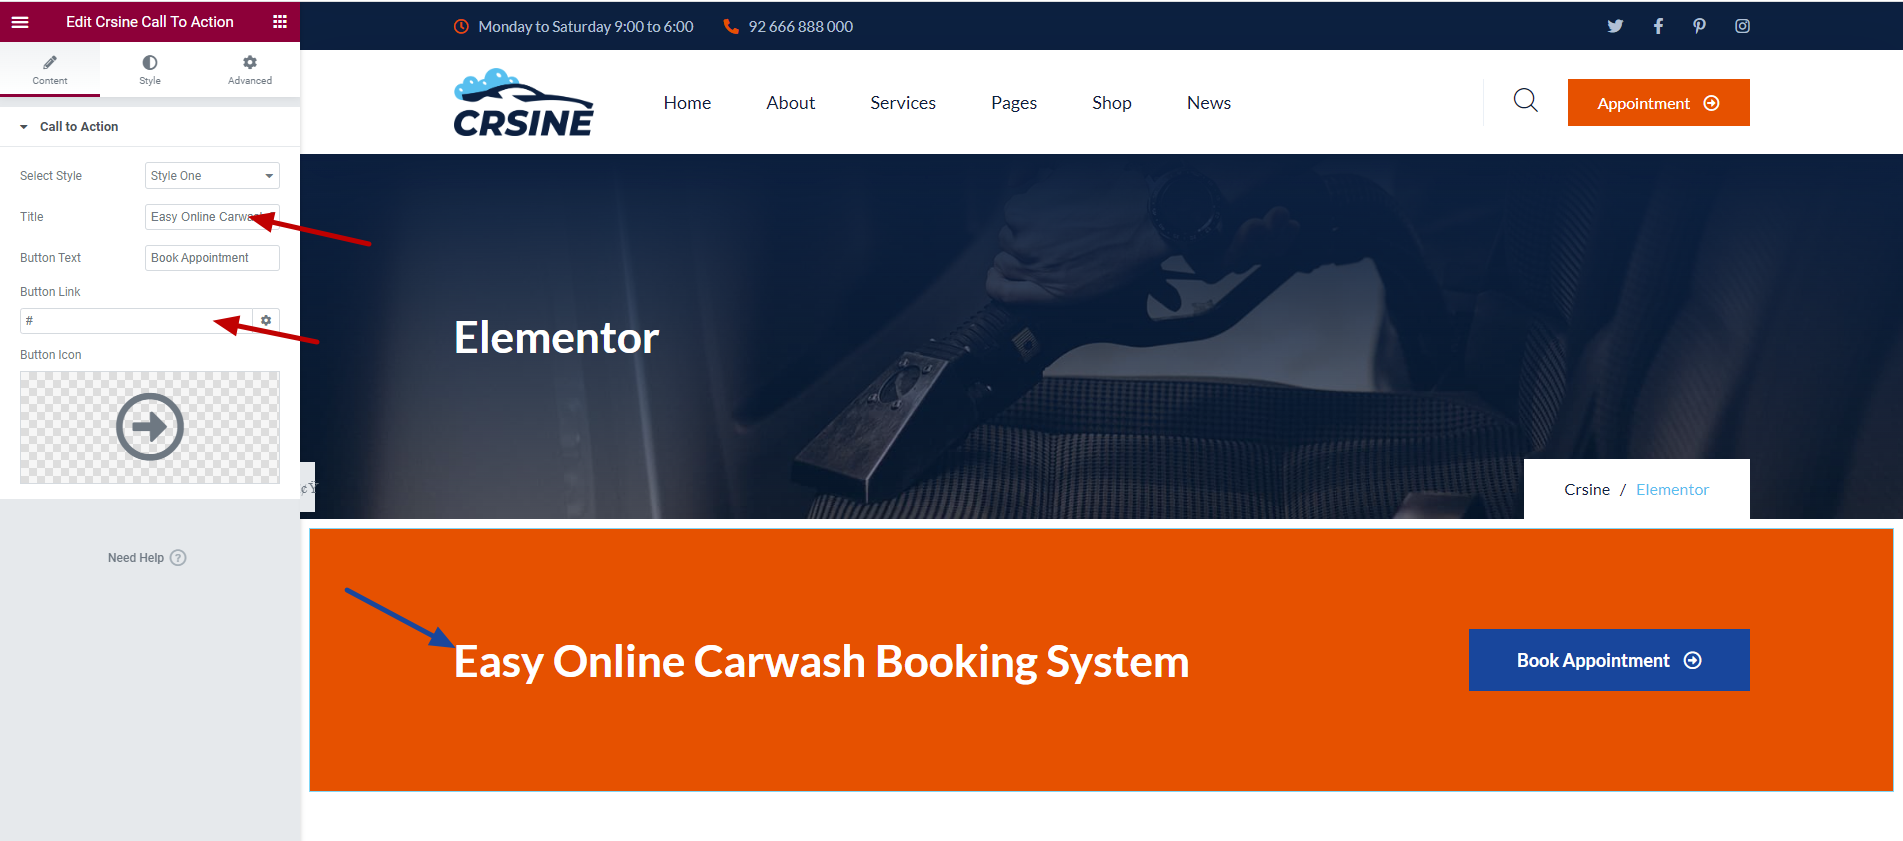
Crsine Call to Action
It is used to give link for other page.
Give Title and link as you want. It will Reflect in output.
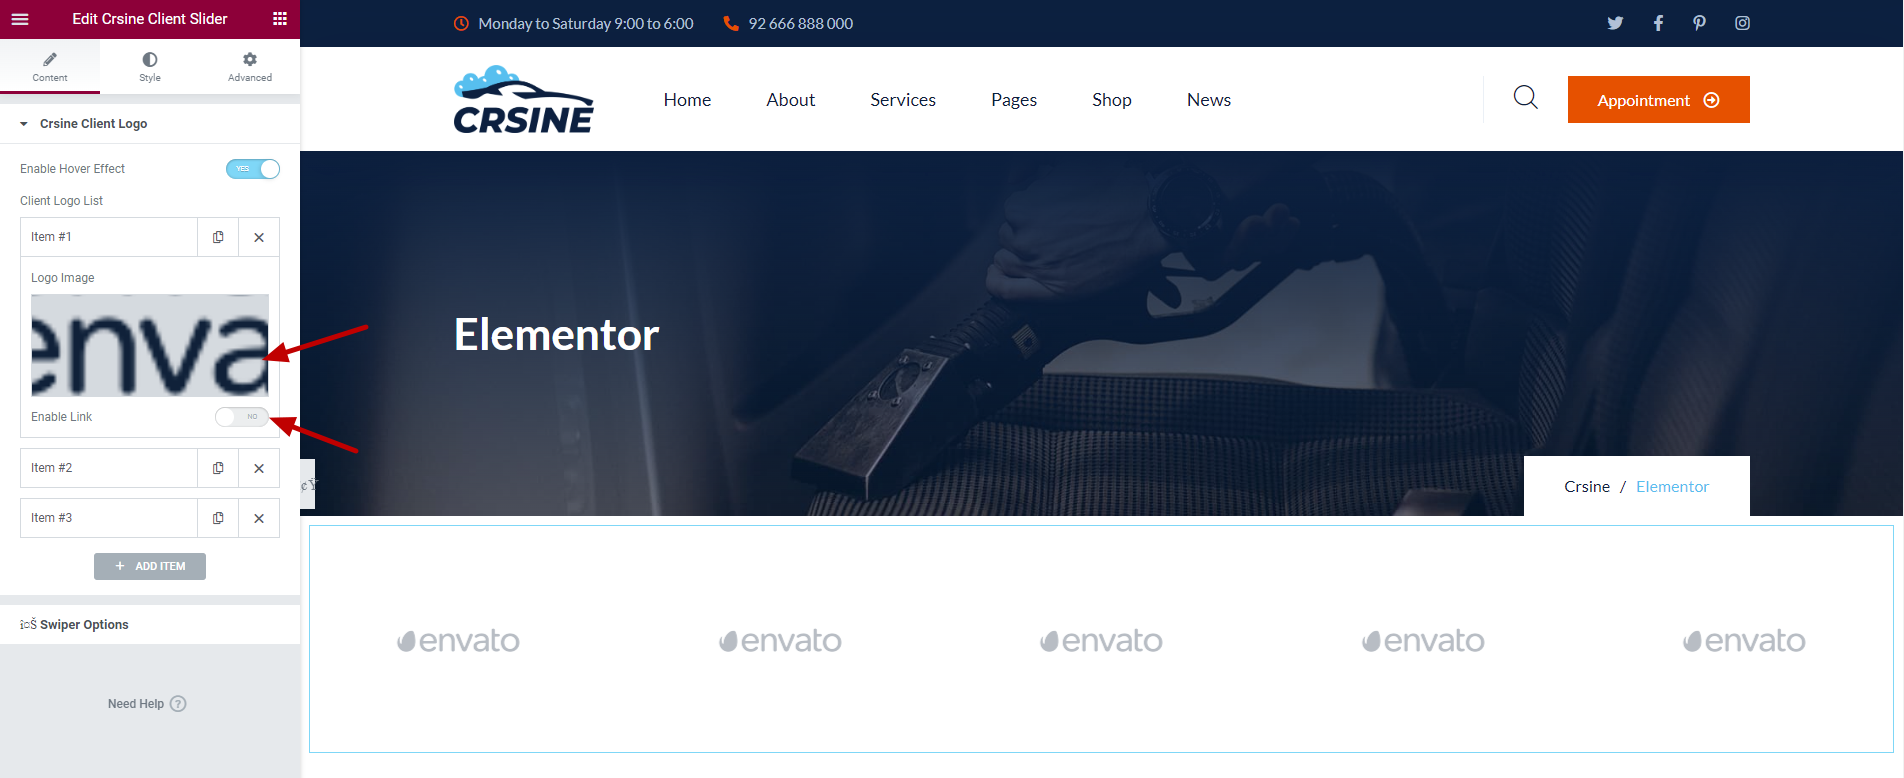
Crsine Client Slider
It is used to give link to your client site.
Choose Logo Image of your Client.
You can turn off the slider if you don't want.
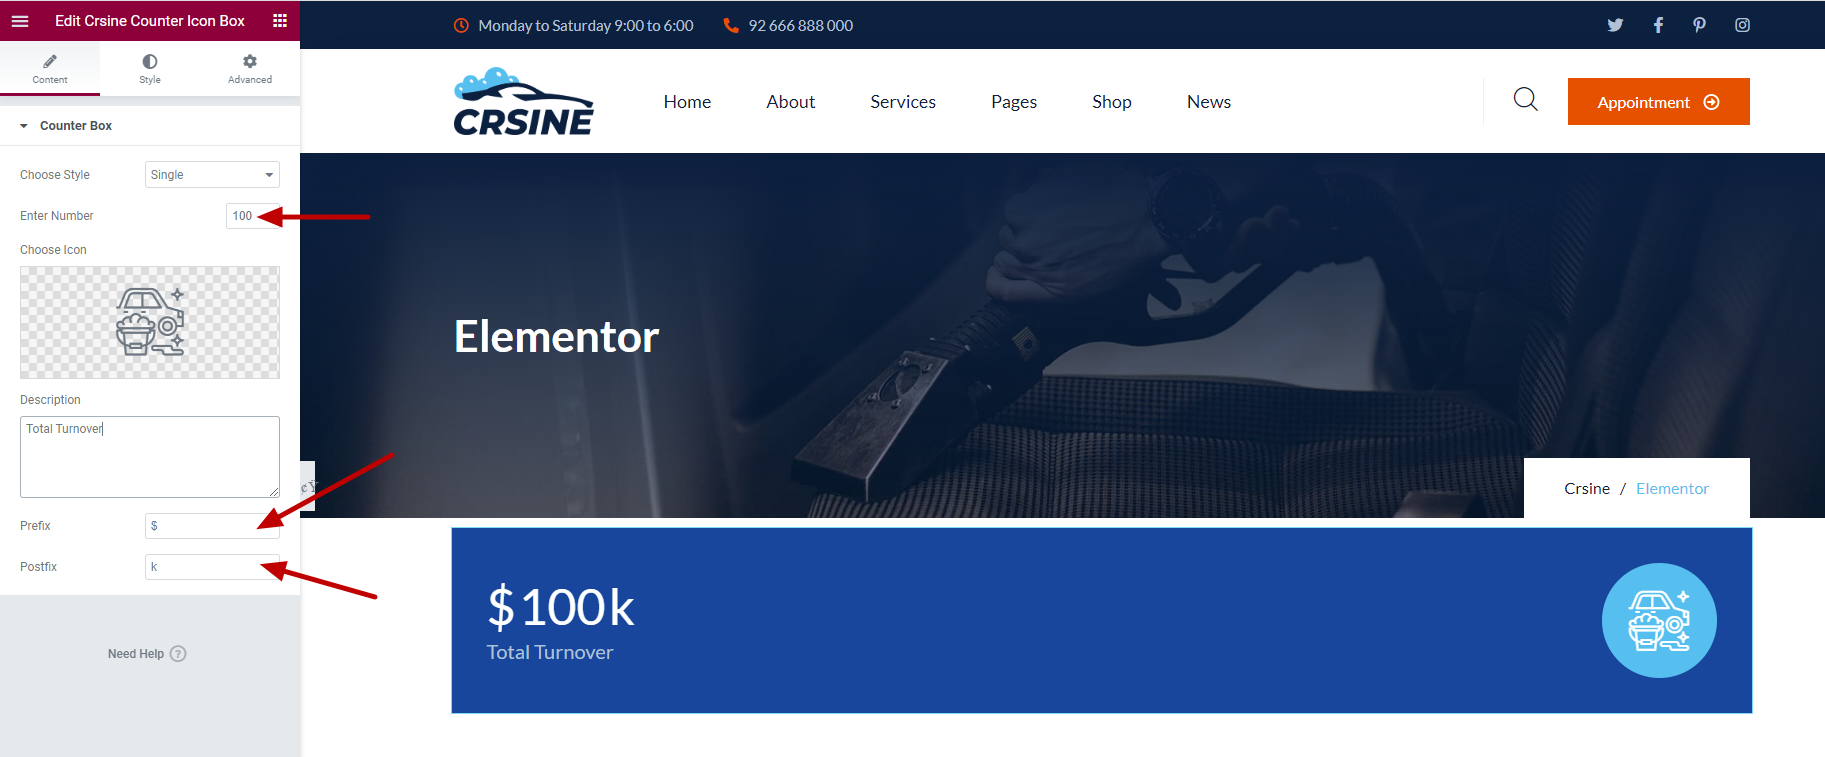
Crsine Counter Icon Box
Enter a number for counter box
You can add prefix as well as postfix. If you don't want, Leave them empty.
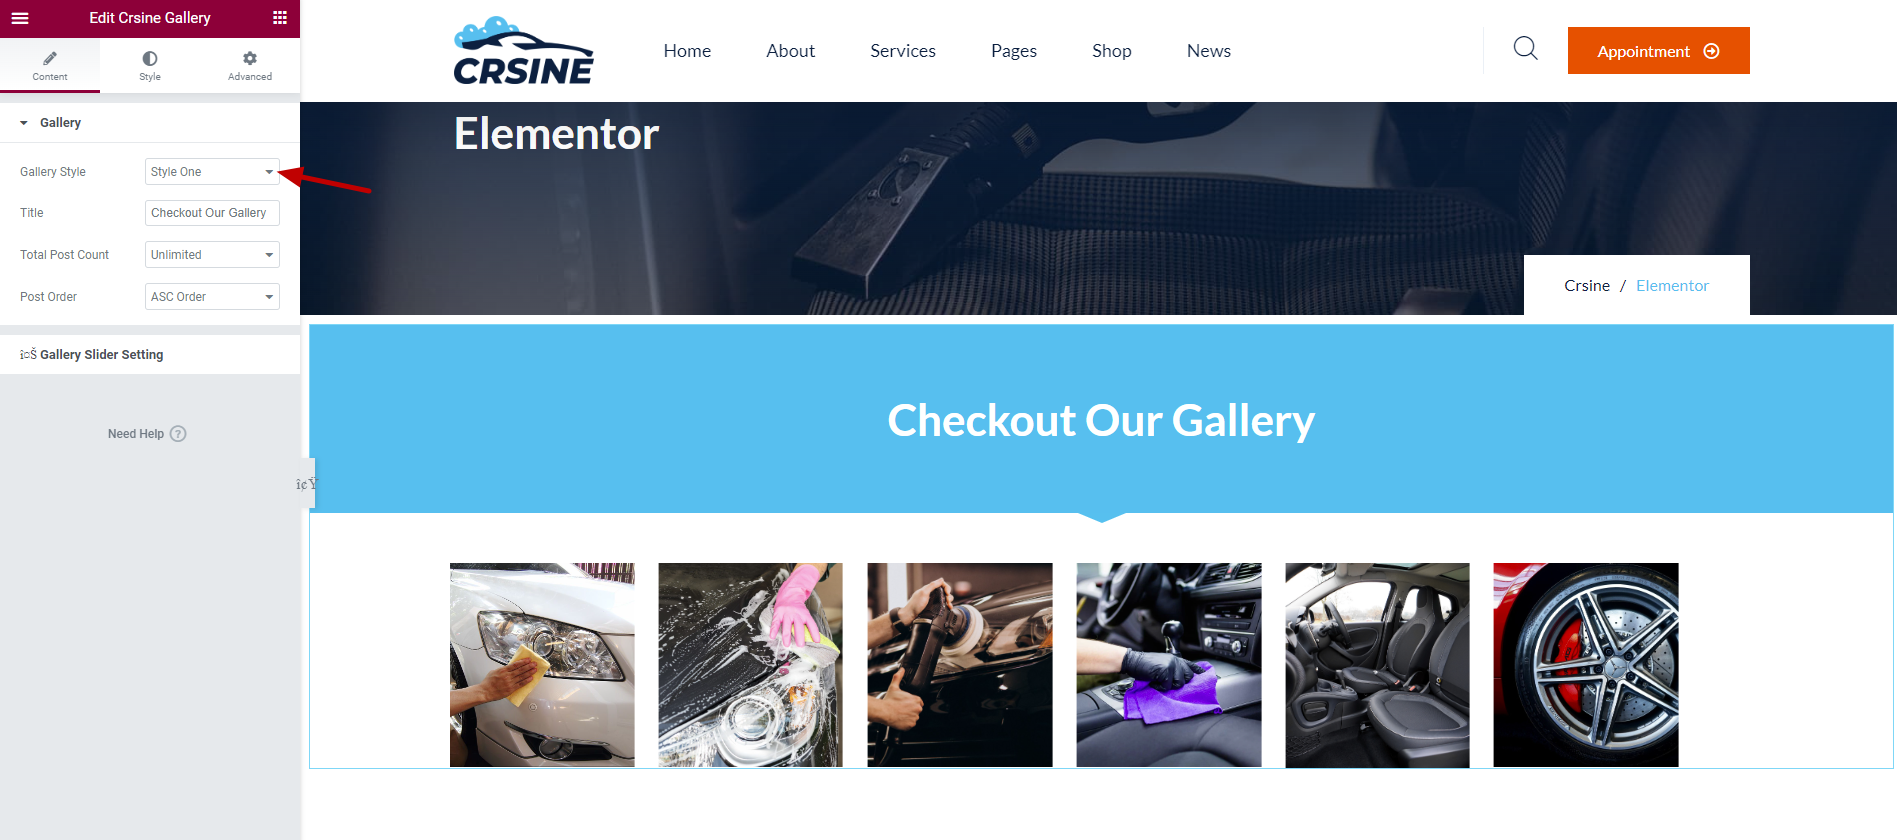
Crsine Gallery
Choose Style of Gallery
Turn on or off the swiper as per your wish.
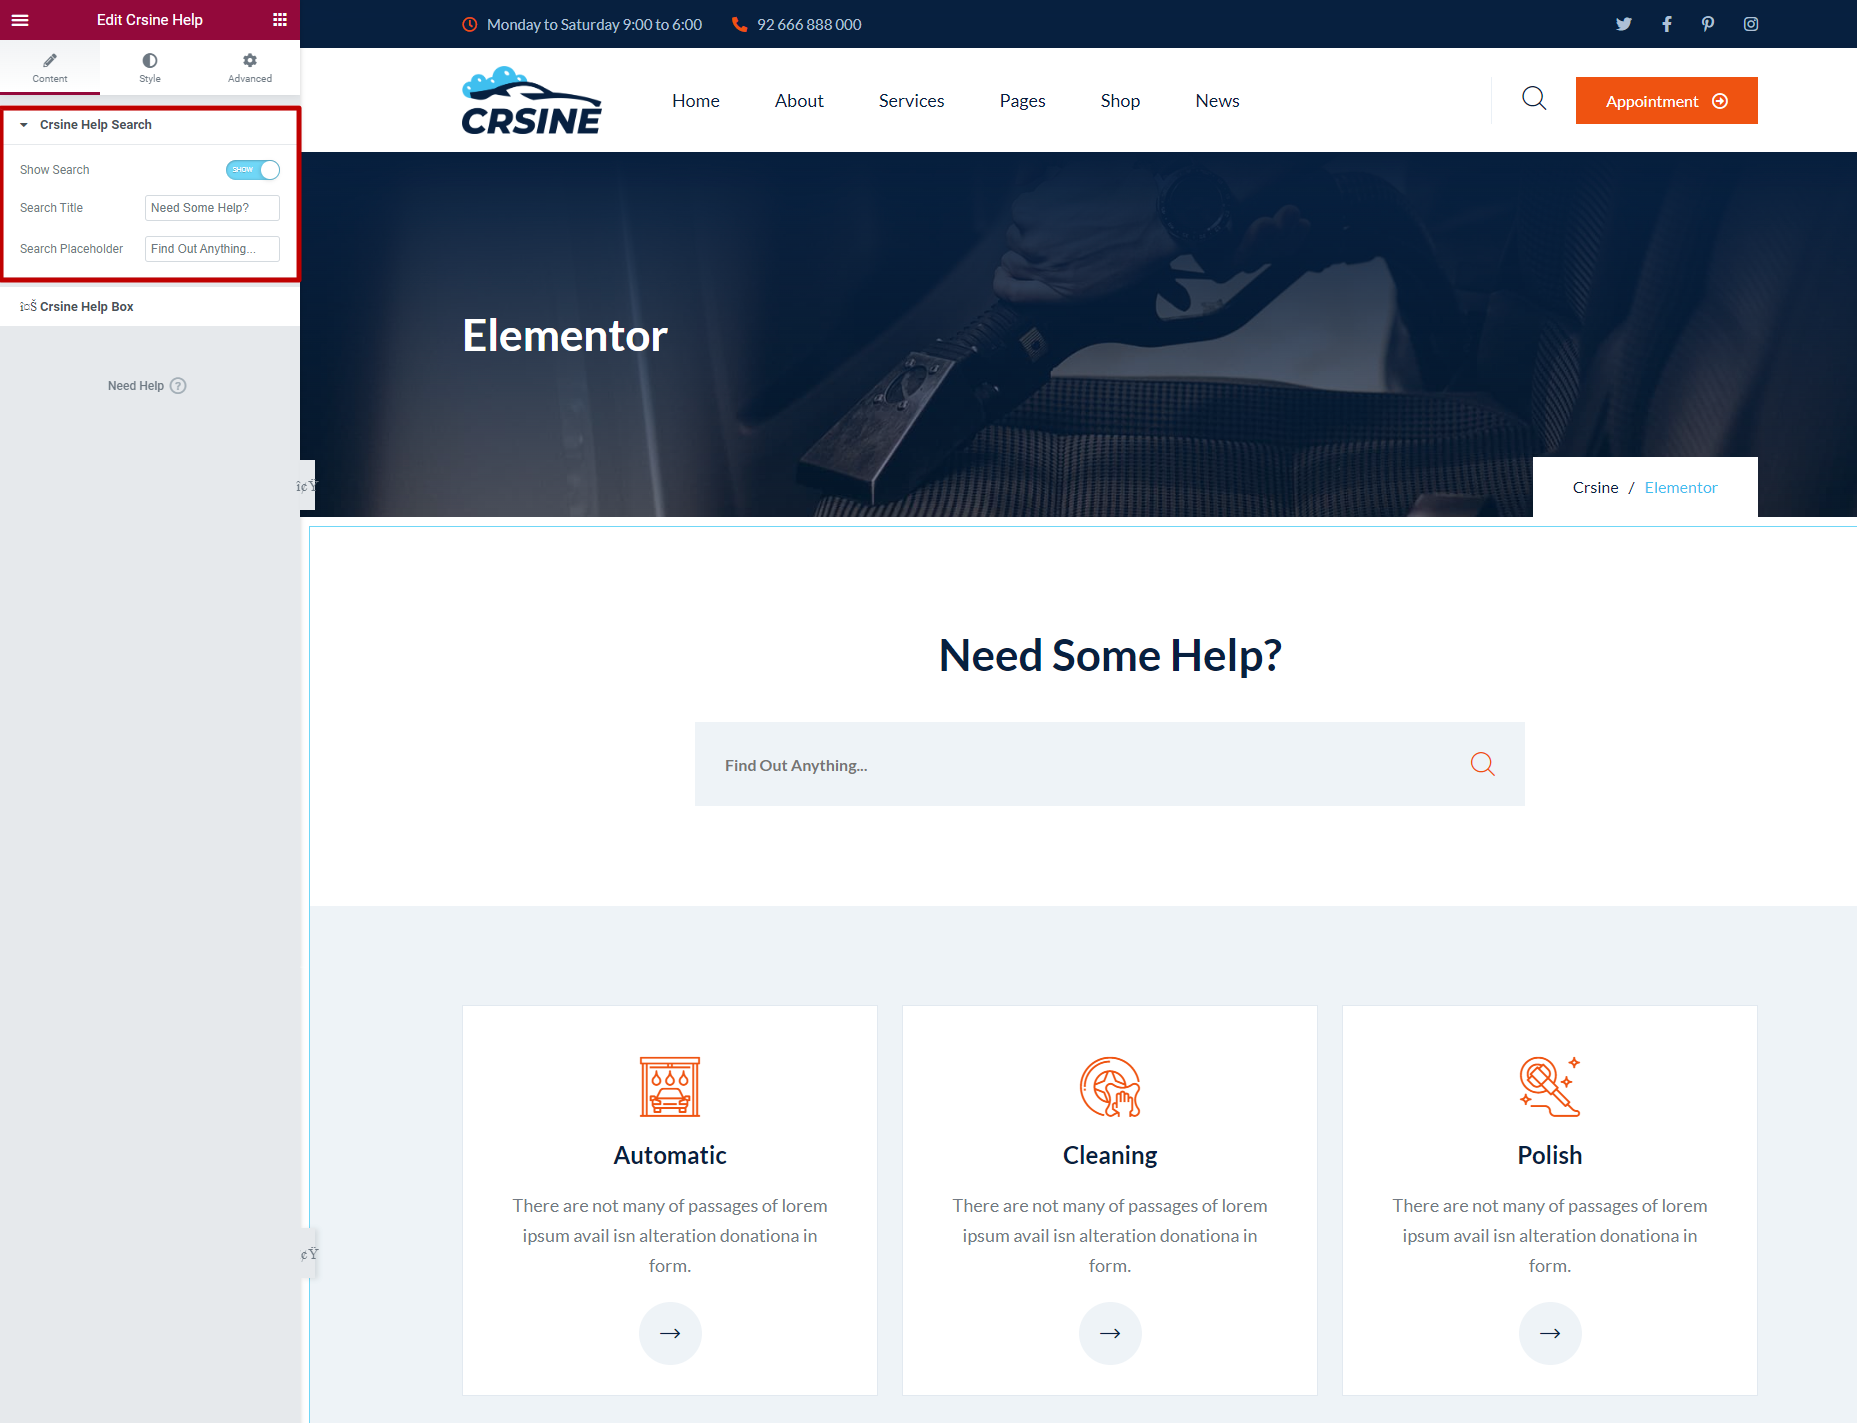
Crsine Help
It is Category based help Section where each catregory will lead to its Frequently Asked Quenstion(FAQ) Page.
Crsine Icon Box
Choose Icon Box Style
Add as many box as you wish.
If you have turned off link and you put link address in icon box, It will not work. In order to give link you must have to turn the switch on.
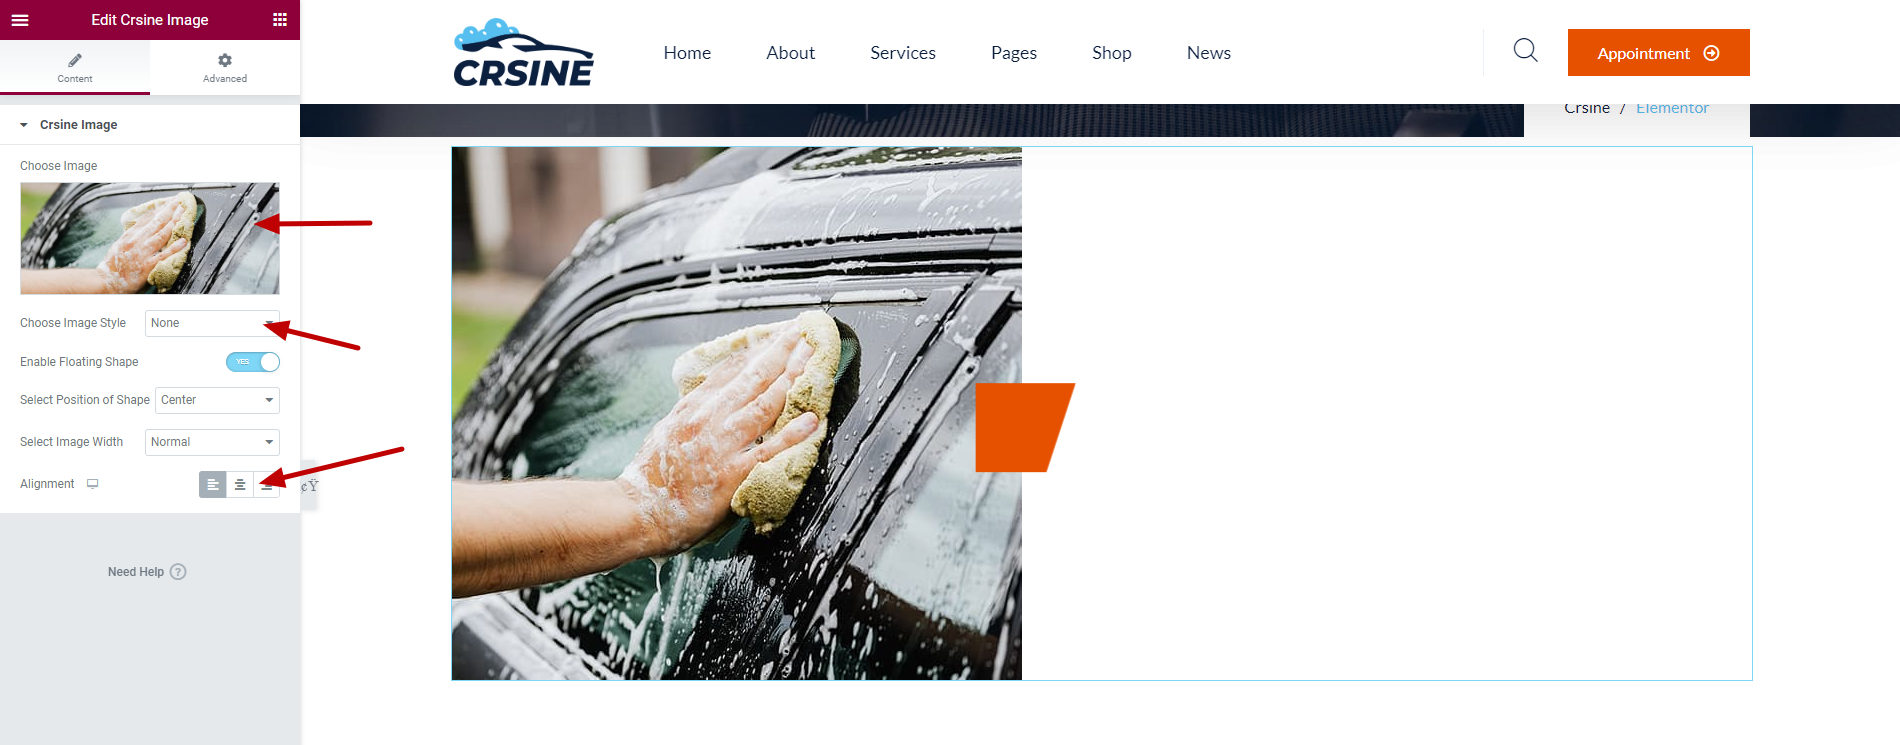
Crsine Image Box
Choose Image.
Choose Floating Shape Position.
Choose Alignment of Image.
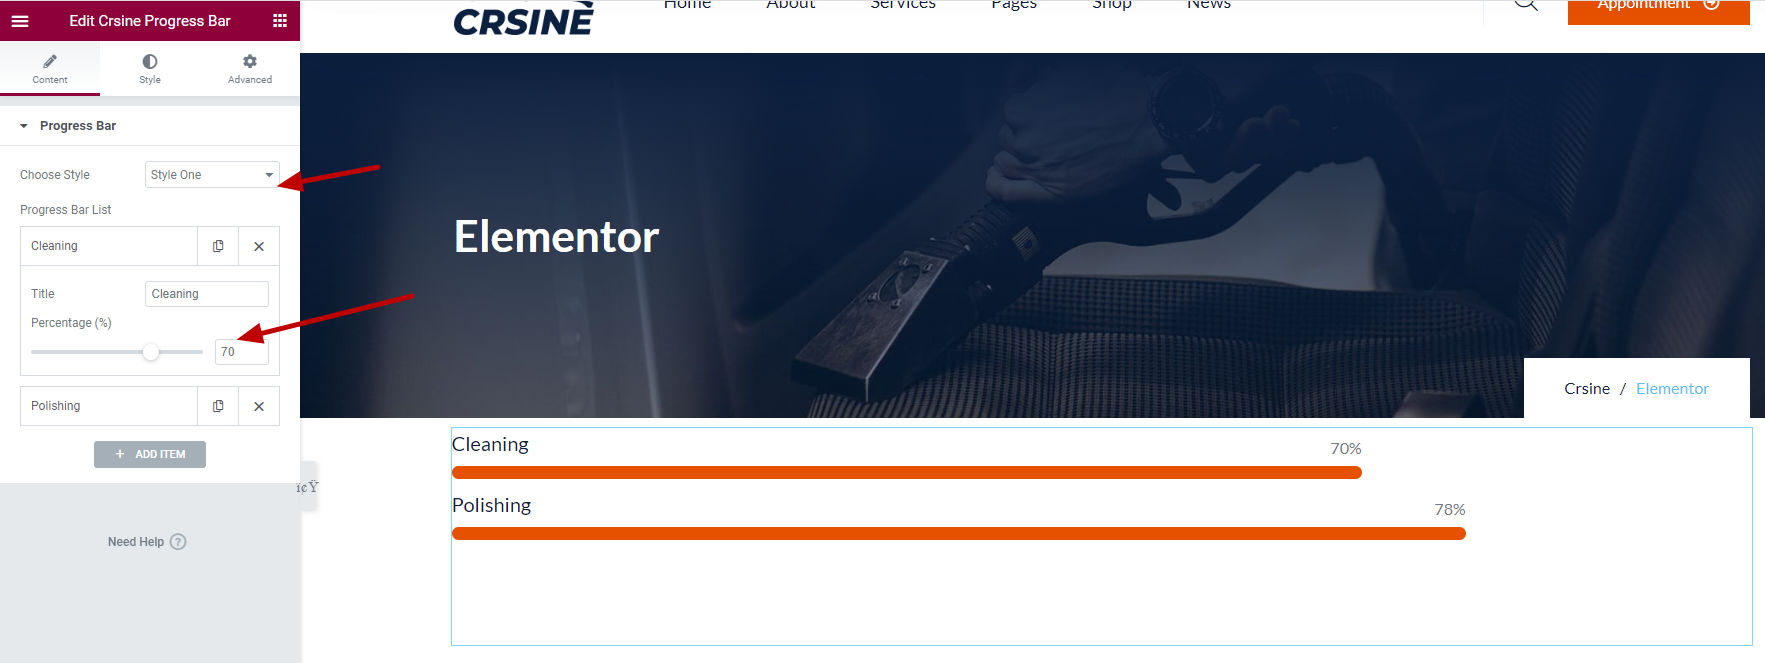
Crsine Progress Bar
Select Style of Progress Bar.
Crsine Service
Select number of post count.
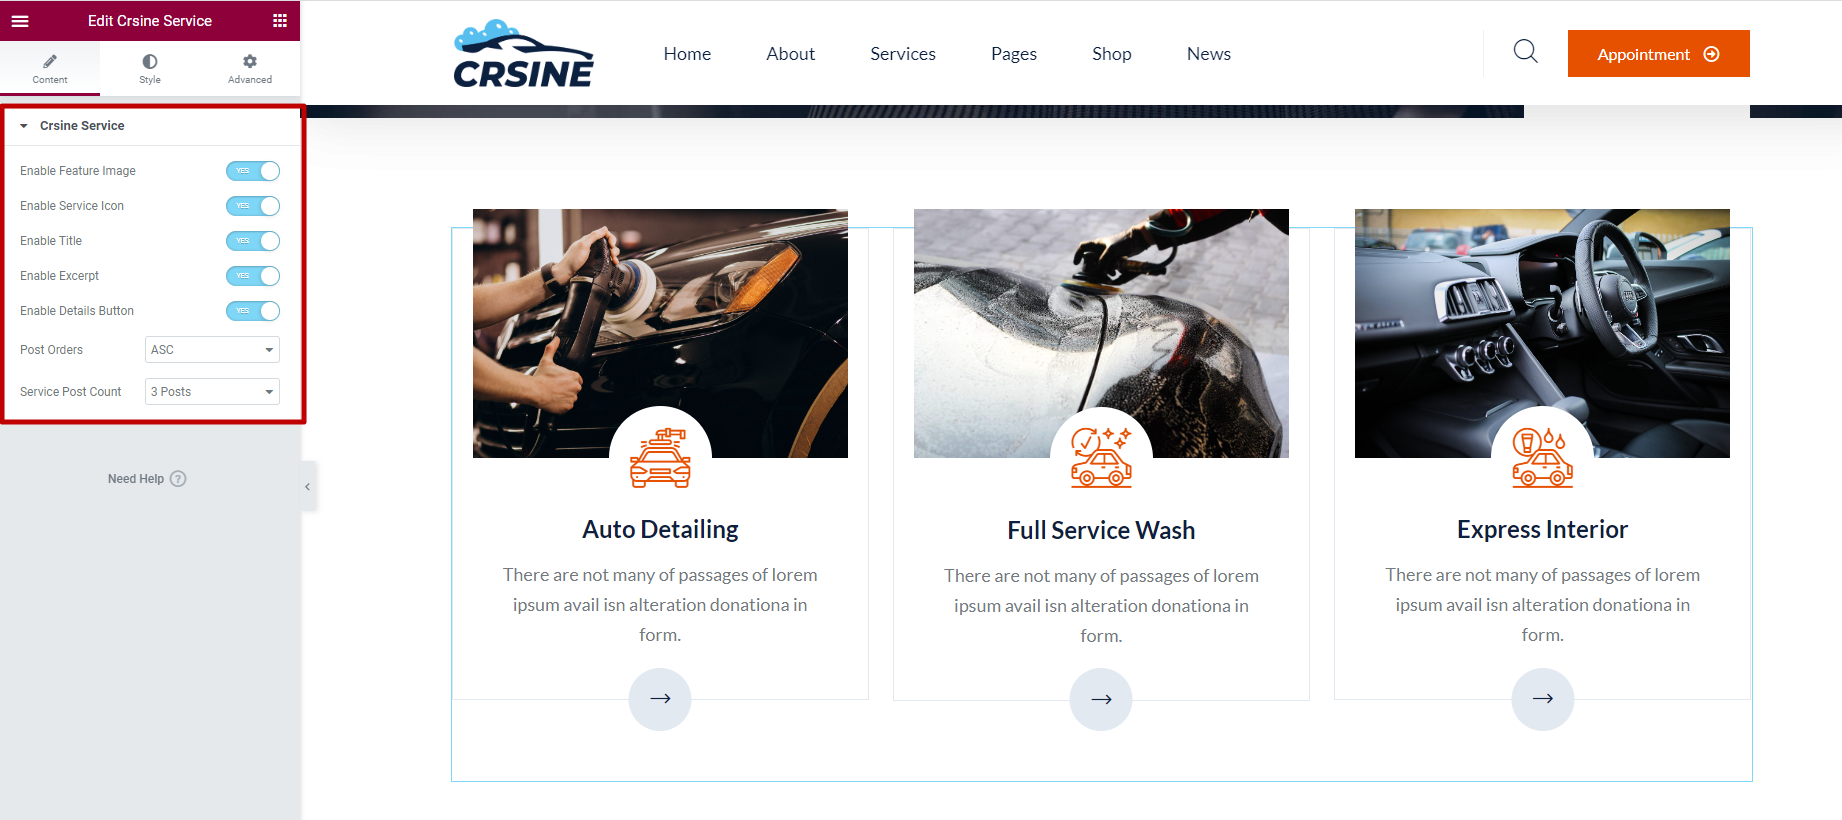
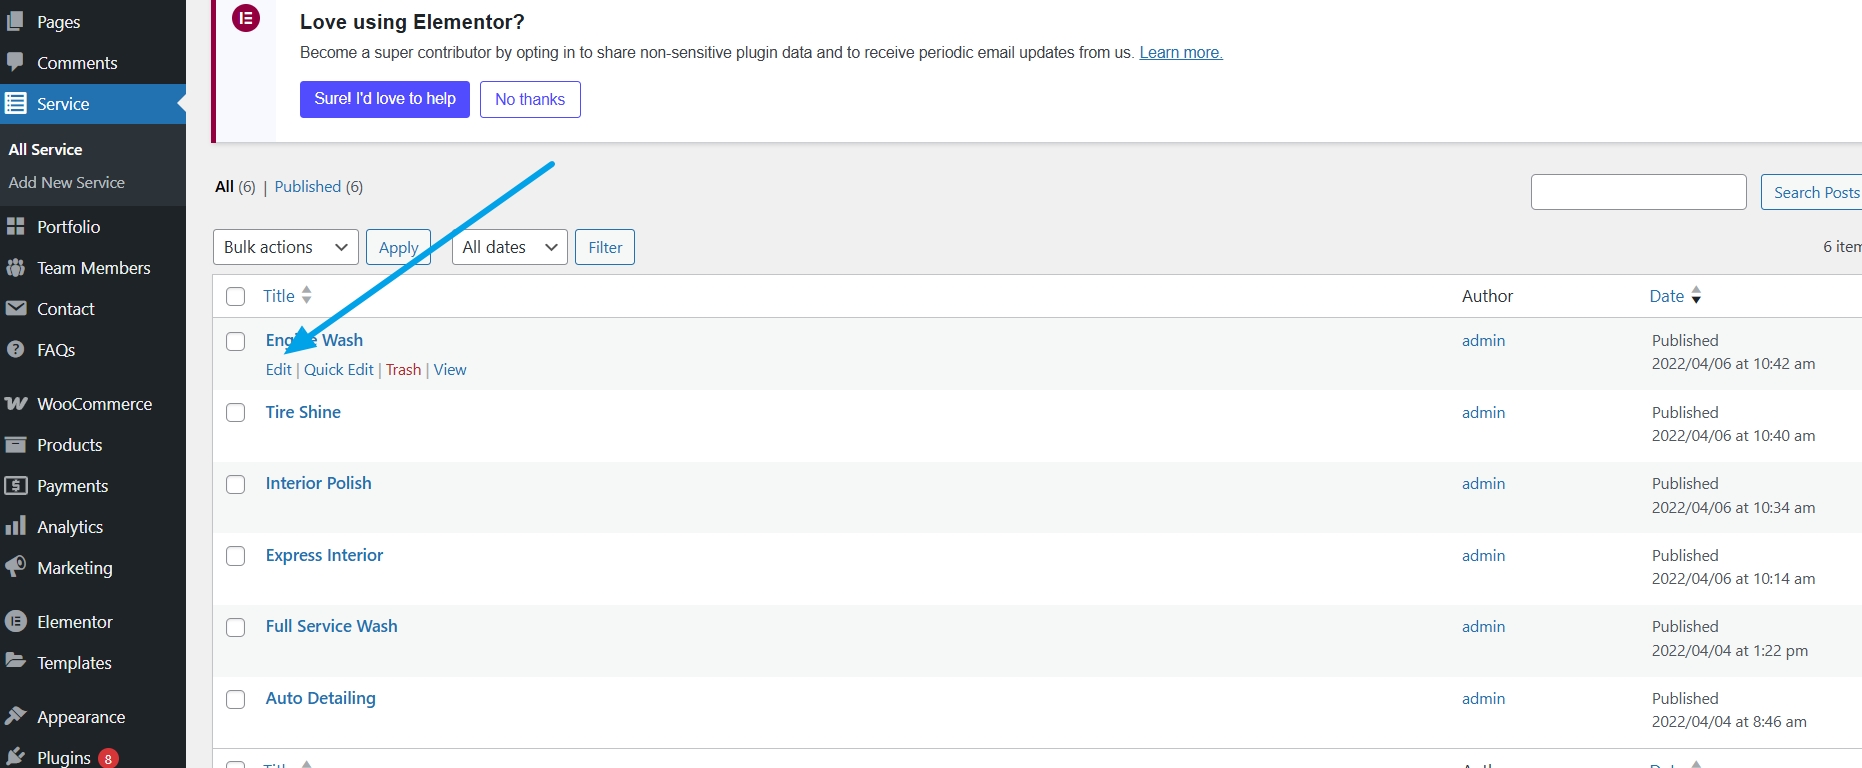
For Services You need to change content from wp-admin >> Services
- Go to Wp-admin >> Services
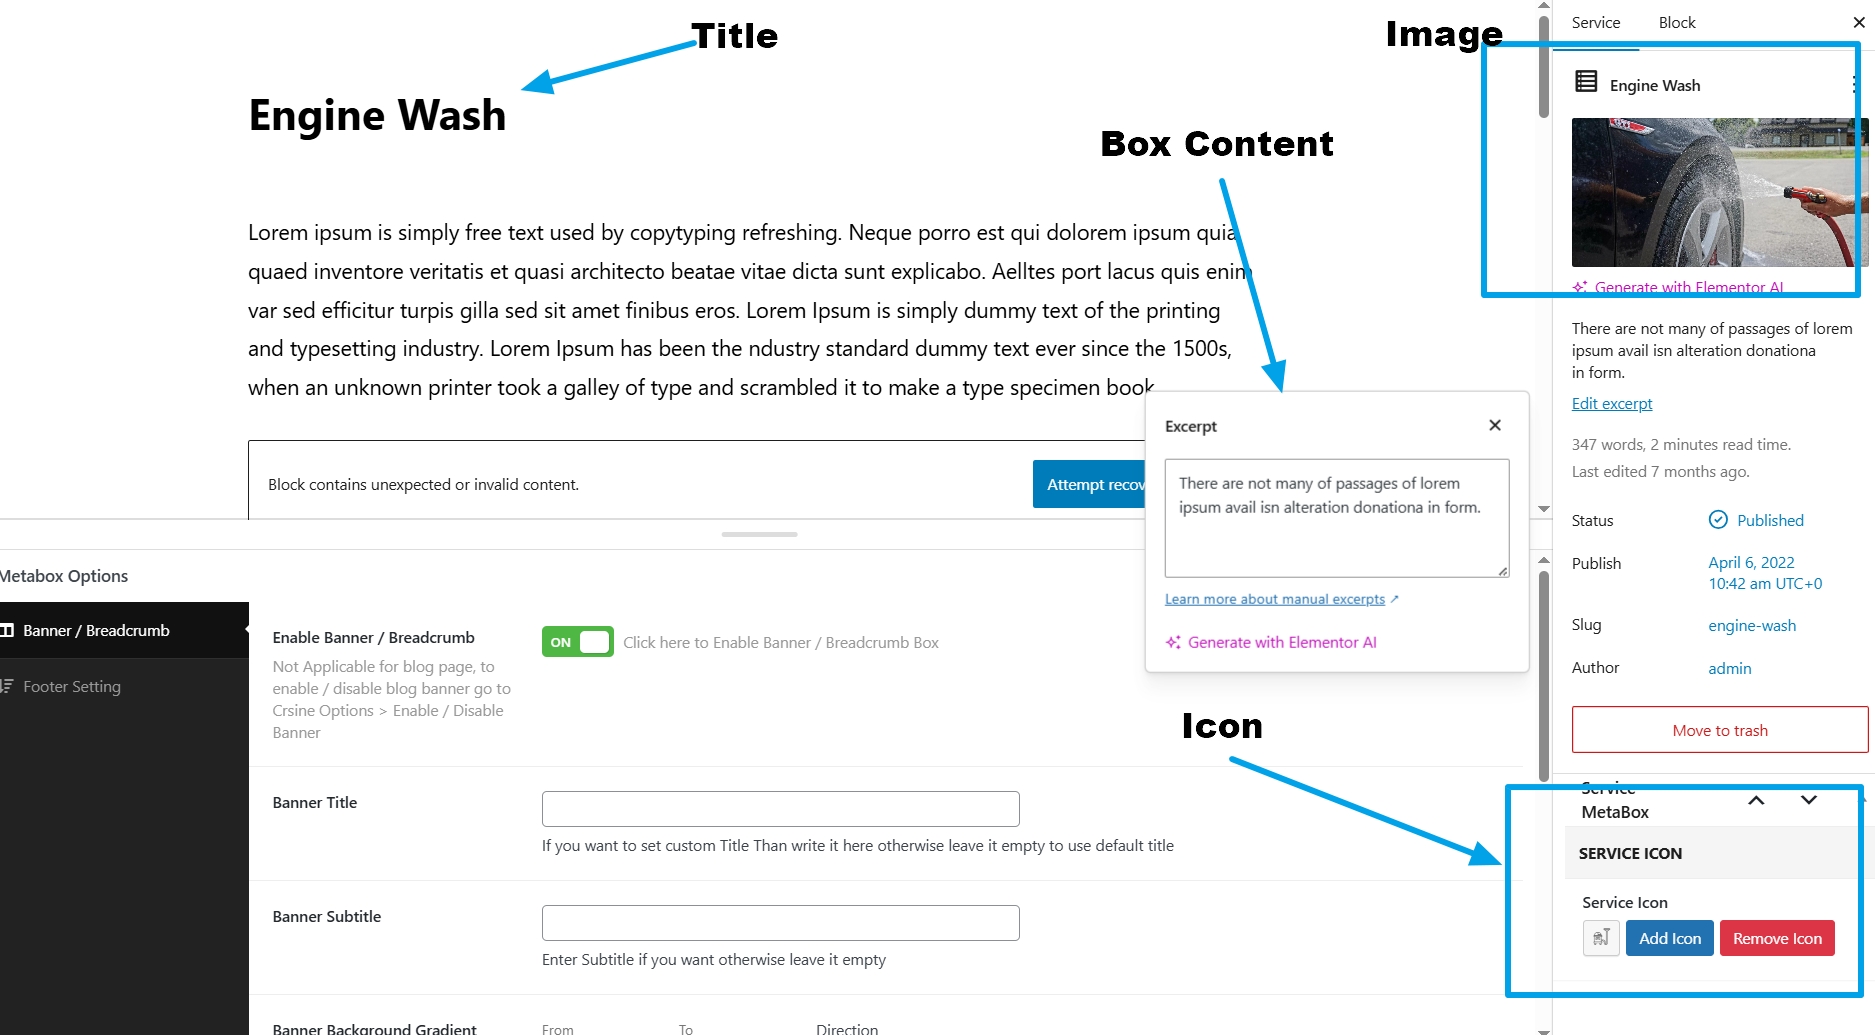
- Click To Edit Services
- Now you can change box text,title,icon and image
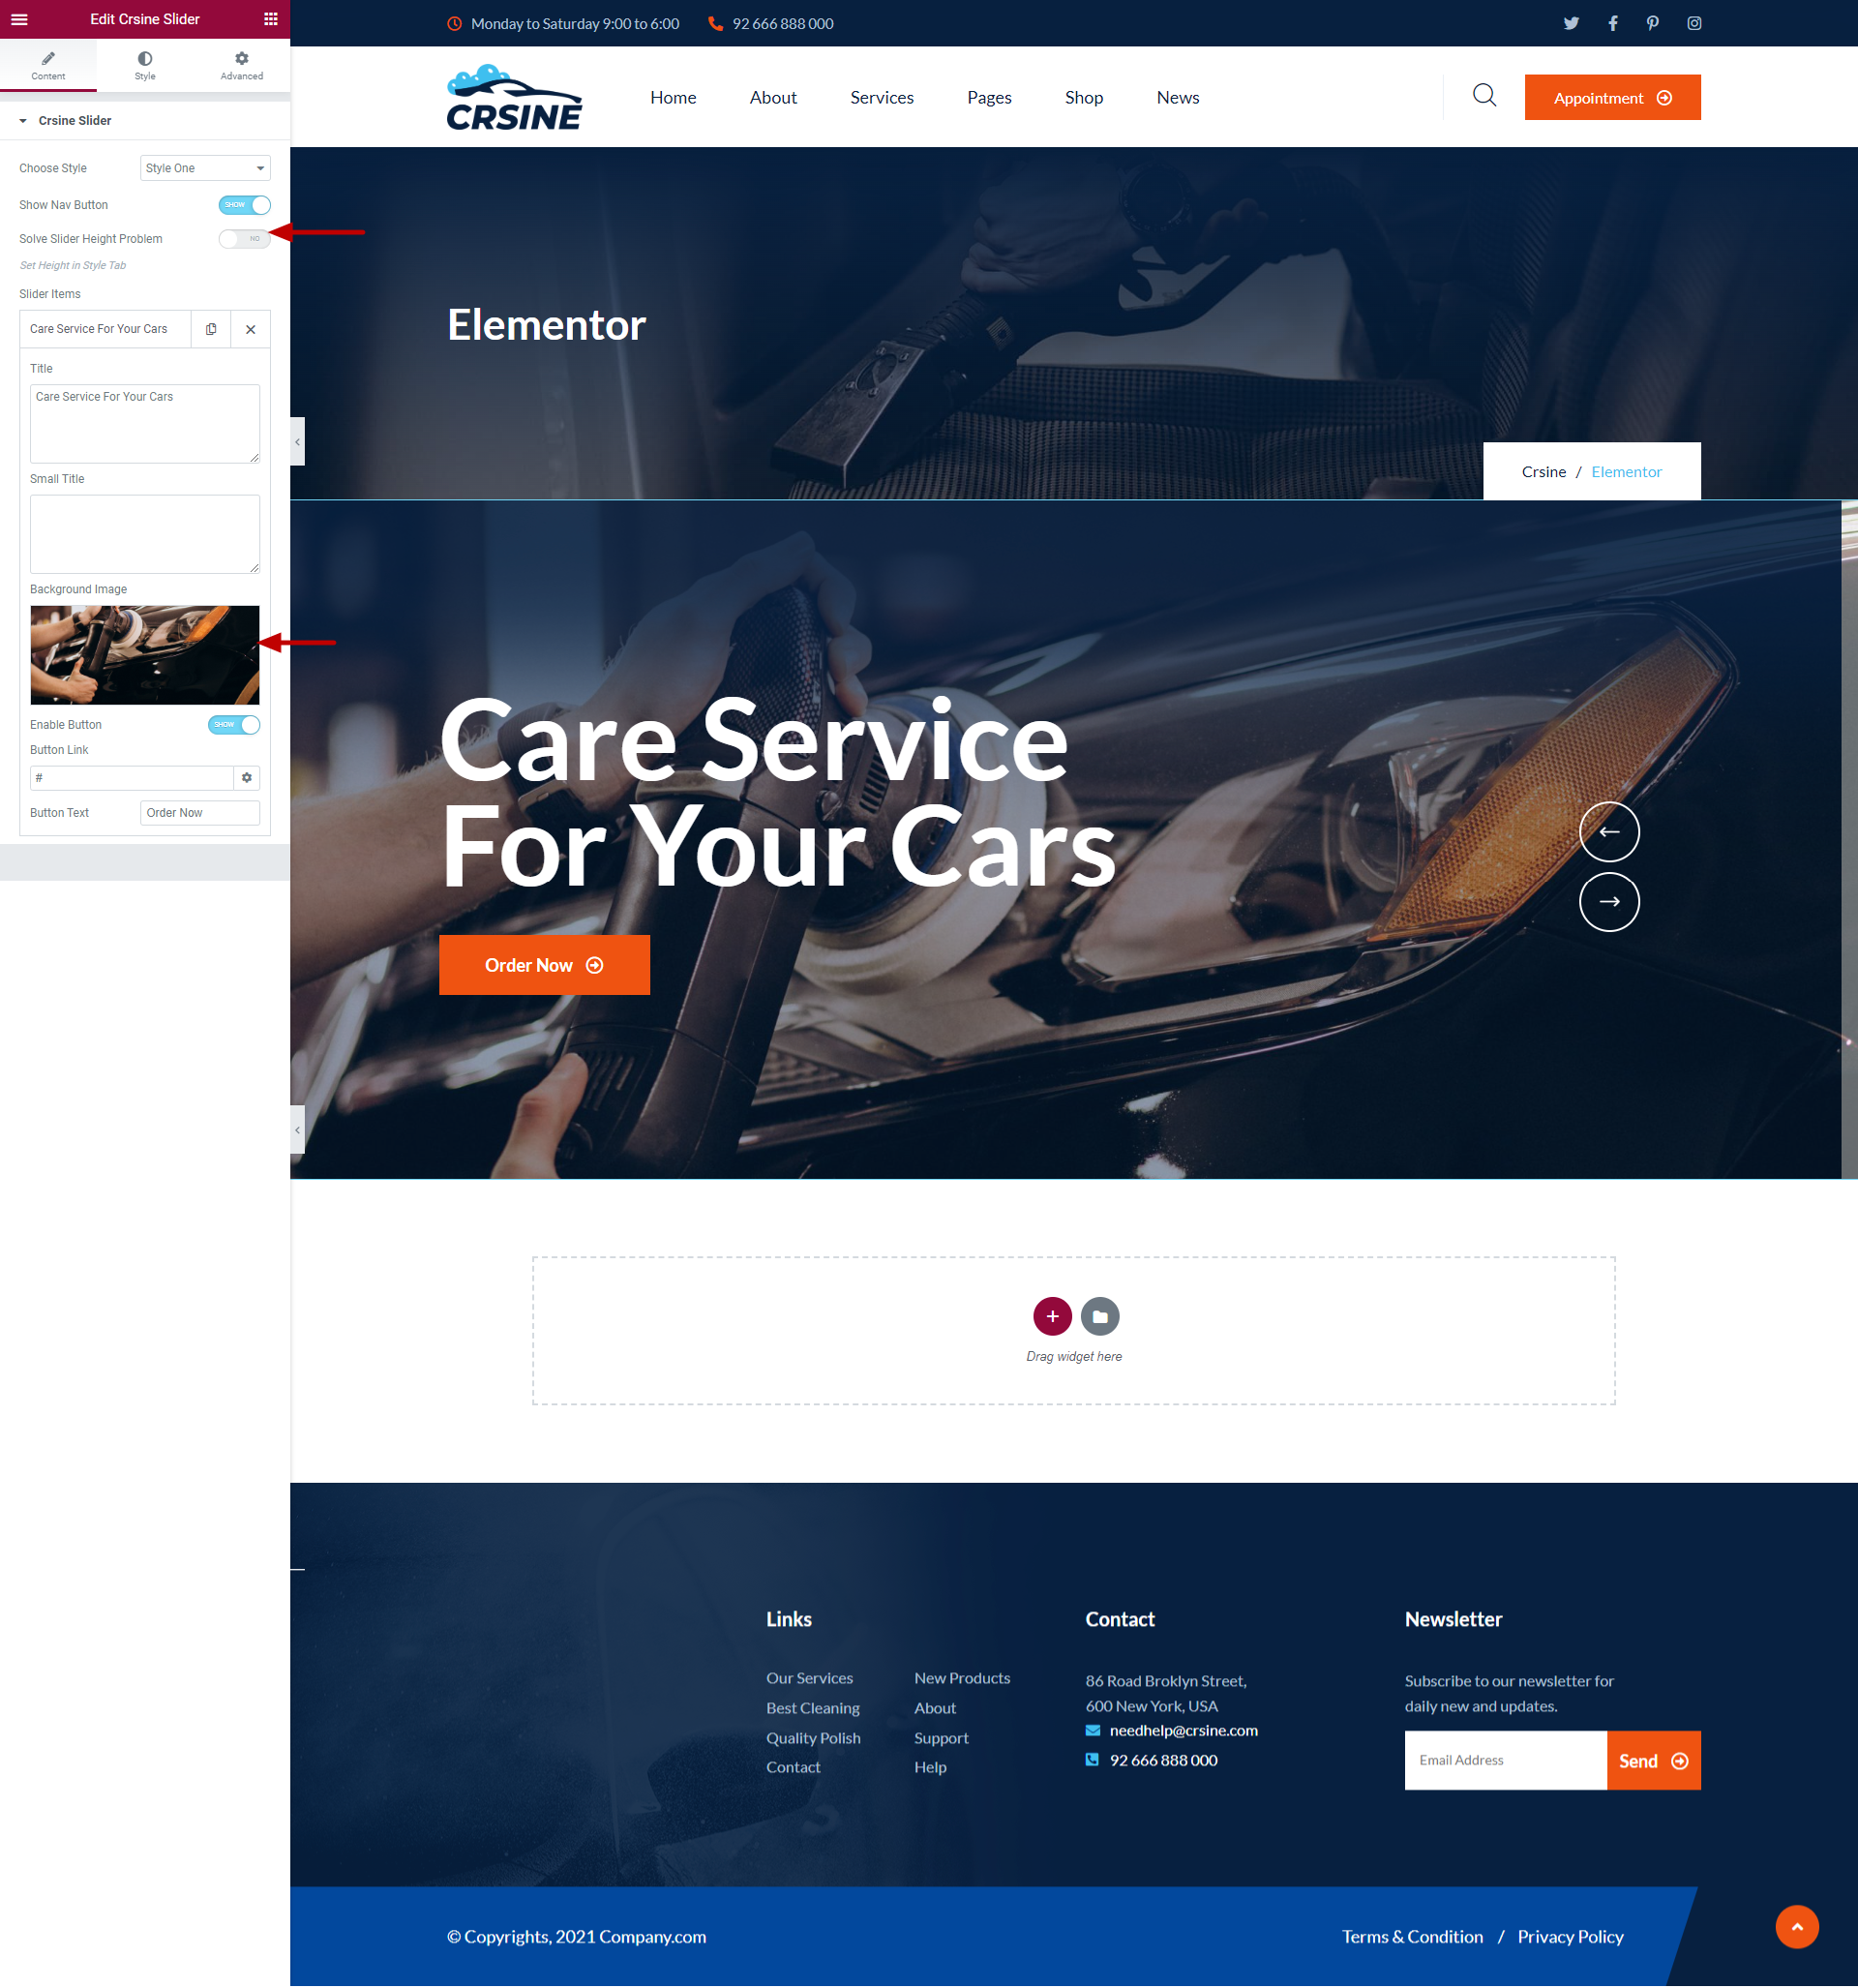
Crsine Slider
Add as much slider as you want.
if you are having problem with height. Turn on the switch callaed 'Solve Slider Height Problem', after that set fixed height in style tab to solve this problem.
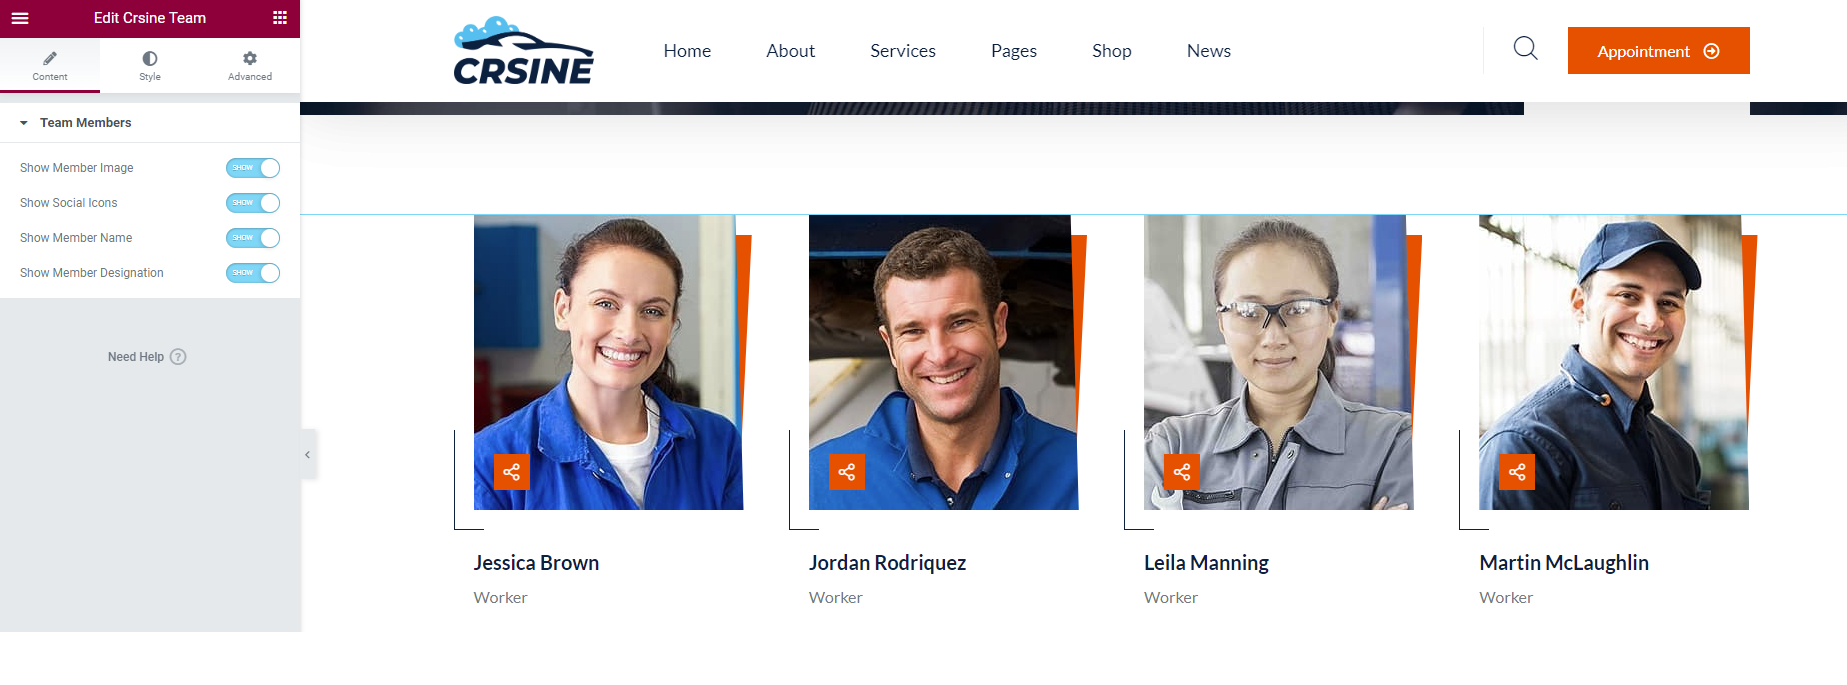
Crsine Team
List of our lovely team
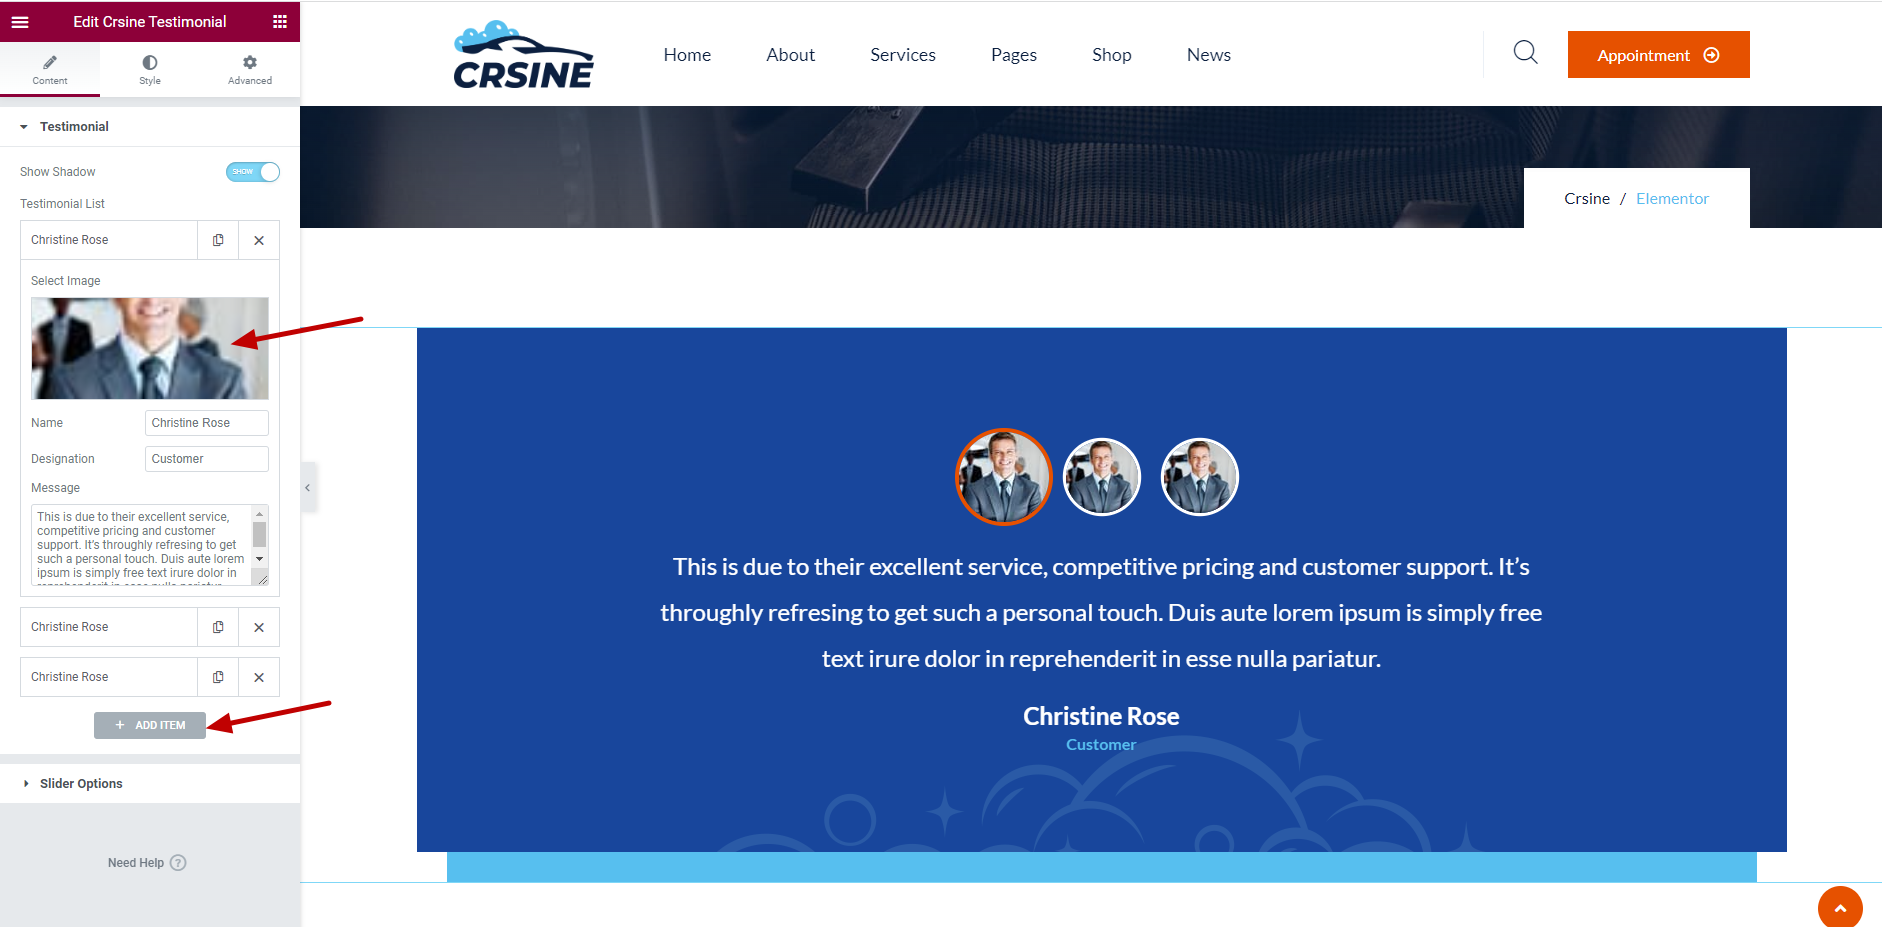
Crsine Testimonial
List of our lovely team
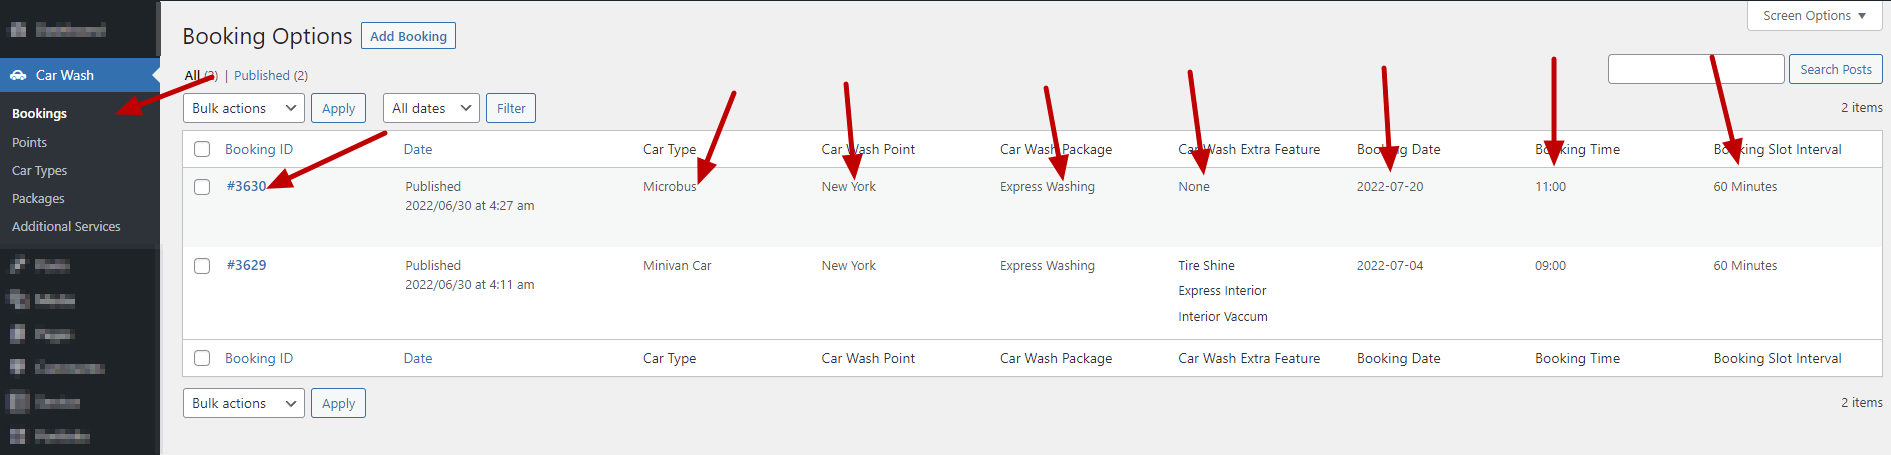
Booking Details
wp-admin >> Crsine Wash >> Bookings
Admin will geta all the details of Online Booking here.
Booking Points
wp-admin >> Crsine Wash >> Points
Add your Booking Point here.
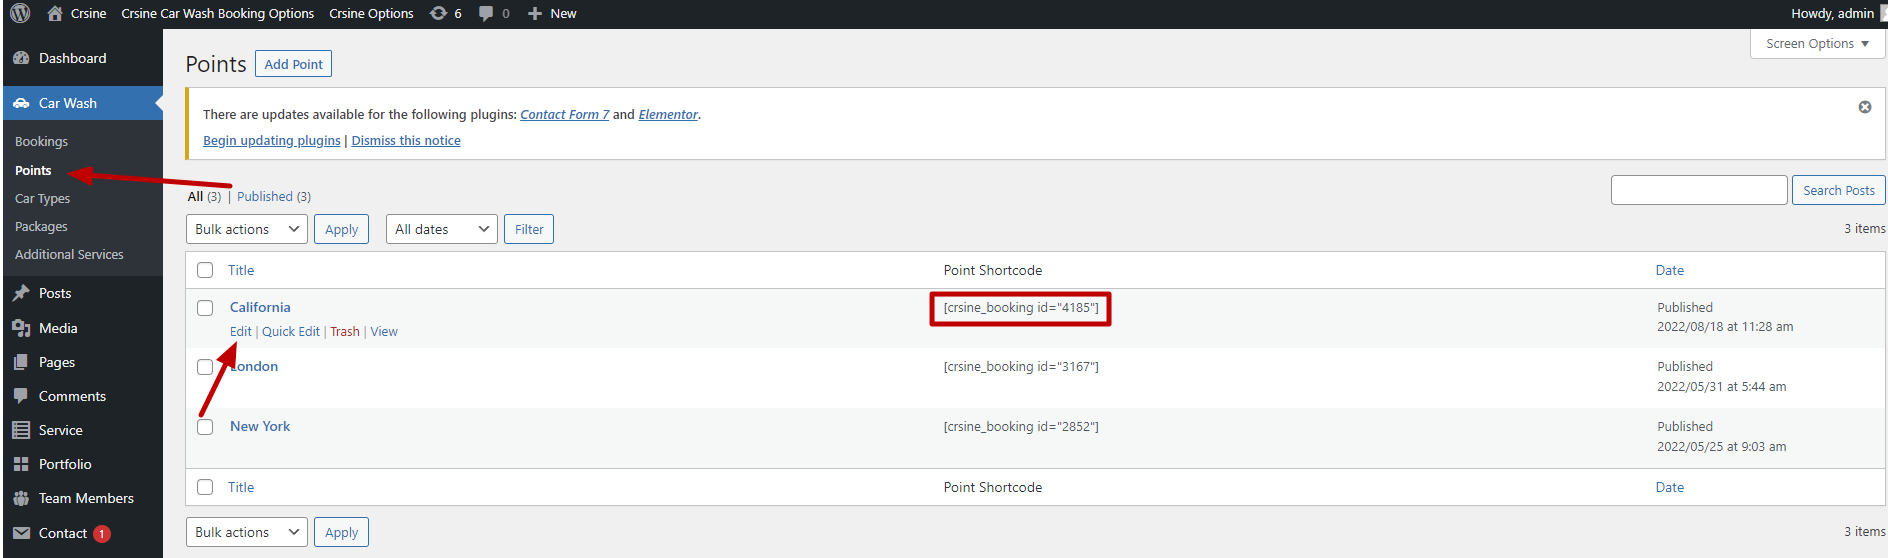
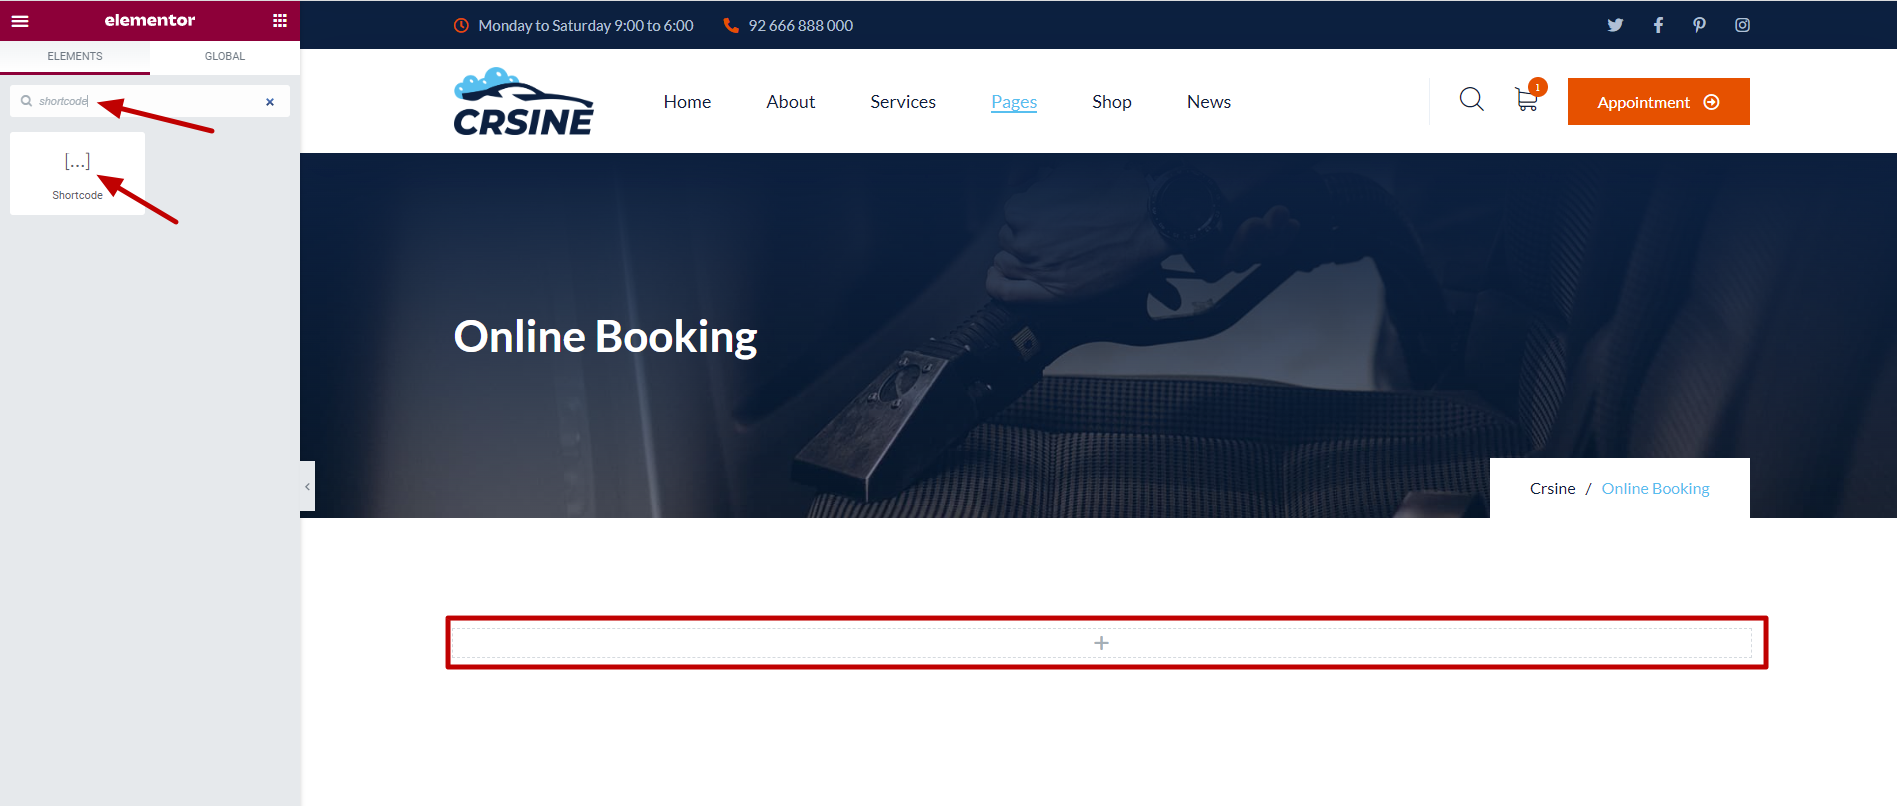
While Creating an Online Booking Page, copy your Point's Shortcode. Then Create a new Page and edit it with Elementor. Serach for Shortcode as shown below and drag and drop it on highlighted area.
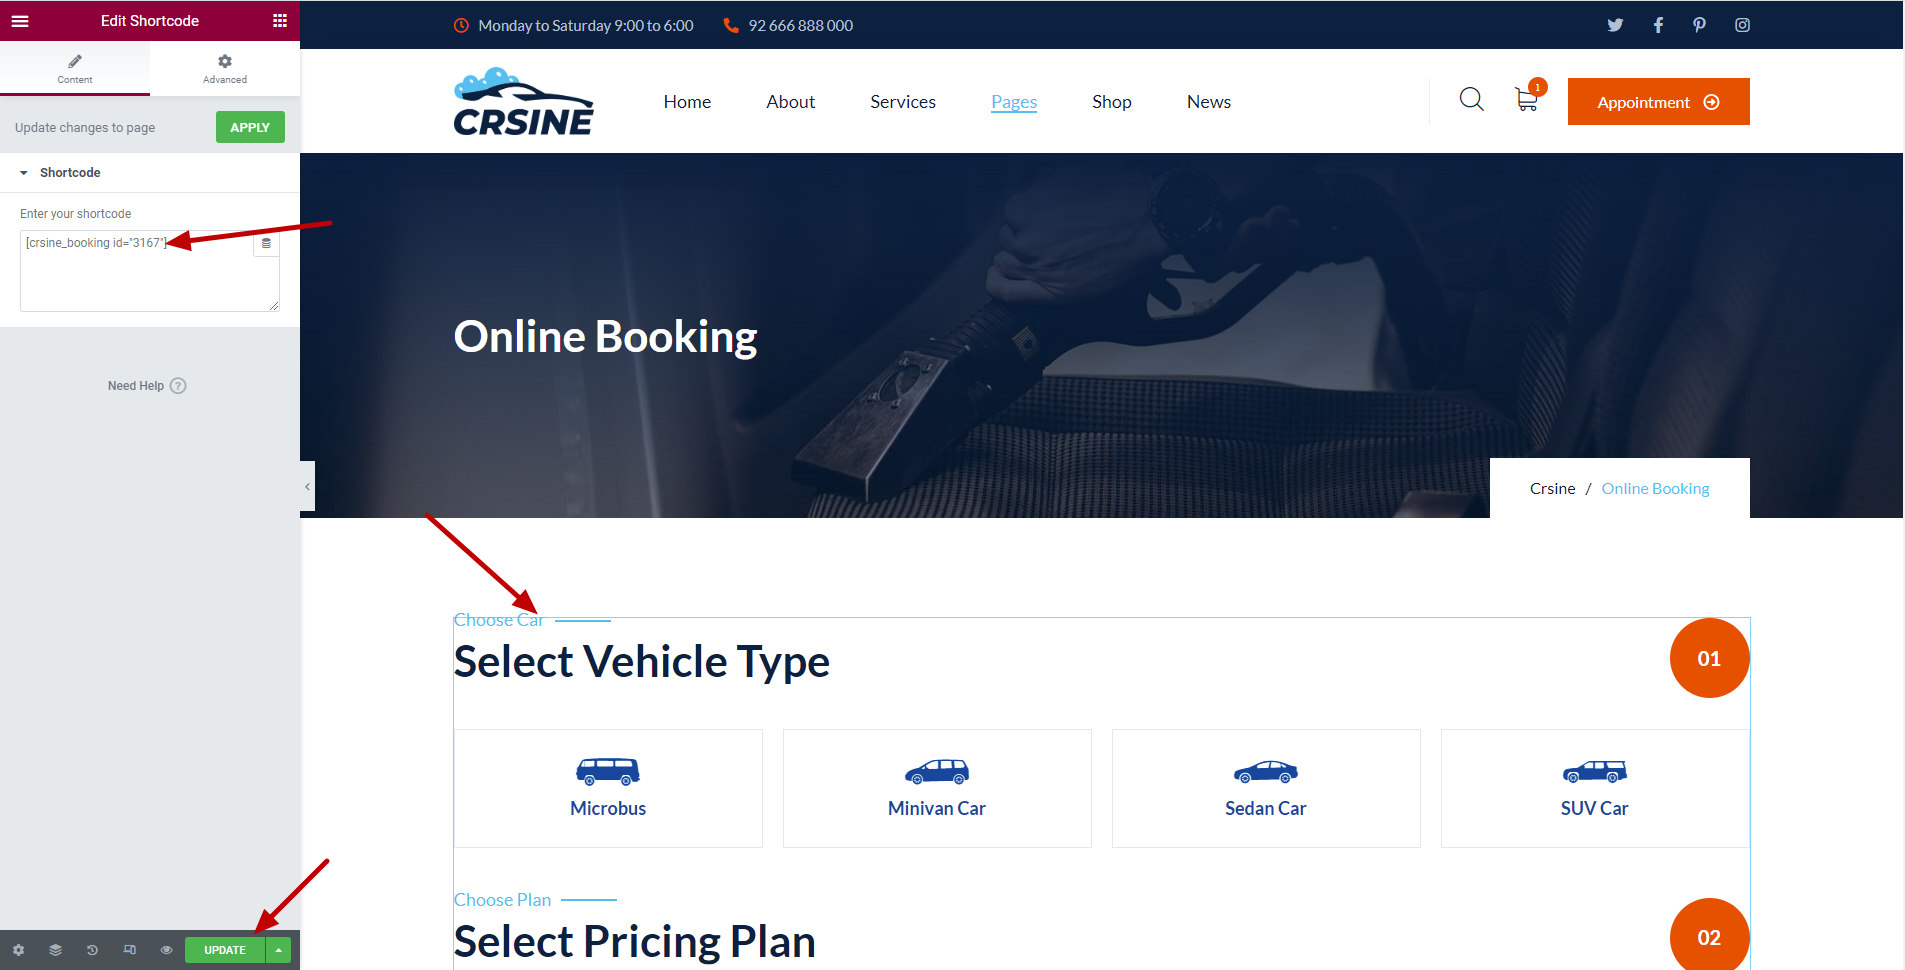
After placing it Write or Paste your Copied Point Shortcode here. That's it, now Save/Update the page and it will start working.
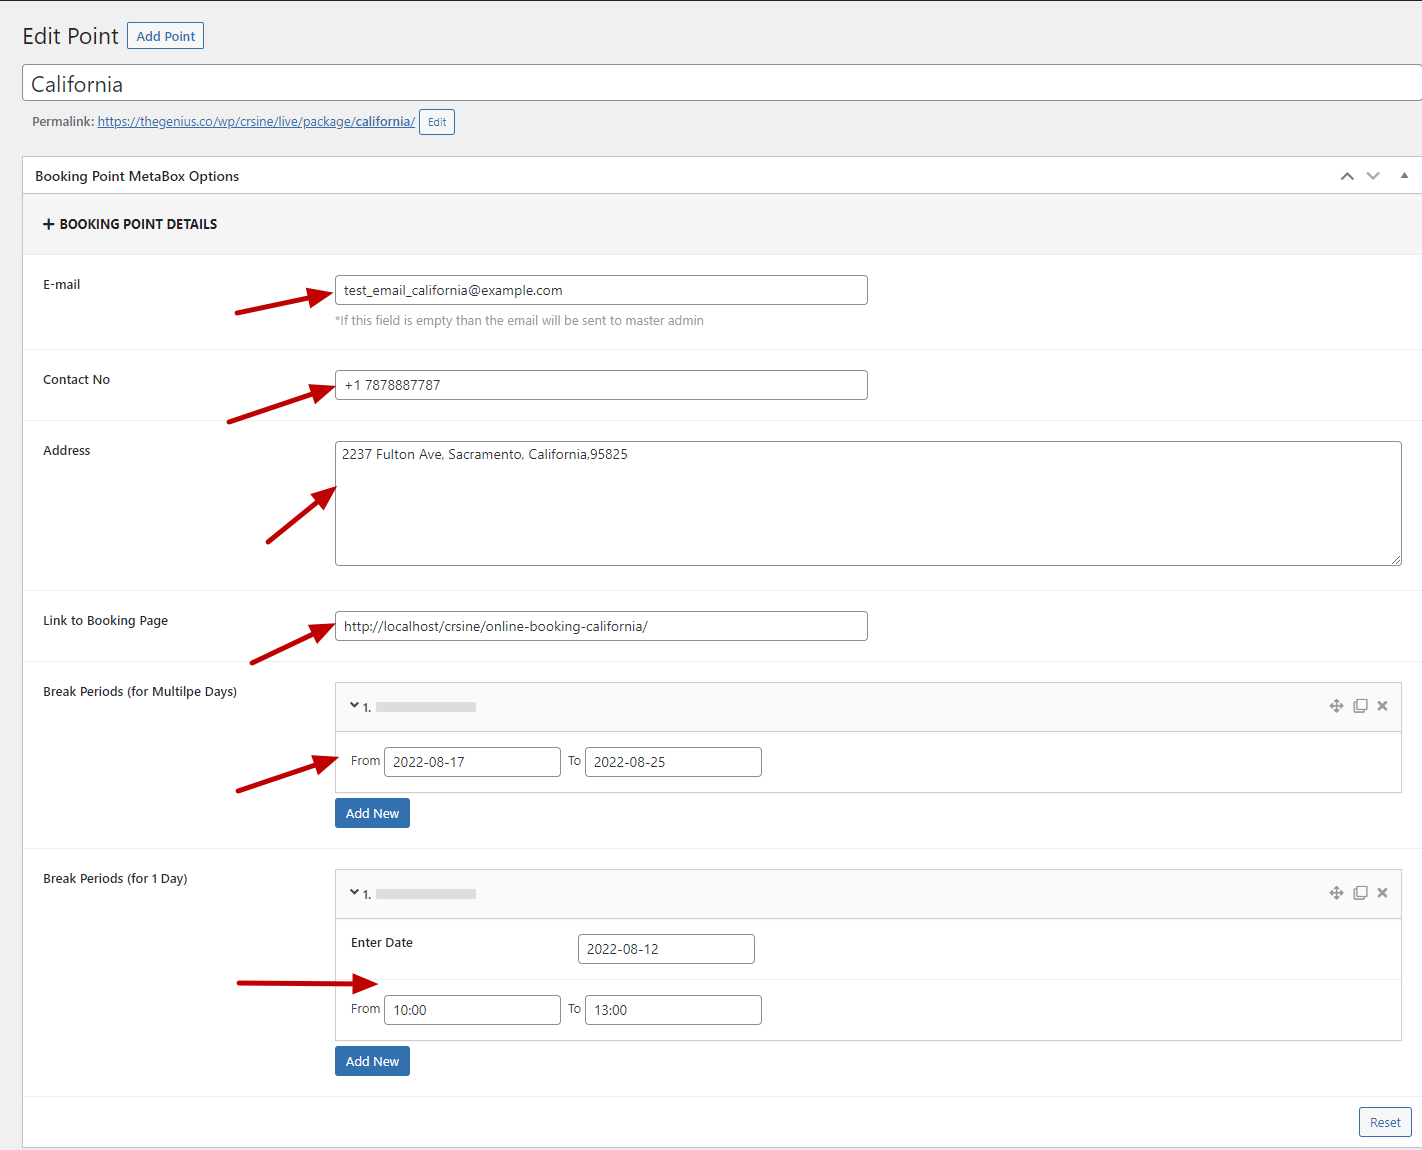
Click on Edit button to add details about particular point.
- Create multiple pages for multiple Points. Than copy the URL of Online Booking page of your point you created and paste it in "Link to Booking Page"
- If you are on break for some days. you can add multiple dates of break period.
- If you got any urgent work or you are not available for some hours in a day then you can also add break period between the time slot.
- Simply select the date and select your break period.
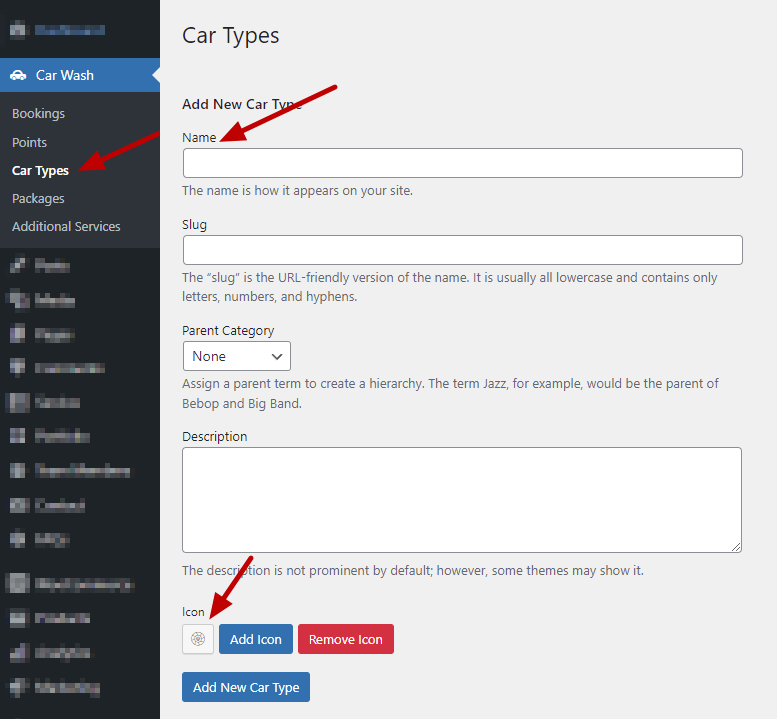
Car Types
wp-admin >> Crsine Wash >> Car Type
Add your Car Types here.
Add Car Type Name and Icon, the slug will will be created automatically while you click on Add New Car Type.
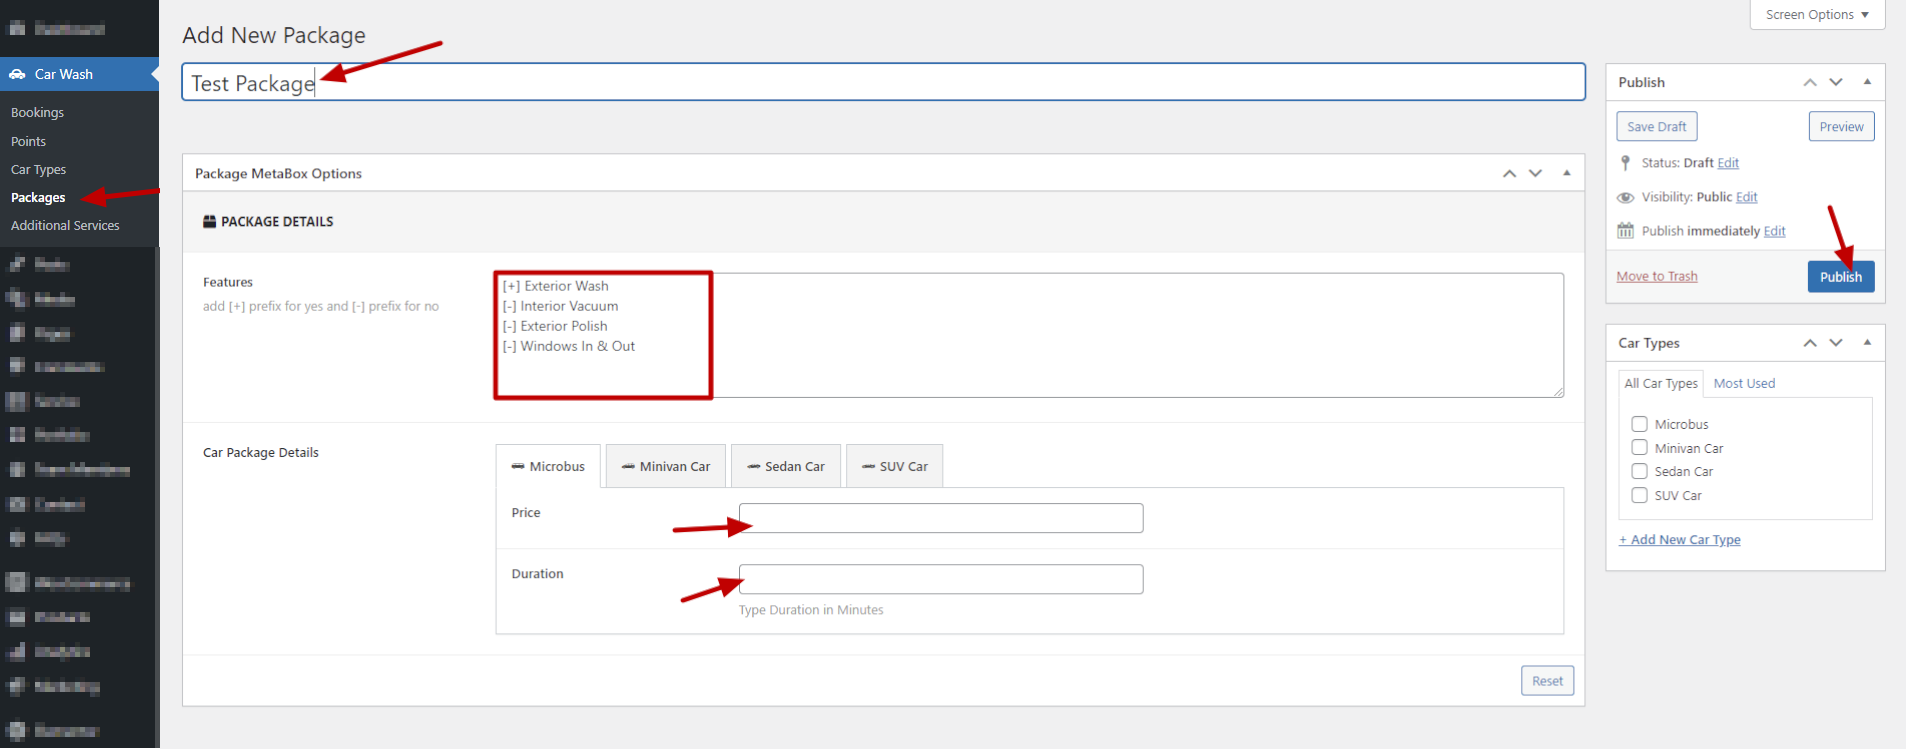
Packages
wp-admin >> Crsine Wash >> Packages
Click on Add Package and to add a new Pacakge.

Add Package Name in Title.
Add Features for The Package. To Show the Feature as yes, add prefix [+] and to Show the Feature as no, add prefix [-].
After that add Price and Duration of Package for every Car types. These Fields are Required in order to Publish/Update the Package.
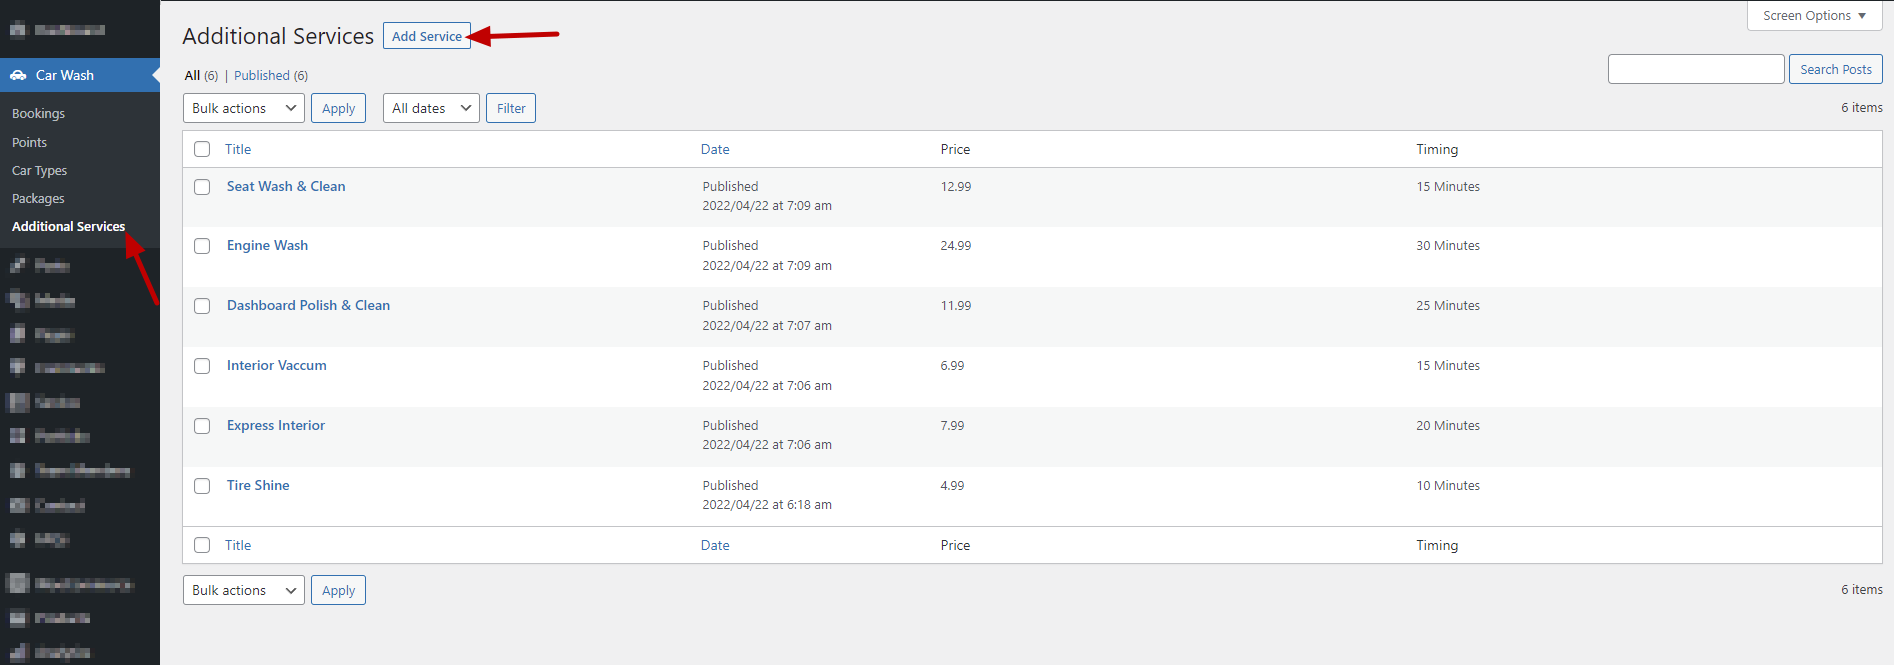
Packages
wp-admin >> Crsine Wash >> Additional Services
Click on Add Service and to add a new Service.
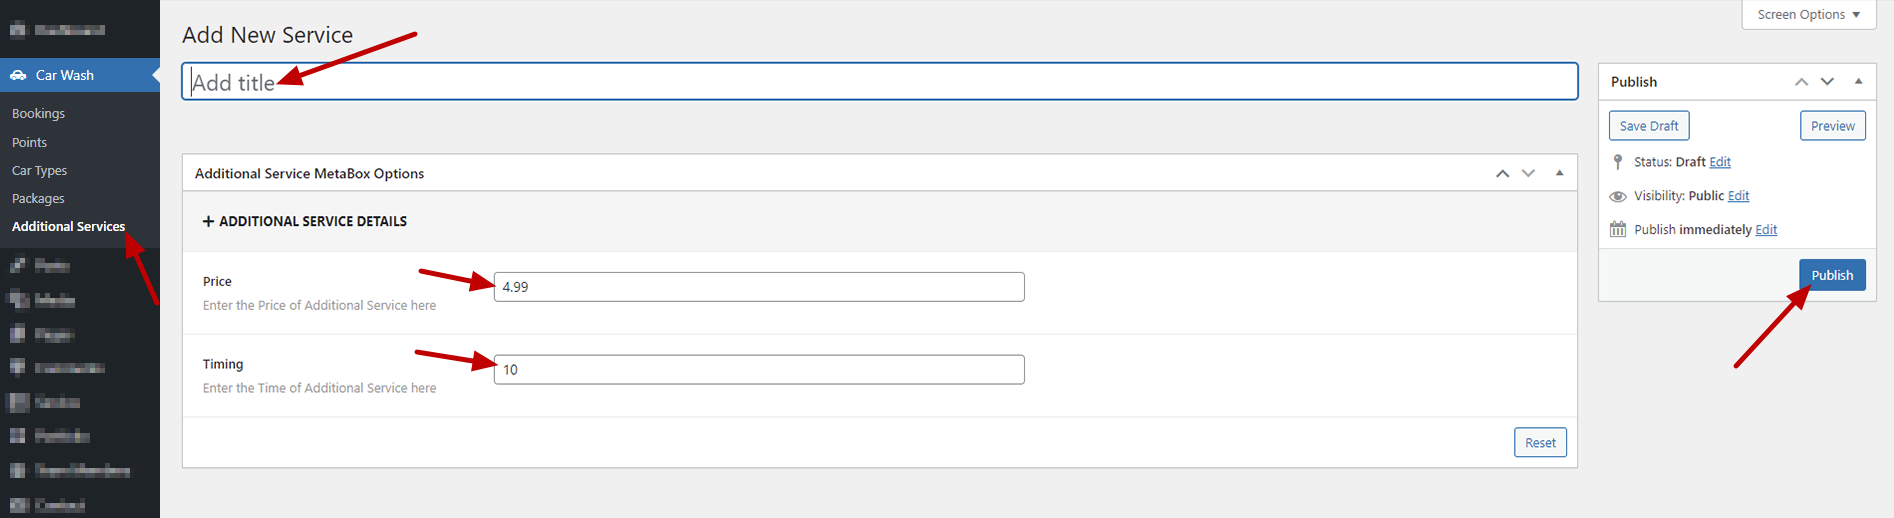
Add Service Name in Title.
After that add Price and Duration of Service and Publish it.
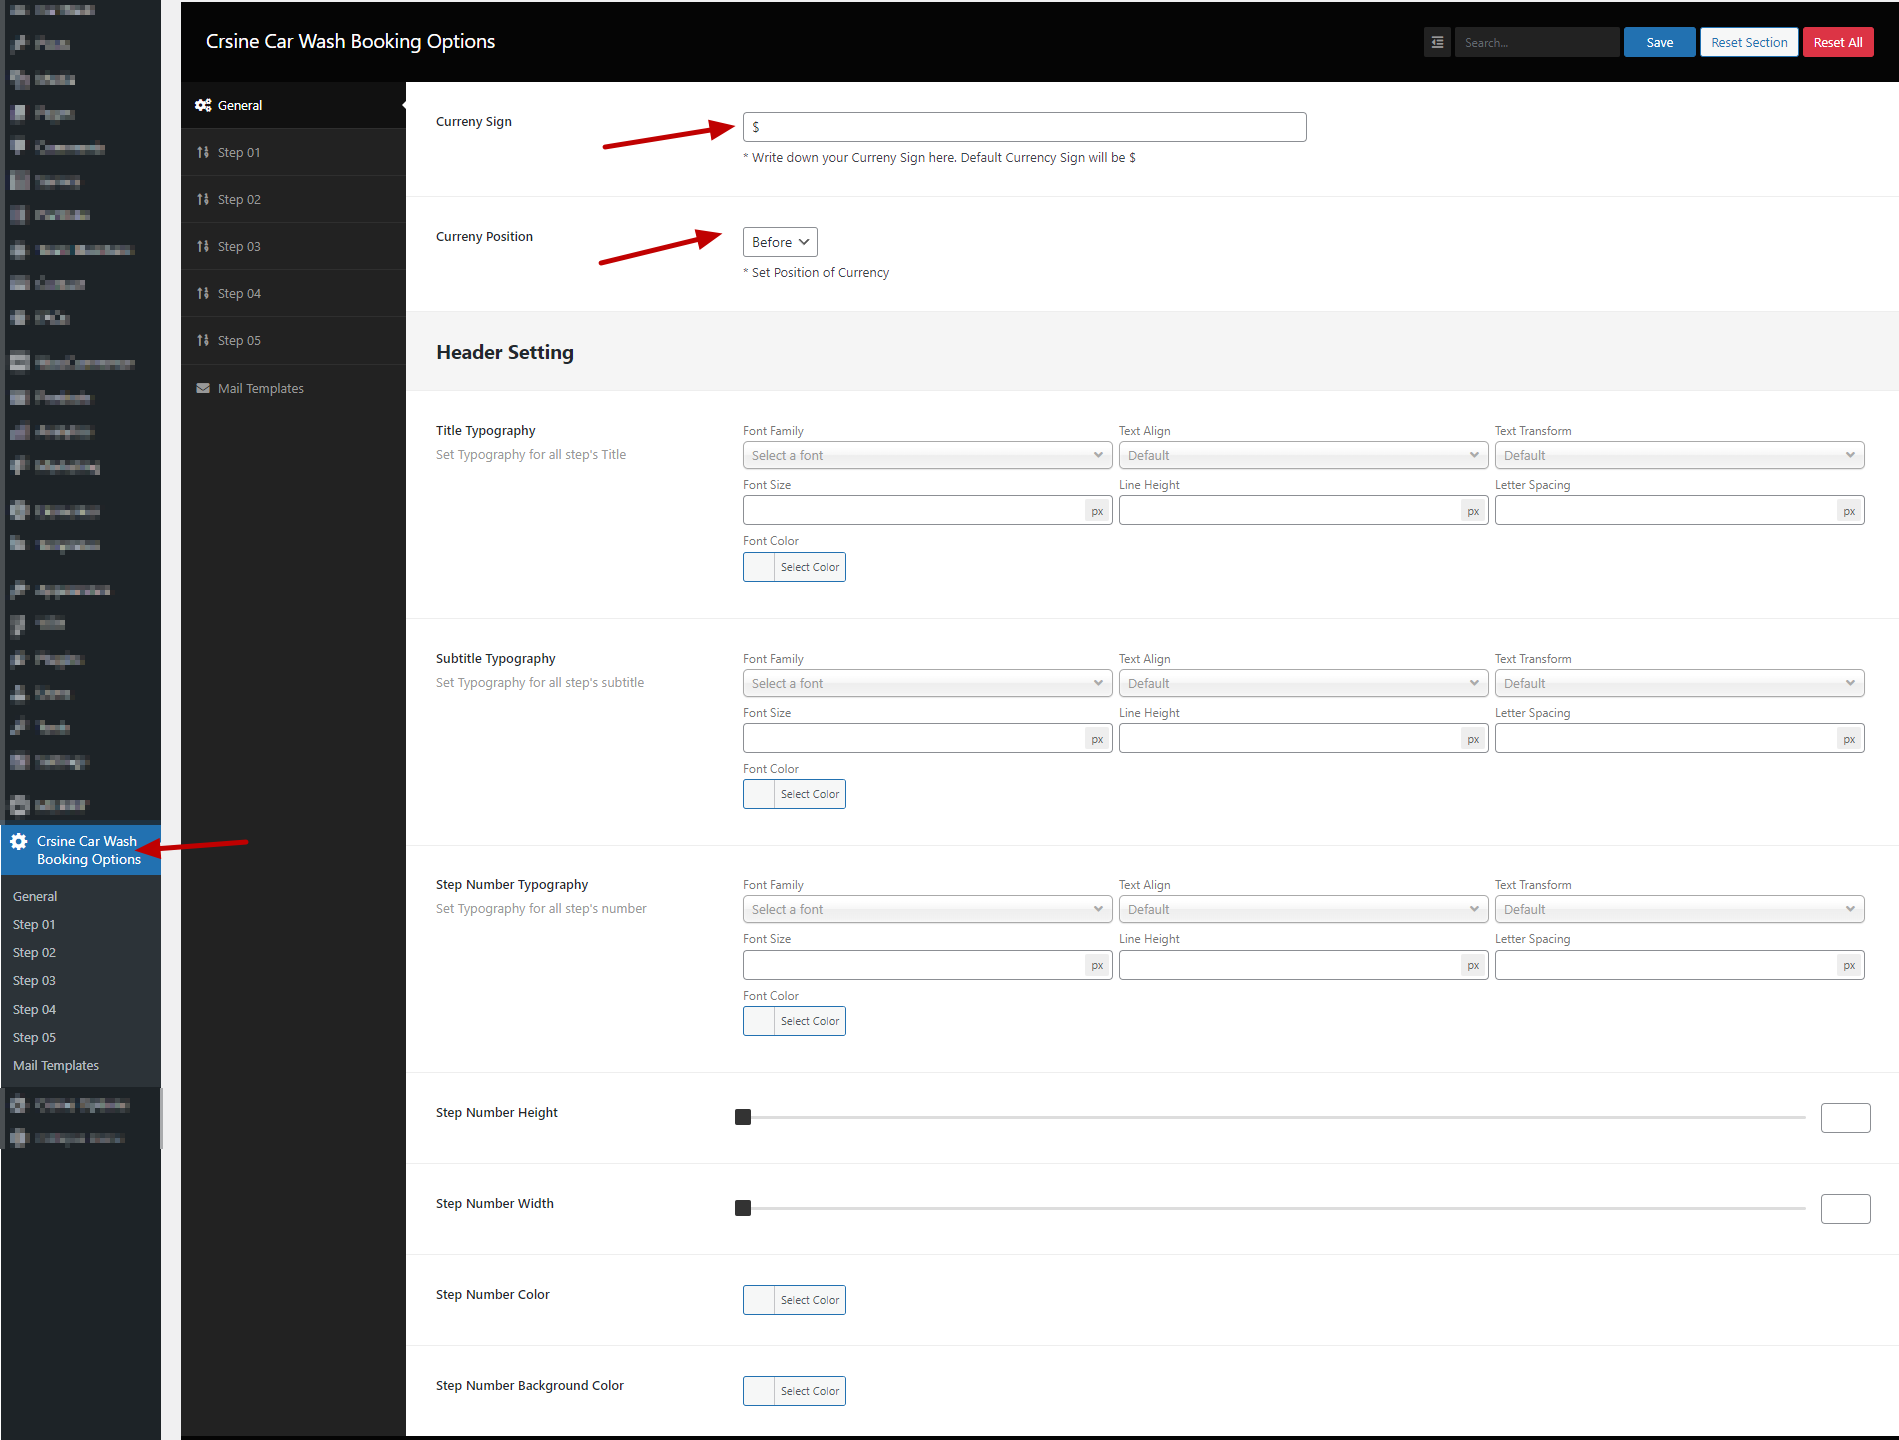
Crsine Car Wash Booking Options
wp-admin >> Crsine Car Wash Booking Options
All Settings for Car Wash Booking are here.
General Settings
All General Settings for car Wash Booking
- Enter Your Currency.
- Set the position of currency.
- Set Typography for Step Title, Subtitle and Number
- Set Height, Width, Color and Background Color for Step Number.
Note: If you want to use default settings for Styling, Don,t change anything in Header Setting.
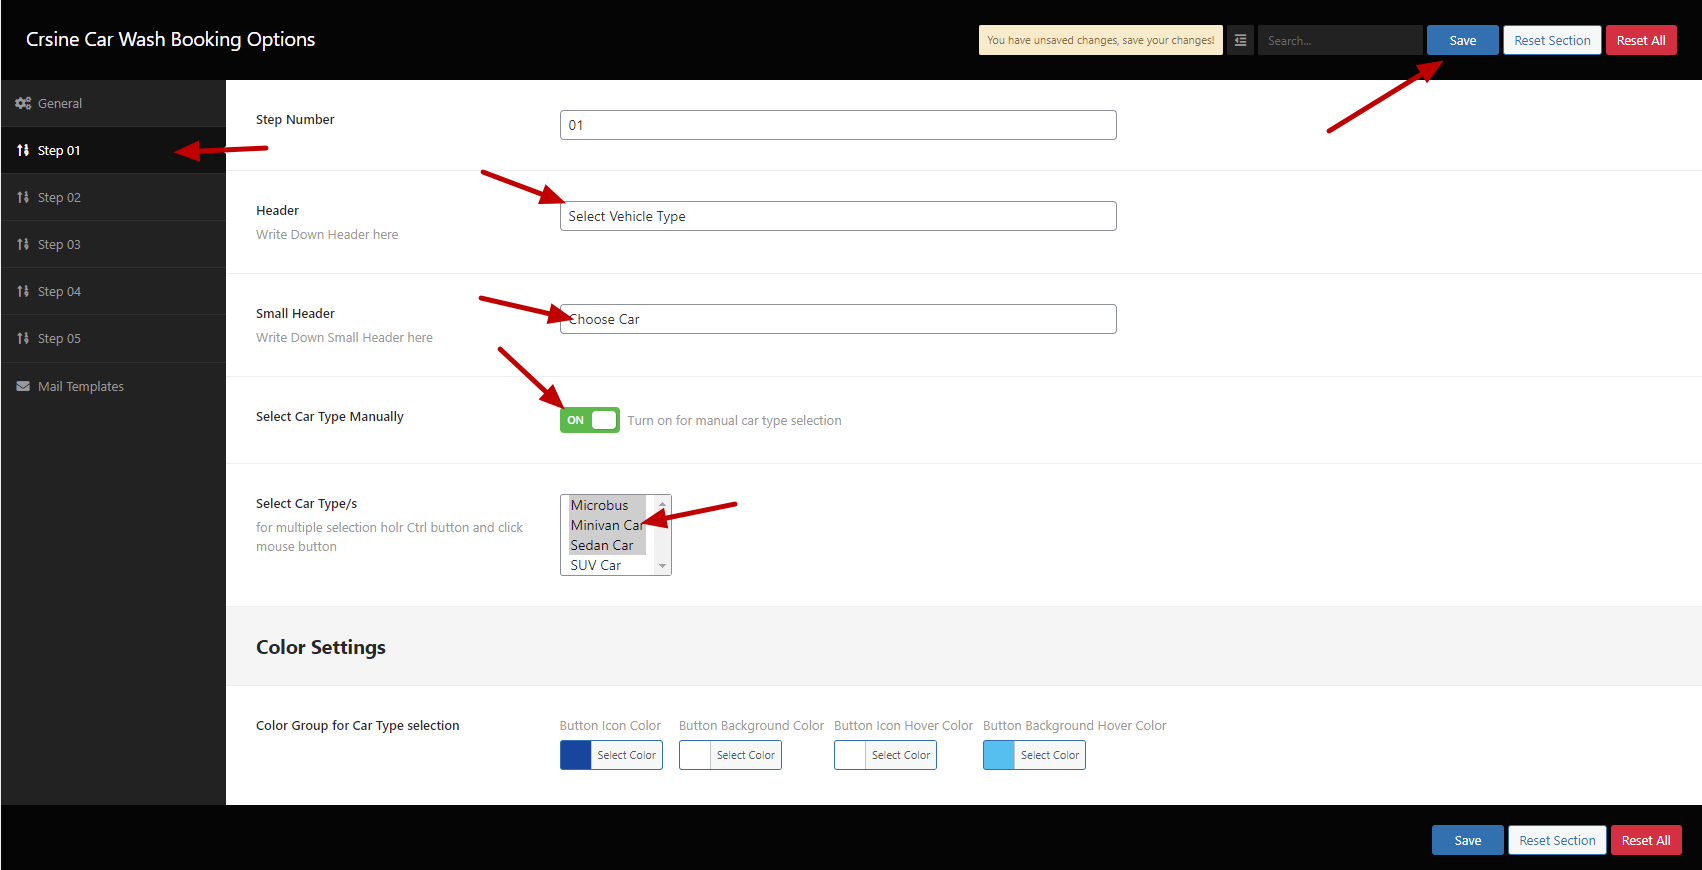
Step 01
These settings are for selecting a Car Type area.
Enter Step Number, Header and Subtitle.
If you want to Select car type manually, turn the switch on and Select Car types. To select multiple car types hold Ctrl Button and click mouse button or you can drag throughout the list.
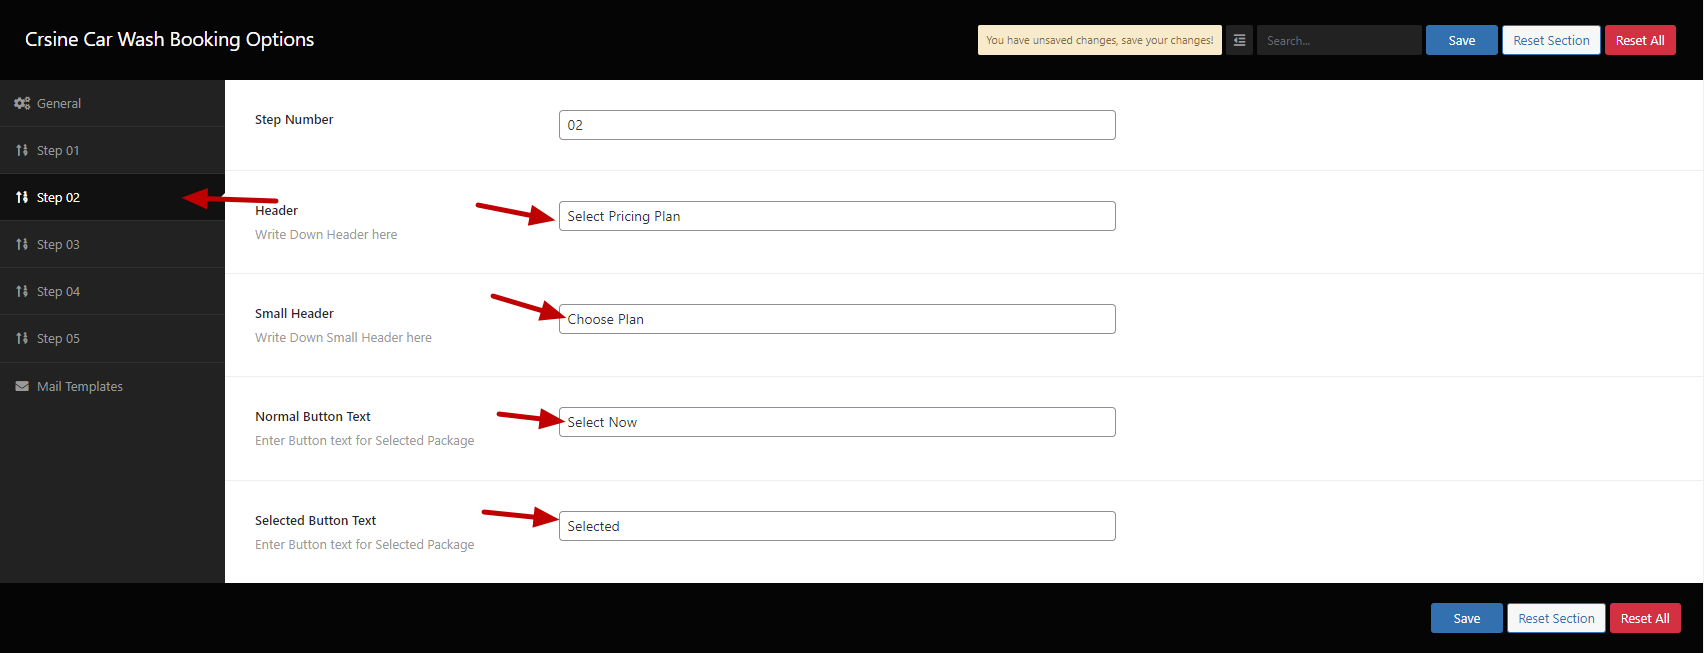
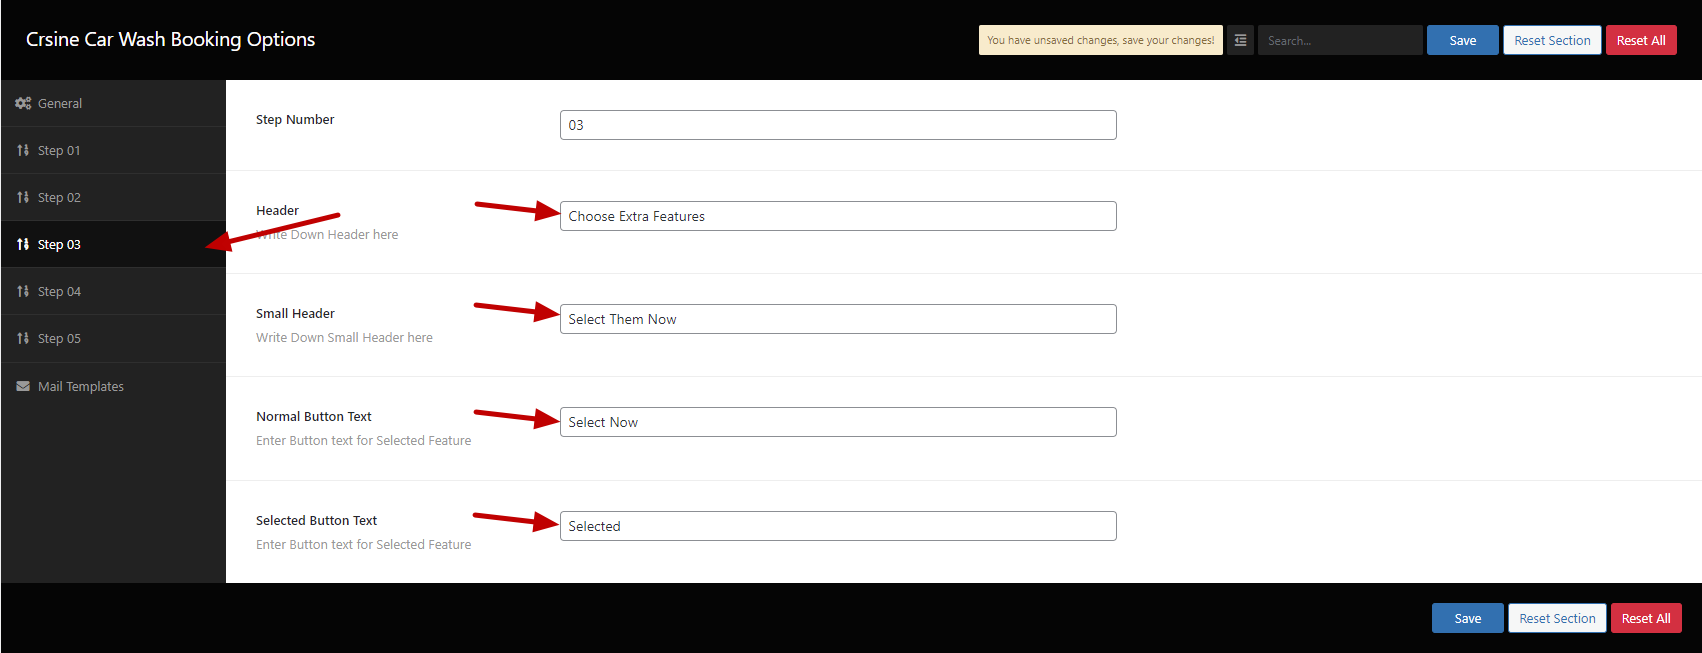
Step 02 and 03
Both Steps have basically same type of settings.
These both steps are for Booking Package and Extra Feature Respectively.
Enter Title, Subtitle, Normal Button Text and Selected Button Text.
Step 04
This Step is for booking appointment calendar.
You can set a limit for traversal of week for appointment.
Set Time Interval for each slot.
Choose weekend days i.e.(Sunday or Saturday & Sunday Both)
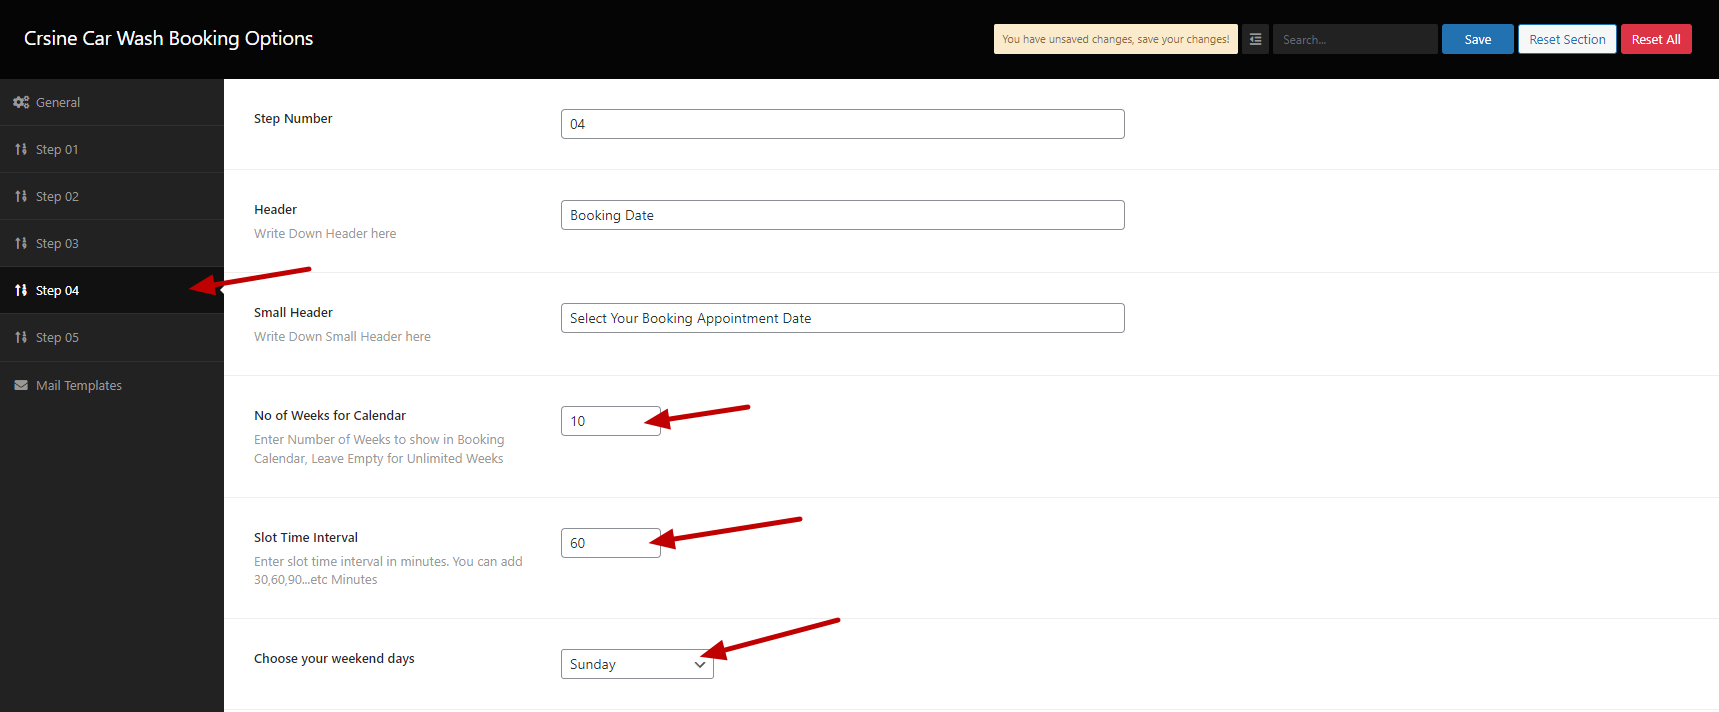
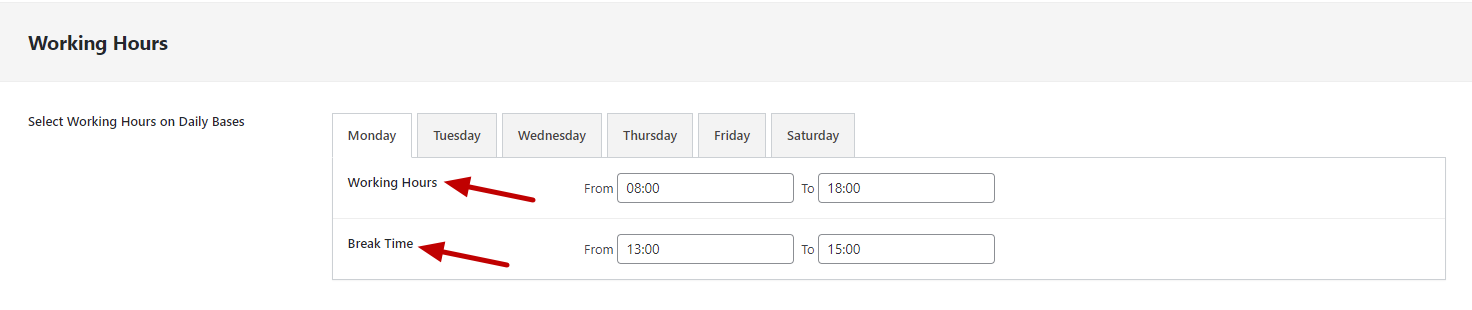
You can set your Working hours and Break time on daily bases.
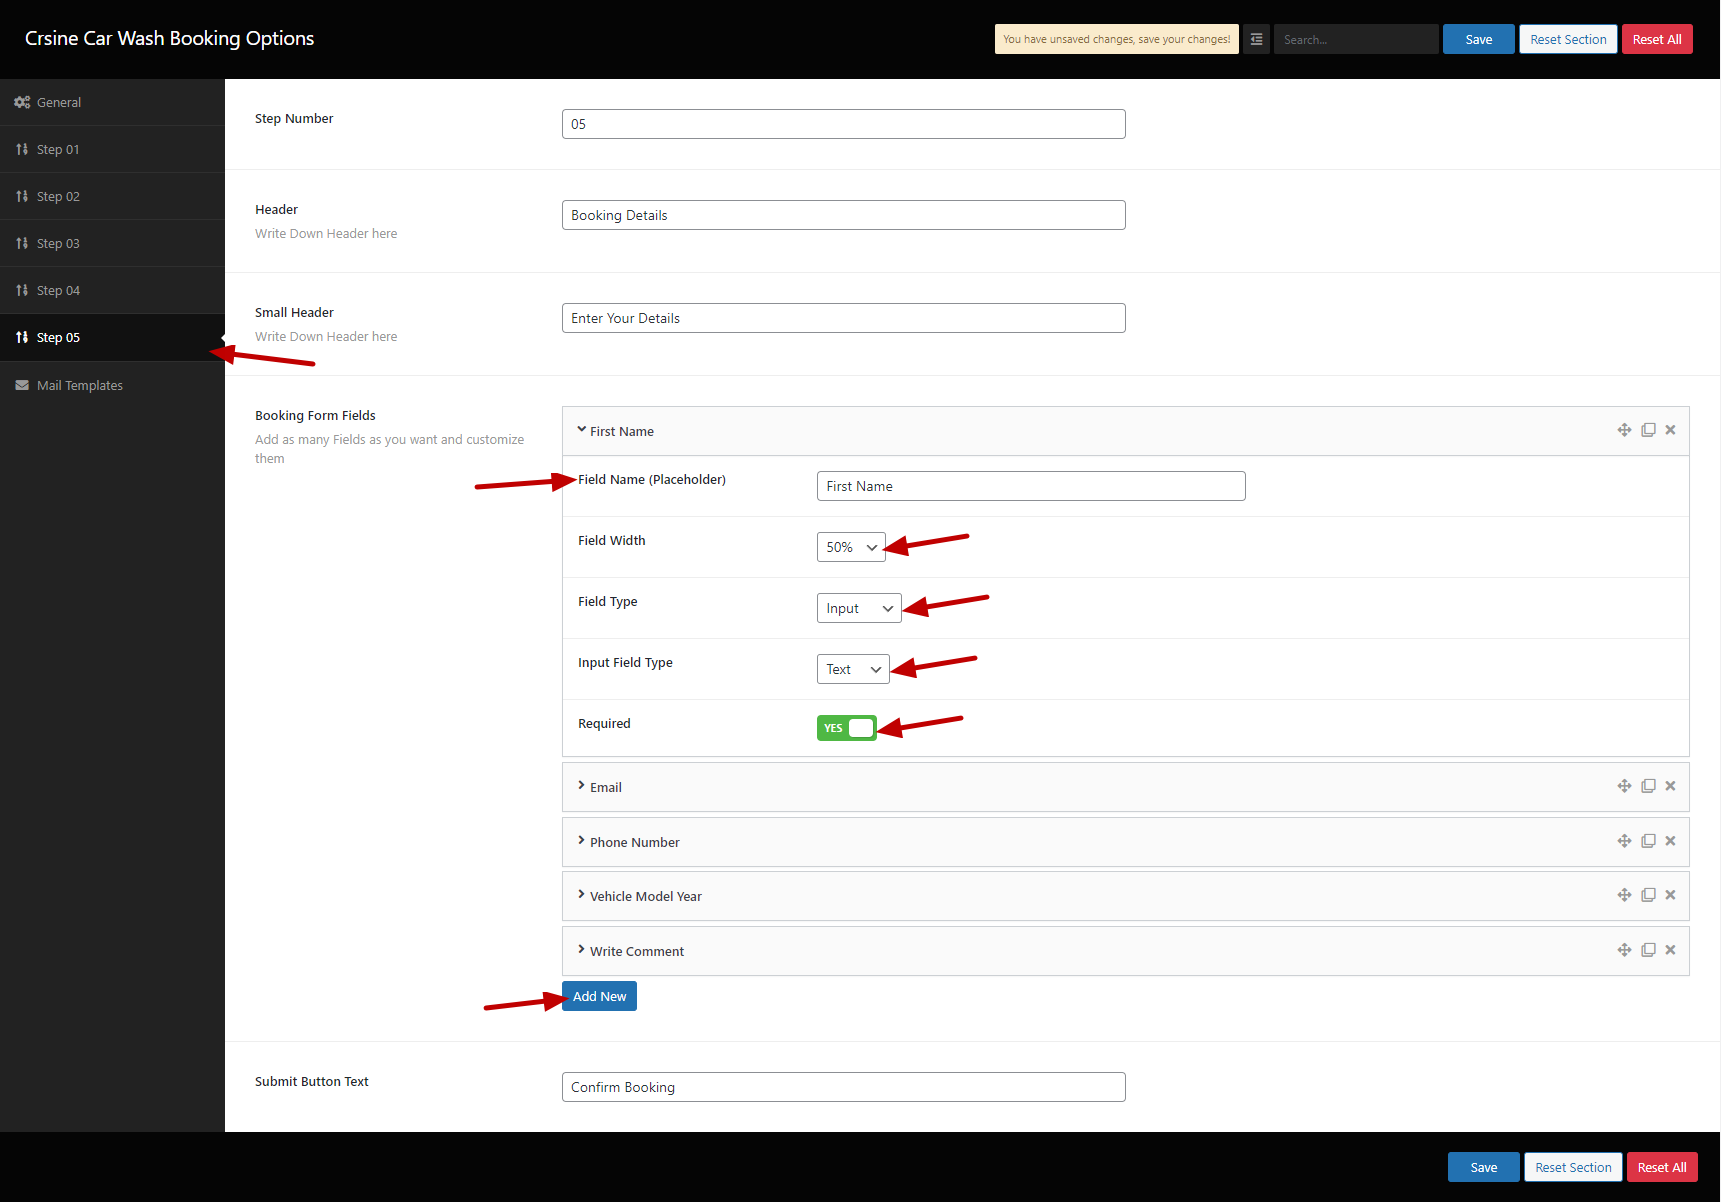
Step 05
This Step is for client details form.
You can add as many field as you want.
Enter Your Field name, Field width, Field type. If the field has to be required to fill up. turn the switch on.
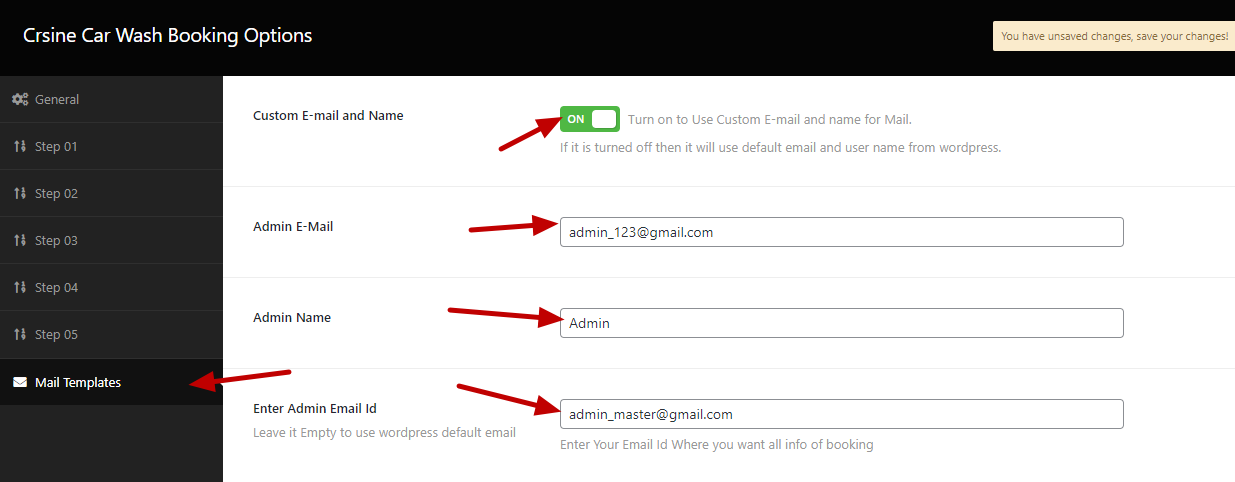
Mail Template
If you want to use Custom Email Address and Name Rather than WordPress Registered Email and Name, Turn the Switch on.
When the Booking is successfully done. The Email with full details will be sent to both Client and Admin.
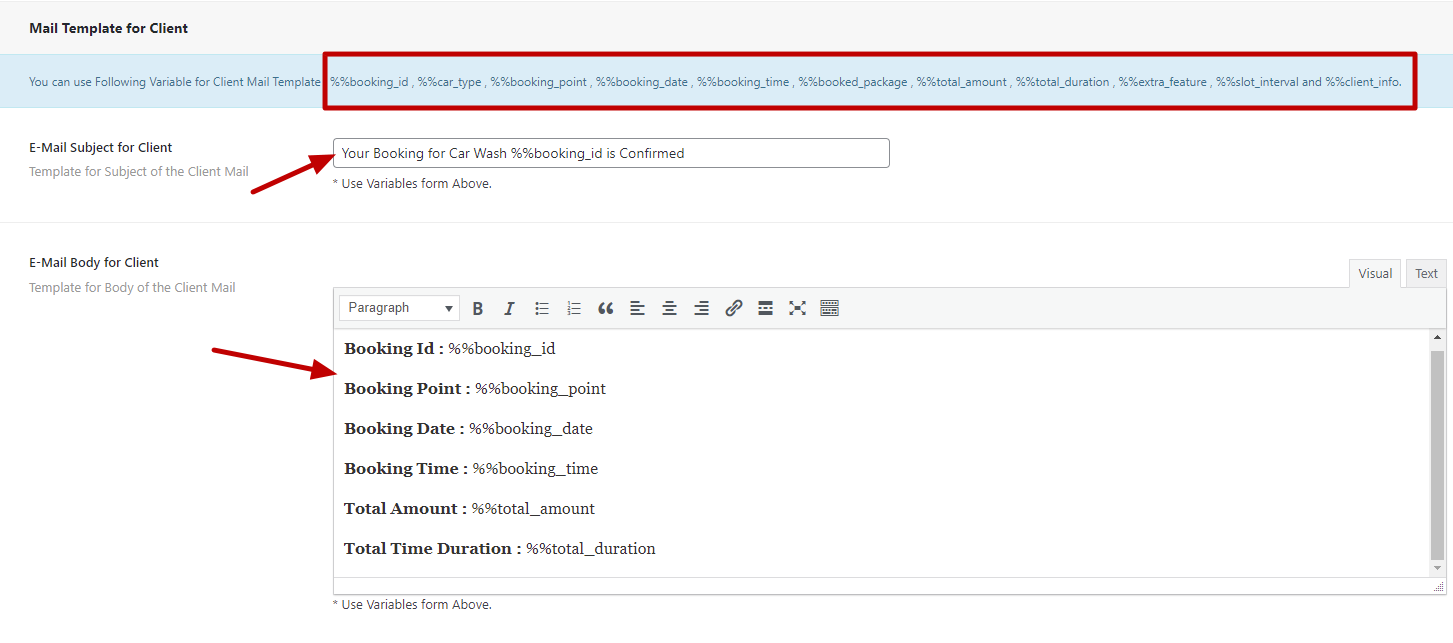
here are the settings of Mail Template for Client.
Type down the Subject and Body of Email.
You can use highlighted variables in Email Subject and body
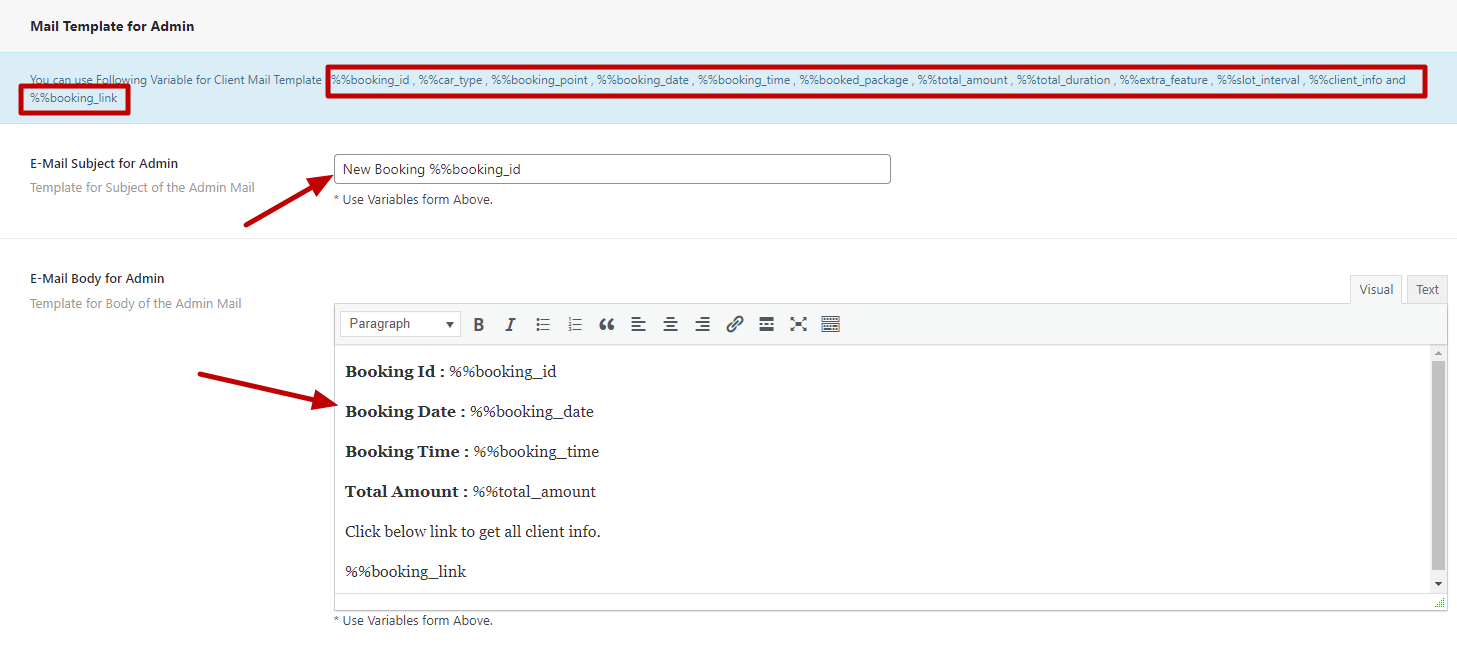
here are the settings of Mail Template for Admin.
Type down the Subject and Body of Email.
You can use highlighted variables in Email Subject and body
FAQ
A FAQ is a list of frequently asked questions (FAQs) and answers on a particular topic.
Please set Max size of an uploaded file shoulde be 64MB
For php.ini
										upload_max_filesize = 32M
										post_max_size = 64M
										memory_limit = 128M
For .htaccess
										php_value upload_max_filesize 32M

										php_value post_max_size 64M

										php_value memory_limit 128M

										php_value max_execution_time 500

										php_value max_input_time 500
For wp-config.php
									@ini_set( 'upload_max_size' , '64M' );

									@ini_set( 'post_max_size', '128M');

									@ini_set( 'memory_limit', '256M' );
How to increase MAX post and Upload MB Ref Link
Support
If this documentation doesn't answer your questions, So, Please send us Email via Item Support Page
We are located in GMT +5:30 time zone and we answer all questions within 3 to 5 days in weekdays. (except holiday seasons which might take longer).
Don’t forget to Rate this template
Go to your Themeforest Profile > Downloads Tab > & then You can Rate & Review for our template.
Thank You.
Changelog
Version 1.0 (24 June, 2022)
- Initial Release
Version 1.1 (23 August, 2022)
- Fixed some bugs
- Added Demo Content Setup
- Added Break Periods in each Branch/Point (Previously there was single Break Period for all Branch/Period)